


Aisi assistant computerEdition features
Zero-threshold operation: The interface is simple and intuitive, the operation process is clear, and you can get started quickly even if you use it for the first time. Provide detailed tutorials and customer service support to solve user questions.

Data security: full data encryption, no viruses and no ads, officially certified by Apple, reliable privacy protection. Backup data supports encrypted storage to avoid the risk of leakage.

Free service: Basic functions are completely free, and advanced functions (such as IPA signature) provide stable services and reduce user costs.

Introduction to functions of AISI Assistant PC version
1. One-click cloud intelligenceFlash the machine
Automatically matches available Apple devicesFirmware, supports three modes: normal mode, DFU mode and recovery mode.

2. Advanced tools such as backup and recovery, data migration, etc.
Application uninstallation,backup, updates can be easily solved, import and export are more convenient, and you can better preview everything in your mobile phone.data.

3. Install massive applications at high speed without an account.game
Massive genuine/jailbroken apps, no account required, free of chargehigh speedDownload, everything.

4. Massive online resources
Massive personalized resources such as ringtones, wallpapers, and ringtones are at your disposal.wallpaperReplacement is done with one click.

Installation steps of AISI Assistant PC version
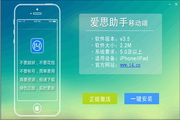
1. First download from this siteAisi AssistantFor the official version of the installation package, you will get the exe installation file after downloading it. Double-click the exe file with the left mouse button to enter the Aisi Assistant installation interface, as shown in the figure below. The interface is very simple, with three options: user license agreement and custom installation. You can first click on the user license agreement to open it and then read it. After reading it, you can start the installation.
2. You can directly click to install, and the Aisi Assistant software will be installed to the system C drive by default, or click Custom Installation at the bottom of the interface, and then the installation directory will appear. Click Modify to select the appropriate installation location and then click the installation option. (The editor recommends that users choose custom installation and install the software to other disks. The C drive is the system drive. Too much software will cause the computer to run slowly.)

3. After clicking Install, you can wait patiently for the software installation to complete. The installation speed of Aisi Assistant software is very fast. When the interface as shown below appears, it means that the software has been successfully installed on your computer. Then you can click the Try Now option on the interface to close the installation interface and open the software to experience it.

Summary of installation steps:
1. Download the exe file and run it, click on the User License Agreement
2. Select custom installation and determine the installation location.
3. Click Install and wait for the installation to complete.
Tips for using the computer version of Aisi Assistant
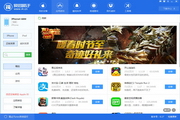
1. First, after downloading and installing the Aisi Assistant software on this site, open and enter the main interface of the software, as shown in the figure below. On the left side of the interface, there are two categories: online resources and local resources. Online resources refer to the genuine applications, ringtones, wallpapers, etc. that you can obtain on the Internet through this software. The editor focuses on introducing information about local resources. Local resources are divided into four types: applications, photos, ringtones and wallpapers, and download centers. The following is an introduction to each.

2. After clicking the application option, you can see the downloaded software applications on the right side of the interface. You can also search for the desired application in the search box in the upper right corner of the interface. You can manage these applications and install, delete, add, etc.

3. Click the photo option, and your local photos will be displayed on the right side of the interface. Similarly, you can also manage these photos. You can add photos or delete photos you don't like.

4. Next, click the ringtone wallpaper option, and then there will be two categories: ringtones and wallpapers on the right side of the interface. In the ringtones, you can add ringtones, delete them, and make your own. In the wallpaper, you can set it up, choose the wallpaper you like, or delete the ones you don’t need.

5. Finally, we click on the Download Center option, and then you can see downloading and completed options on the right side of the interface. The downloading center displays software applications that are being downloaded. You can stop downloading, delete, etc. Completed are applications that have been downloaded. You can also delete, install, or import them to your phone.

Frequently Asked Questions about Aisi Assistant PC Version
How to check the machine with AISI Assistant?
Open the Aisi Assistant software and putappleConnect the mobile phone to the computer,
Click "ViewMachine inspectionReport",
All contents of the device can be viewed in the machine inspection report of AISI Assistant.
How to flash the Aisi Assistant?
1. Download and install Aisi Assistant. iTunes may be automatically installed during the installation process to ensure normal function;
2. After the installation is completed, open the main interface of Aisi Assistant and usedata cableConnect the device to the computer to view device details, as shown in the figure below:

3. Flashing will cause the device data to be cleared. Before flashing, you need tobackupDevice information data, click "Backup/Restore Data" on the page to back up;

4. Select the data content that needs to be backed up, such as photos, contacts, information, etc., and click "Now" below.backup";

5. Wait for the device backup to be completed, click "Flash and Jailbreak" - "One-click Flash", and select the appropriate one according to your needs.Firmware, select to complete and click "Download".

6. Wait for the firmware download to complete, select the firmware, and check "Keep user dataFlash the machine";

7. Click "Flash Now"

9. Next, the flashing will be carried out automatically. Keep the data cable connected during the process and wait for the flashing to be completed. After rooting is completed, the mobile device will automatically power on. After powering on, click "Flash and Jailbreak - Advanced Features" Activation can also be done manually on the deviceactivate, if you are flashing the machine with data protection, there is no need to activate it.
How to change virtual location in Aisi Assistant?
Usage steps1. Download and install the latest version of Aisi Assistant on the computer, and connect the Apple device to the computer with a data cable.
2. After the connection is successful, open the "Aisi Assistant" toolbox in sequence -virtualPositioning".
3. You can modify the positioning in three ways: enter the place name and search, enter the precise longitude and latitude, and click directly on the map
4. After selecting the virtual positioning, click "Modify Virtual Positioning", and a "Modify Virtual Positioning Successfully" pop-up window will appear to indicate completion.
Note: Please unlock the device screen lock when modifying virtual positioning, otherwise the modification may fail!
AISI Assistant Virtual Positioning and Simulation Trajectory Usage Tutorial AISI Assistant Virtual Positioning and SimulationtrajectoryTutorial
5. Afterwards, open maps, Weibo and other software on your Apple device, and you will find that the positioning has changed to the location you just set.
6. If you need to restore normal positioning, you can click the "Restore True Positioning" button on the AISI Assistant and "restart" the device;
You can also directly restart the device manually to restore the true positioning.
Note
1. When using positioning on iPhone, you need to first turn on "Settings - Privacy"Positioning
Related topics
-

Aisi Assistant
-

Aisi Assistant Special Topics
-

App store special collection
-

Aisi assistant download


Useful
Useful
Useful