


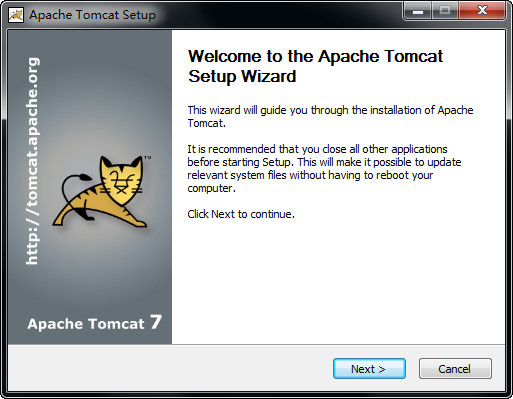
Basic introduction
Tomcat server is a free open source web application server. It is a lightweight application server. It is commonly used in small and medium-sized systems and situations where there are not many concurrent access users. It is the first choice for developing and debugging JSP programs. For a beginner, you can think of it this way: when the Apache server is configured on a machine, it can be used to respond to access requests for HTML (an application under the Standard Universal Markup Language) page.
Installation method
1:
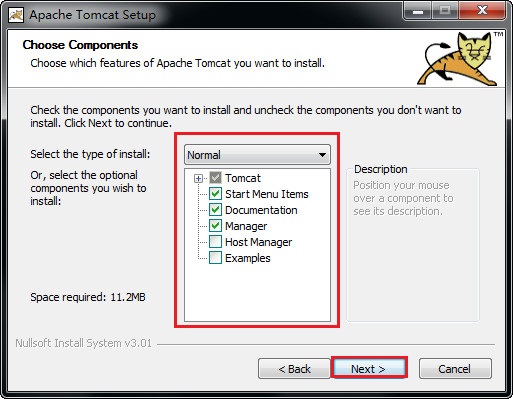
After the download is complete, the installation begins. Users who are installing for the first time are advised to click "next" directly without selecting the plug-in.
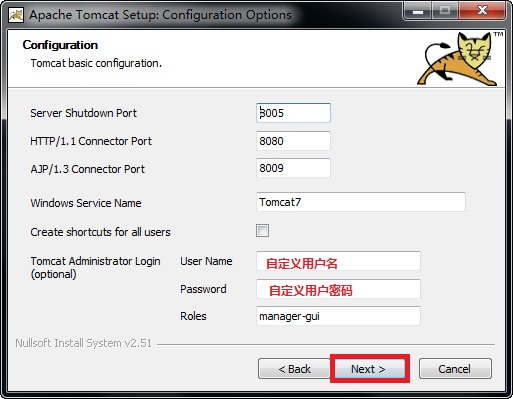
You can set your own account name and password
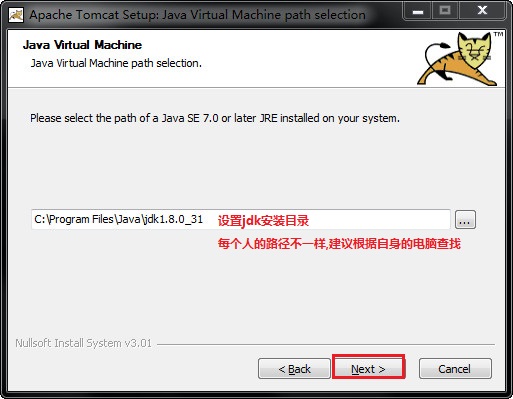
A very important step! ! ! ! ! ! ! ! ! Set the jdk installation directory. Everyone’s path is different. It is recommended to search according to your own computer.
2:
After the installation is complete, right-click My Computer—Properties—Advanced System Settings—Environment Variables.
Add the following variables in the system variables
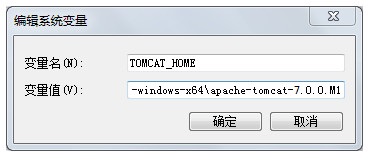
(1)TOMCAT_HOME, this variable points to the path of the decompressed file. There are lib, bin and other folders in this directory. Add as follows:
Click "New" under environment variables, fill in "TOMCAT_HOME" in "Variable Name", and fill in the path of the decompressed file in "Variable Value".
D:Tomcatapache-tomcat-7.0-windows-x64apache-tomcat-7.0
(There is no semicolon after it) Then click "OK", as shown in the figure
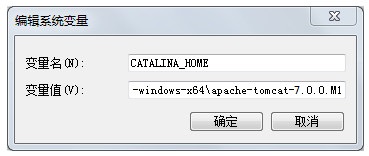
(2)CATALINA_HOME, the value of this variable is the same as TOMCAT_HOME, and the setting method is the same as (1), as shown in the figure
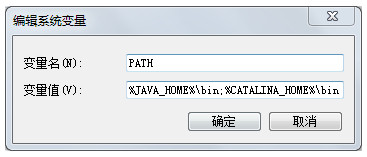
(3) Found in "System Variables"PathVariable, double-click to open the Path variable, and add it at the end of "Variable Value"
%CATALINA_HOME%bin
(There is no semicolon after it), as shown in the figure
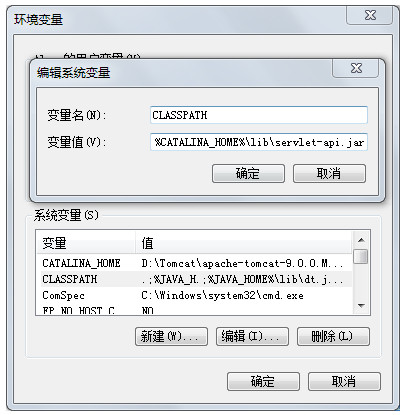
(4) Found in "System Variables"CLASSPathVariable, double-click to open the CLASSPath variable, and add it at the end of "Variable Value"
%CATALINA_HOME%libservlet-api.jar
(There is no semicolon after it), as shown in the figure
Three:
Click "Start" - "Run", type "cmd", enter service install Tomcat9 in the console,
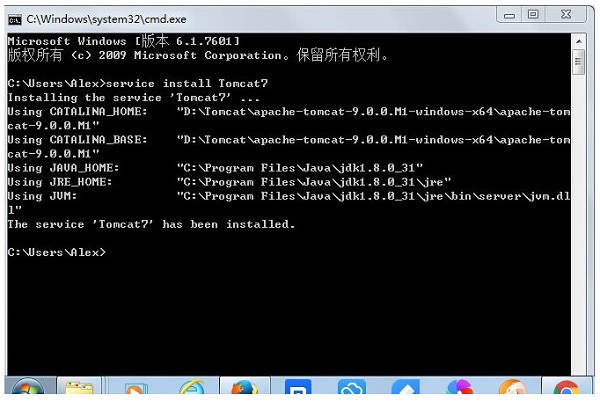
When the above black window appears, the installation is successful!
How to use
Next, I will introduce to you how to use this thing after the installation is successful.
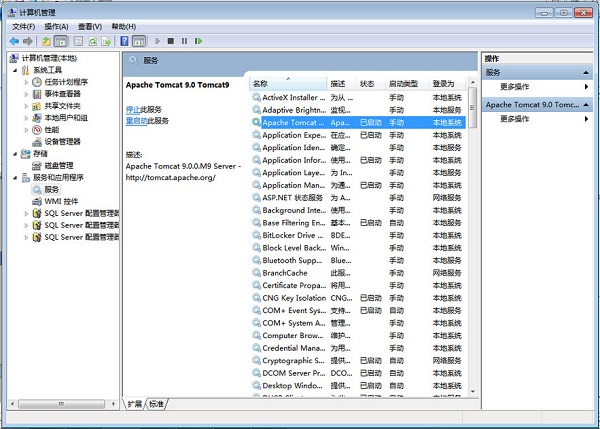
Then go to the Control Panel - System and Security - Management Tools - Services, find the Apache Tomcat Tomcat9 service item, right-click the item, click "Start" to start the service, as shown in the figure
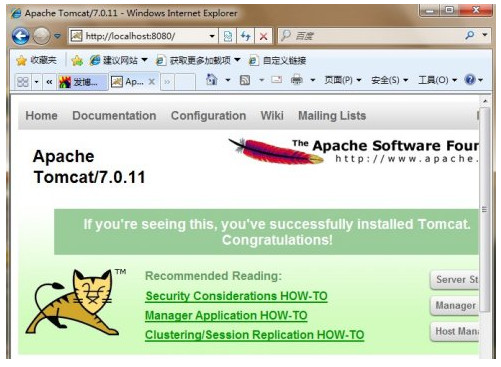
Open the browser and enter http://127.0.0.1:8080 in the address bar
If the tomcat sample homepage appears, it means that the server installation is successful, as shown in the figure
FAQ
※What to do if port 8080 is occupied! !
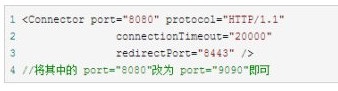
If port 8080 is occupied, you can modify the access port of tomcat. The method is as follows: Find the server.xml file in the directory D: Tomcatapache-tomcat-9.0.0.M1-windows-x64apache-tomcat-9.0.0.M1conf, open the file, and find the following content. Don’t worry.
Apache Tomcat 7 change log
Developer GG said there are really no bugs this time~
Huajun editor recommends:
Apache Tomcat 7 is free software, download it if you need it! This site also hasjarfix,Argo UML,Apache Tomcat 9,FreeJava,WinPack, available for you to download!


Useful
Useful
Useful