


Although most users are happy to use Eclipse as a Java IDE, Eclipse's goals are not limited to that. Eclipse also includes the Plug-in Development Environment (PDE). This component is mainly targeted at software developers who want to extend Eclipse because it allows them to build tools that integrate seamlessly with the Eclipse environment. Since everything in Eclipse is a plug-in, all tool developers have an equal playing field when it comes to providing plug-ins for Eclipse and providing users with a consistent and unified integrated development environment.
This equality and consistency is not limited to Java development tools. Although Eclipse was developed using the Java language, its use is not limited to the Java language; for example, plug-ins to support programming languages such as C/C++, COBOL, and Eiffel are already available or expected to be released. The Eclipse framework can also be used as the basis for other application types not related to software development, such as content management systems.
Eclipse SDK introduction:
Eclipse has many special names, such as Eclipse SDK, etc. Let’s talk about the SDK first. The Eclipse Project is also often called the Eclipse SDK, which is the core project of Eclipse.
This project contains four sub-projects: Platform, Plug-in Development Environment (PDE), Java Development Tools (JDT) and Equinox.
Eclipse is a software, and sdk refers to the development platform. Generally used to develop Java software.
If you downloaded the green version, unzip the file you downloaded. Find eclipse.exe in the file and double-click it to use it.
eclipseSDKConfiguration
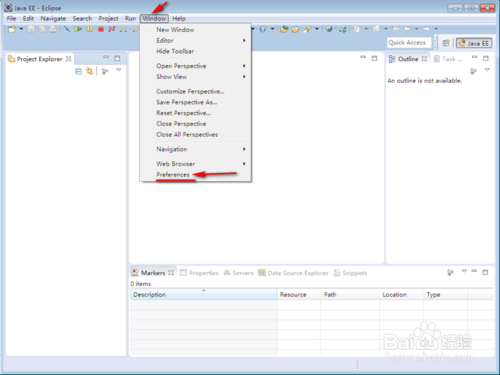
Open the eclipse interface, click the "Window" button, click the "Preferences" button in the drop-down menu, and the system will pop up the "Preferences" interface.
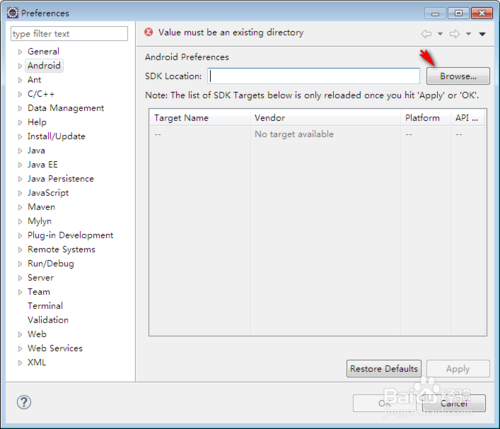
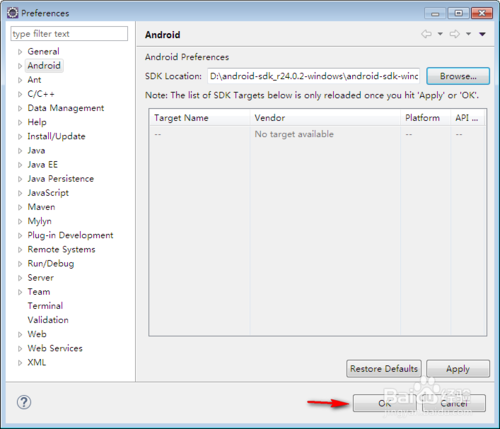
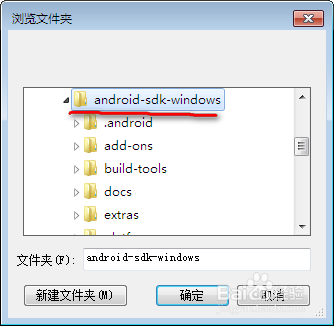
Select "Android" on the left side of the "Preferences" interface, click the "Browser" button on the right side of the interface, and select the storage path of the SDK (that is, the system will put the SDK selected in step 4 under this path). The system will automatically fill in the path in the text box corresponding to "SDK Location:". After completing the selection, click "OK", and then the system pops up the "Welcome to Android Development" interface.
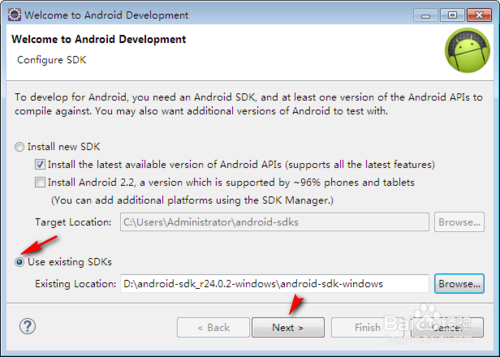
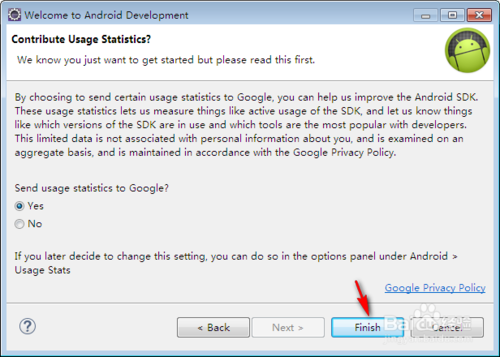
In the "Welcome to Android Development" interface, select the radio button named "Use existing SDKs", click the "Browse" button corresponding to "Existing Location:", and select the path to the previously unzipped SDK (that is, the location of the unzipped SDK in step 1). After making your selections, click the "Next" button. Then select the default system in the next interface, and then click the "Finsh" button.
Things to note
ADT was installed before eclipse


Useful
Useful
Useful