


Environment configuration:
I chose to install JDK. After the installation is completed, add the relevant environment variables of Java (under win7, readers of other systems can find the location to add the environment variables by themselves).
"My Computer"-->right-click "Properties"-->"Advanced System Settings"-->"Environment Variables"
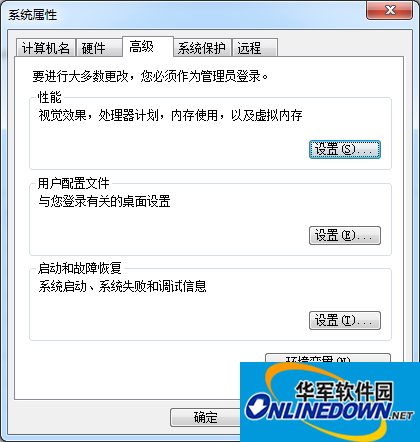
Add or modify environment variables:
1. Add: JAVA_HOME

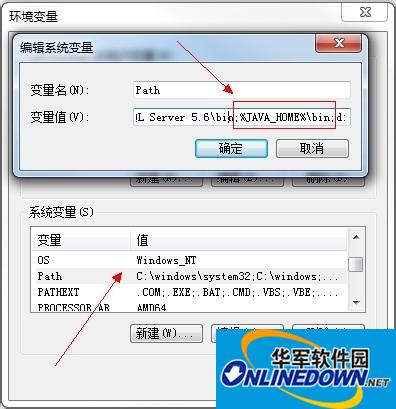
2. Modify: PATH
The PATH attribute already exists and can be edited directly. It is used to configure the path and simplify the input of commands. Its value is: %JAVA_HOME%bin.
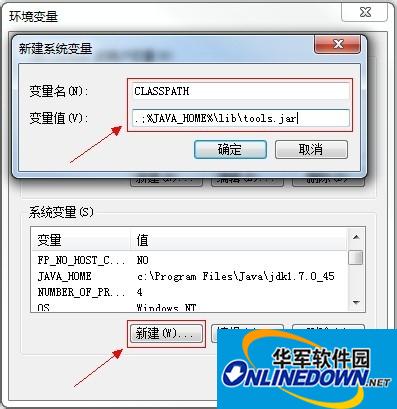
3.Add CLASSPATH
Used for the path of the JAVA class during compilation. Note that there are two values set here. (.;) means that the JVM searches the current directory first. Its value is: .;%JAVA_HOME%libtools.jar.
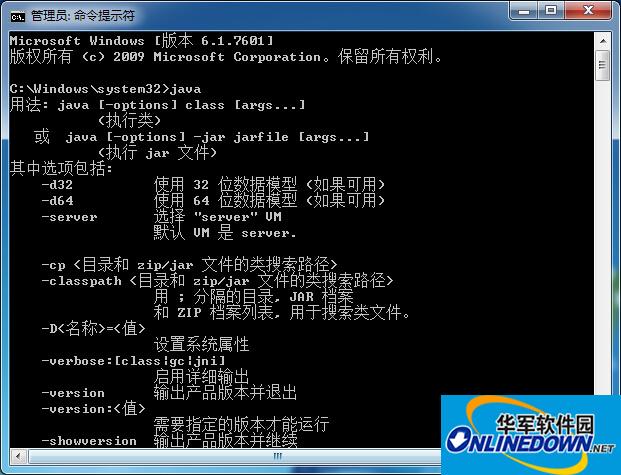
After restarting the computer, use relevant commands to determine whether jdk is installed.
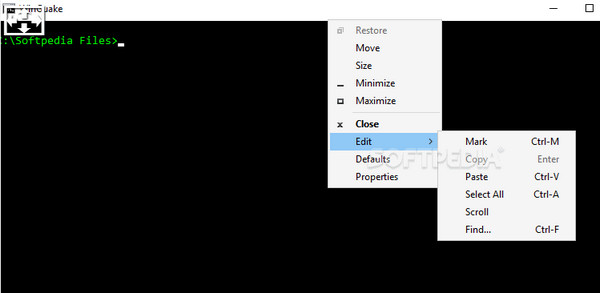
Open the Dos command window and enter: java
Open the Dos command window and enter: java -varsion
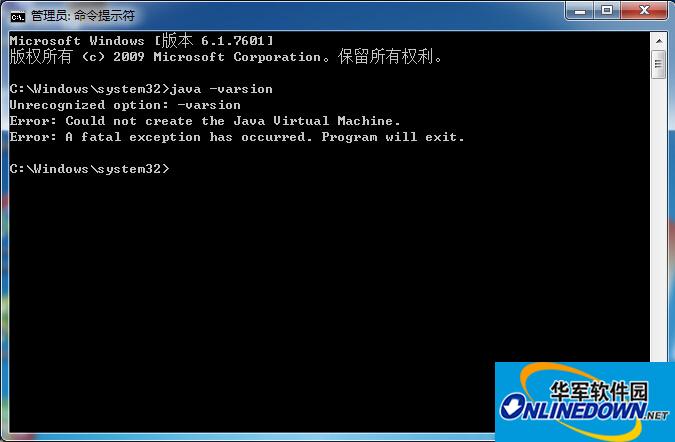
Open the Dos command window and enter: javac
Use Sencha Cmd to package into apk
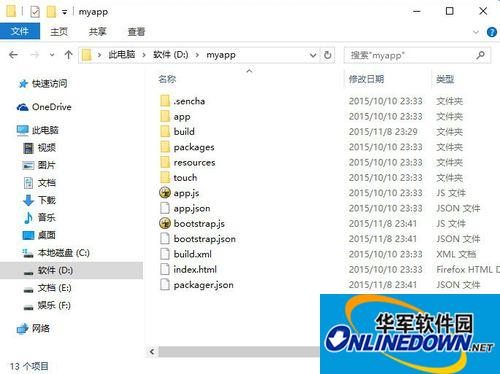
First, enter the directory of the Sencha Touch project in the file explorer (D:myapp here). The directory situation of the project is basically as shown in the figure below.
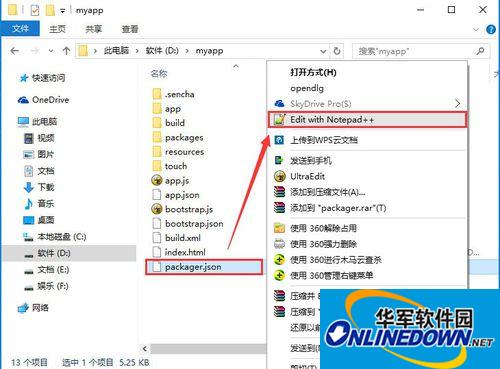
We can see the packager.json file in the project directory. We use the editor to open the packager.json file. (It is recommended to use an editor that can format json data, otherwise it will be difficult to view the data content)
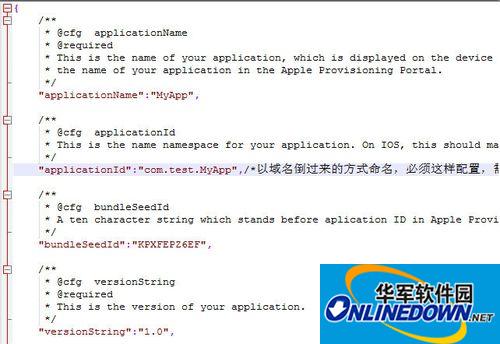
If you only want to generate a test version of the apk that can be used instead of a released version, you only need to modify some of the configurations. The specific configurations to be modified are as follows:
"applicationId":"com.test.MyApp",
/*Name the domain name in reverse order. This must be configured to ensure the uniqueness of the package name*/
"configuration":"Debug",
/*For testing, use Debug (no need to set the signing certificate path), and for publishing, use Release*/
"platform":"Android",
/*This is packaged as apk, which needs to be changed to Android or AndroidEmulator*/
"sdkPath":"D:/adt-bundle-windows-x86_64-20140702/sdk",
/*Configure the path of Android Sdk (configure according to the actual situation) Note: the slash in the path is "/"*/
"androidAPILevel":"10",
/*Configure the API version number of Android and ensure that this API is installed*/
Some of the modified documents are shown in the picture below. If you want all the files, you can download them from the network disk (pan.baidu.com/s/1c03BDAw)
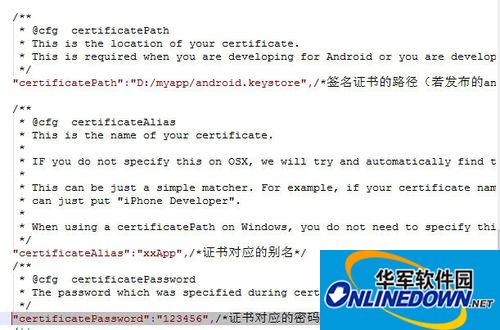
If formal release is required, of course you also need to configure a signing certificate. The specific configuration to be modified is as follows:
"applicationId":"com.test.MyApp",
/*Name the domain name in reverse order. This must be configured to ensure the uniqueness of the package name*/
"configuration":"Release",
/*To publish, use Release*/
"platform":"Android",
/*This is packaged as apk, which needs to be changed to Android or AndroidEmulator*/
"sdkPath":"D:/adt-bundle-windows-x86_64-20140702/sdk",
/*Configure the path of Android Sdk (configure according to actual situation)*/
"androidAPILevel":"10",
/*Configure the API version number of Android and ensure that this API is installed*/
"certificatePath":"D:/myapp/android.keystore",
/*Signing certificate path (if the android version released is Release, the certificate path must be set)*/
"certificateAlias":"xxApp",
/*The alias corresponding to the certificate (fill in the double quotes yourself)*/
"certificatePassword":"123456",
/*Password corresponding to the certificate (fill in the double quotes yourself)*/
Note: The slash in all paths is "/". Do not use the windows path slash "", otherwise an error will be reported. For example, the correct reference of the above SDk is D:/adt-bundle-windows-x86_64-20140702/sdk, not D:adt-bundle-windows-x86_64-20140702sdk.
To generate a certificate, please refer to the reference link below.
0Generate Android's digital certificate keystore file in the command line
0 Generate Android digital certificate keystore file in eclipse
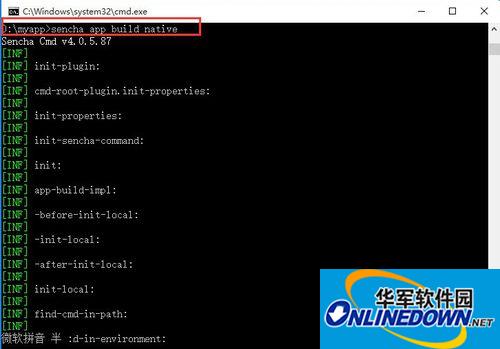
First, enter the directory of the Sencha Touch project in the command prompt (D:myapp here), and then enter the following command to package it into an Android apk installation package.
sencha app build native
(Note: Be sure to install the Android SDK before doing this. If you have not installed it, please refer to the reference link below)
3 Configure Android environment variables on Windows 10
3How to build an Android development environment on Windows
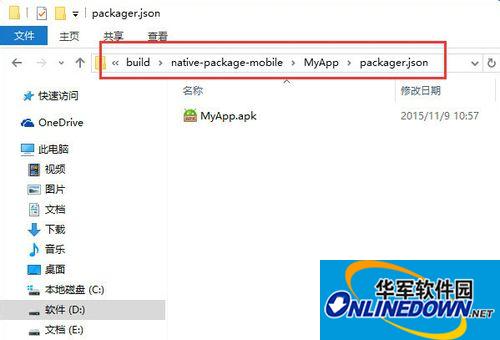
Then, enter the build-->native-package-mobile-->MyApp-->packager.json directory in the project directory and you can see the generated Android apk application. Here I generated MyApp.apk, as shown in the figure below.
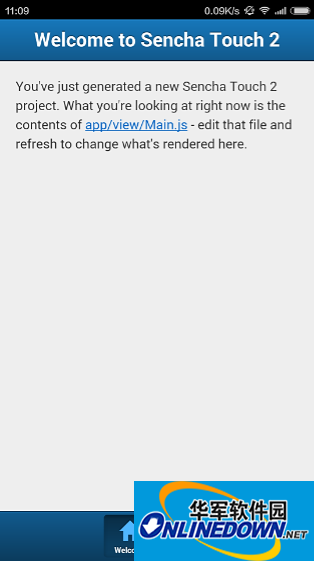
Pass the generated apk through QQ or360 mobile assistant, or connect the data cable to the mobile phone and install it on the mobile phone. After the installation is completed, you can see that the app icon is the Sencha Touch icon. Click on it and it will be your default homepage. Since I have not changed the content here, the default is the Sencha Touch welcome interface, as shown in the figure below.


Useful
Useful
Useful