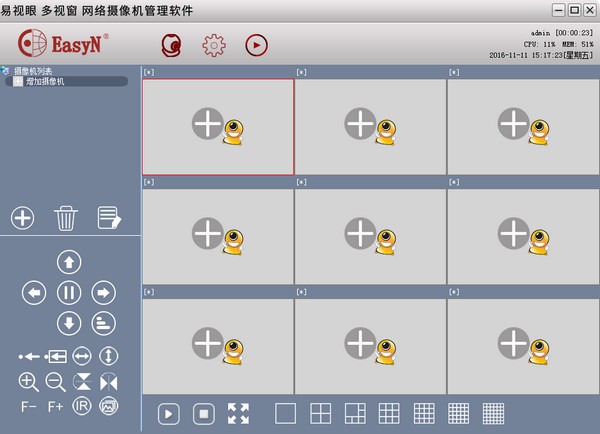
EasyN multi-window softwareFunction introduction
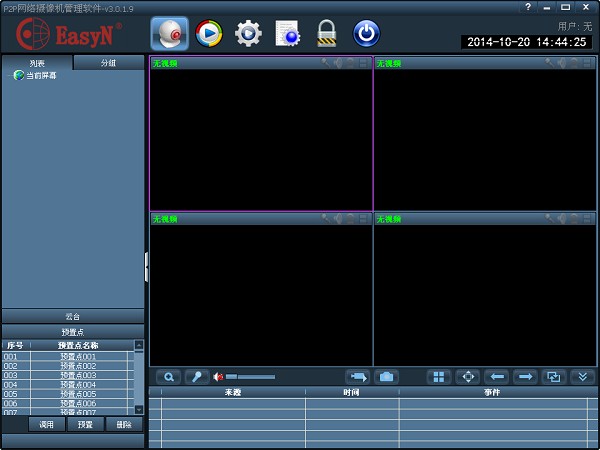
System function bar: The main function buttons of the system;
Equipment information bar: Displays the basic information of the added equipment;
PTZ control: PTZ control for cameras that support PTZ control;
Preview interface: real-time preview of camera video;
Basic information: Displays basic information such as date, CPU usage, memory usage, etc.;
EasyN multi-window softwareInstallation steps
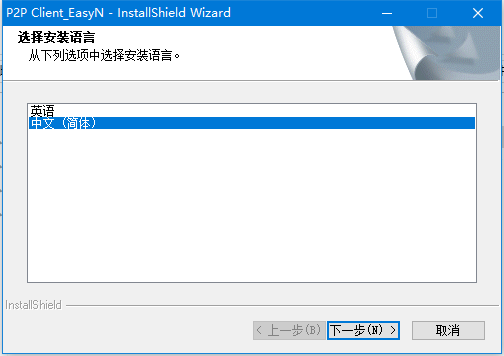
1. Download the software from this site, compress it and double-click the .exe to run it, enter the installation interface, and select the language
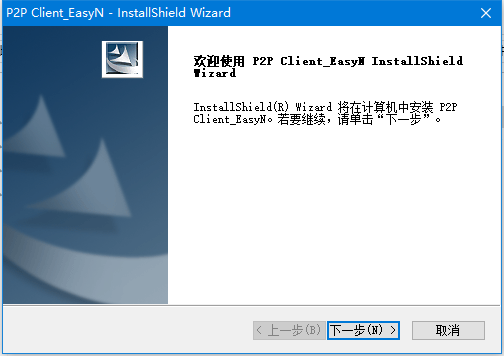
2. Enter the software installation wizard interface and click "Next" to continue.
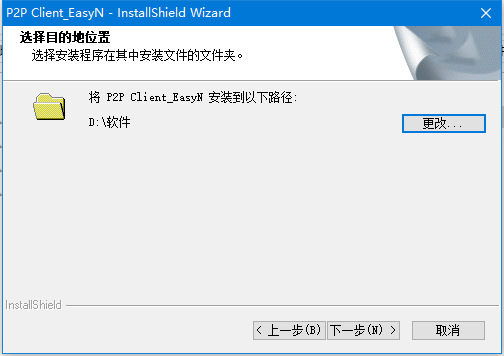
3. It is recommended to install the software on the D drive, click "Next" to continue.
4. The wizard is ready and you can start the installation. Click "Install"
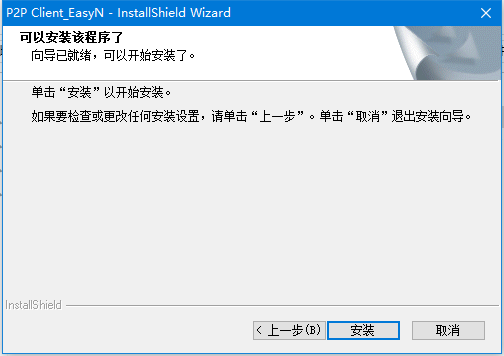
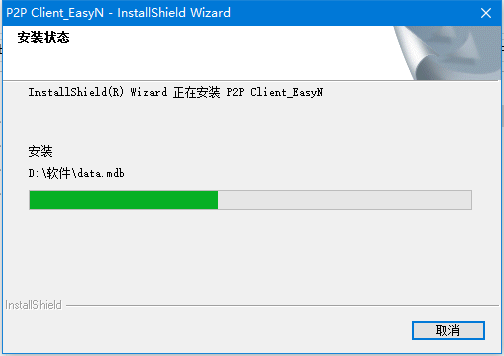
5. The installation is in progress, please wait patiently. The interface will automatically exit after the installation is completed.
How to use EasyN multi-window software
1. Double-click to open the software, and the loading data interface will appear with version information. After the loading is completed, the software interface will be displayed.
2. Click the third button [Settings] in the top row, and a login dialog box will appear. The default user name is admin and the password is empty.
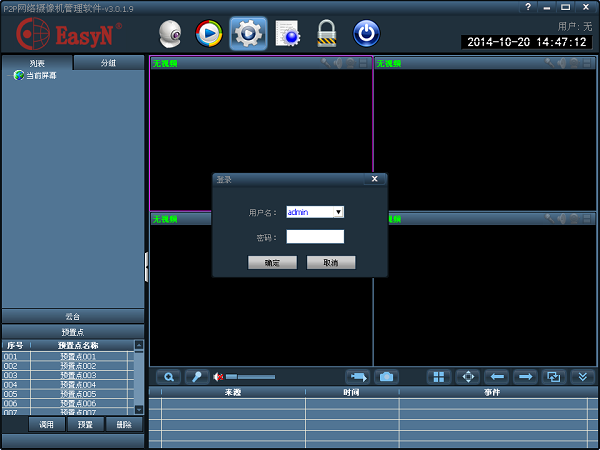
3. Click Confirm or press Enter directly to log in. A prompt to set a new password will pop up. Please change the password yourself.
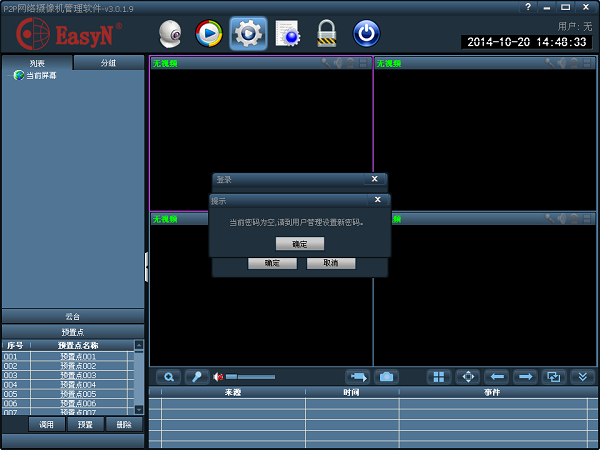
4. After clicking OK, you enter the setting interface. We first add an area. The pop-up box asks to fill in the area name. Fill it in and confirm.
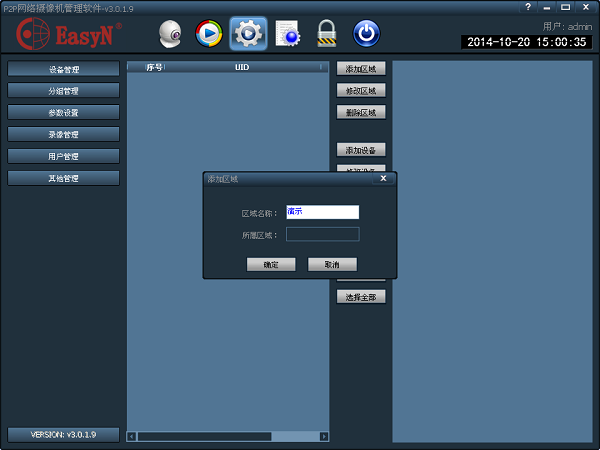
5. After clicking OK, you will find that there is an additional area on the right named Demo.
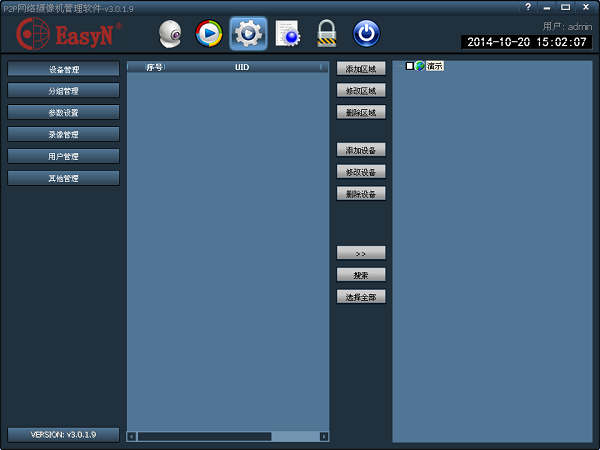
6. At this time, our computer, network camera, and router are usually connected to the same LAN, so we can quickly find the device through search. You will find the search button at the bottom of the middle column, second to last, click Search, and the device corresponding information will appear in the serial number and UID columns.
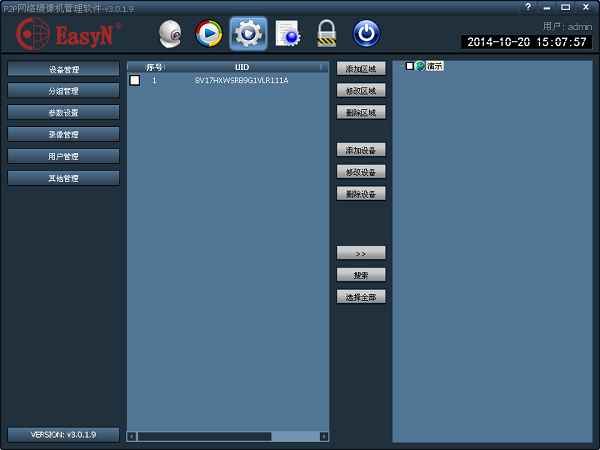
7. Check the box in front of the serial number. A √ appears, indicating that it is selected, and then check the selected area.
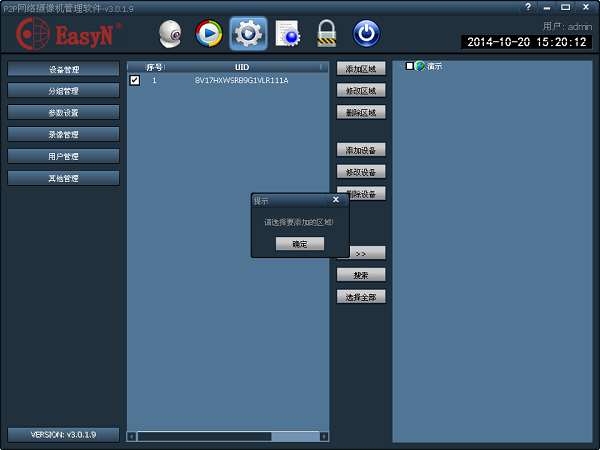
8. Check the device, then select the area, click the third "》" button from the bottom, the one above the search button, and then you will find that there is an additional device under the area.
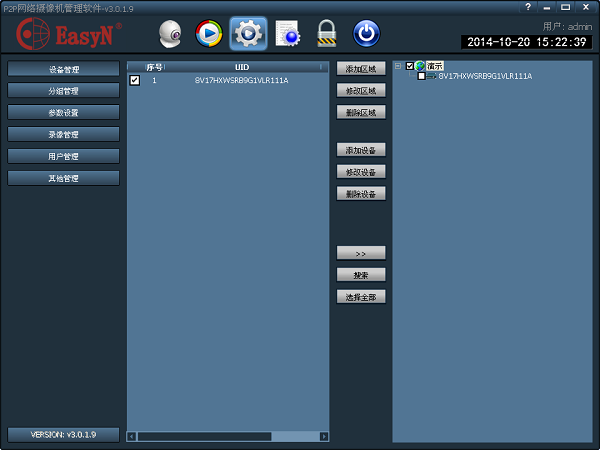
9. We select the device under the right area, then click Modify Device in the middle to change the device name.
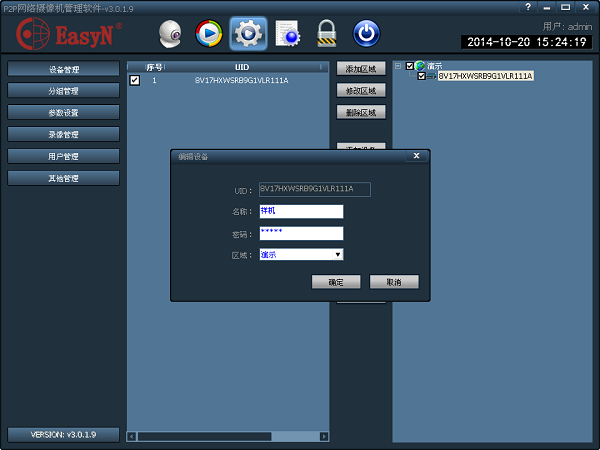
10. After confirmation, a name will be displayed behind the UID.
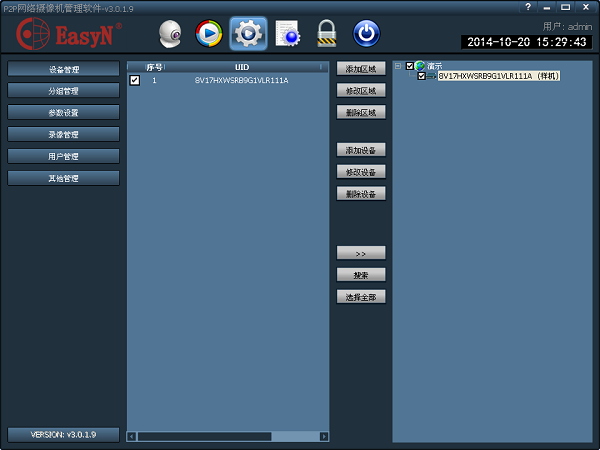
11. At this point, we have completed adding areas and devices. The same operation is done for multiple devices and multiple areas. We return to the interface where the software opens and click the first preview button in the top row of buttons.
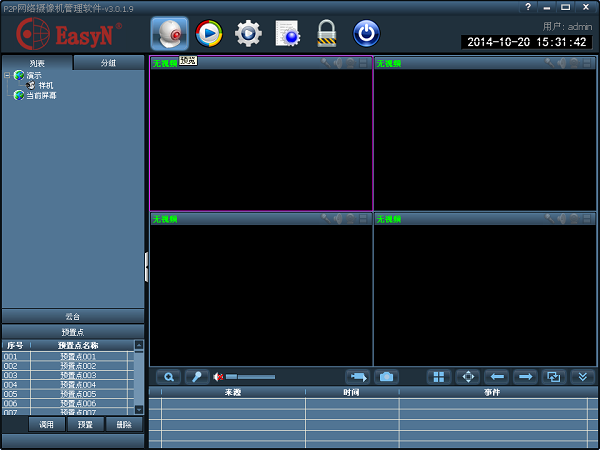
12. You can see a list in the upper left corner, and below it is the area "Demo" and device "Prototype" we just added. In the problem just now, if you don't change the device name, a string of UIDs will be displayed here, which can easily leak account information. Double-click the device under the area, here double-click the prototype, and a picture will be displayed in the right frame. Then the name of the device you just double-clicked will appear below the current screen, followed by PTZ control. There is a status bar at the bottom, which can be hidden by clicking the button on the far right.
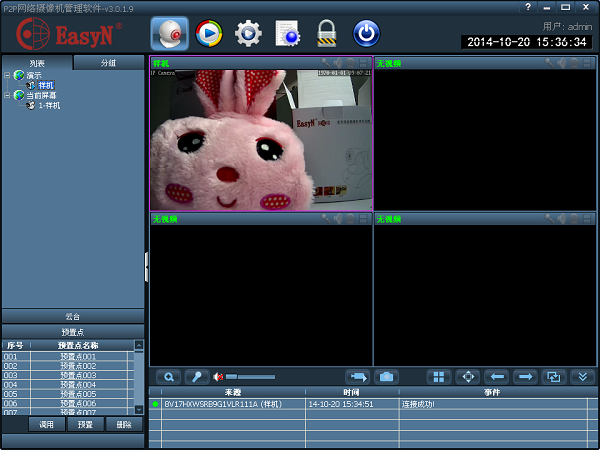
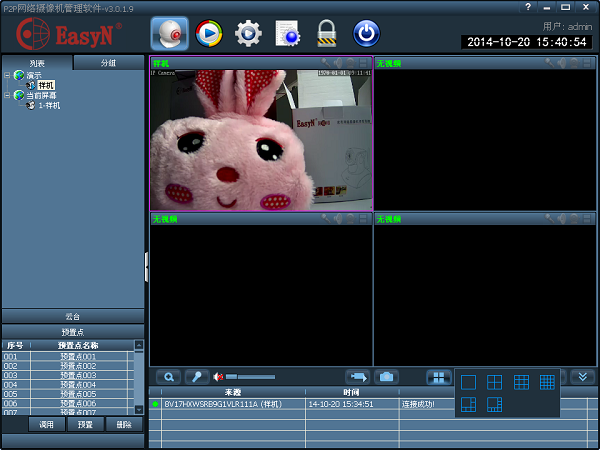
13. The default is four-screen, which means multiple devices can be displayed and viewed at the same time. The button to switch between single screen and multi-screen is to the right in the middle position above the status bar, and there are four squares to the right of the photo button. Click on it and you will find single-screen, 4-screen, 6-screen, 8-screen, 9-screen, and 16-screen options. That is to say, up to 16 devices can be connected to watch at the same time.
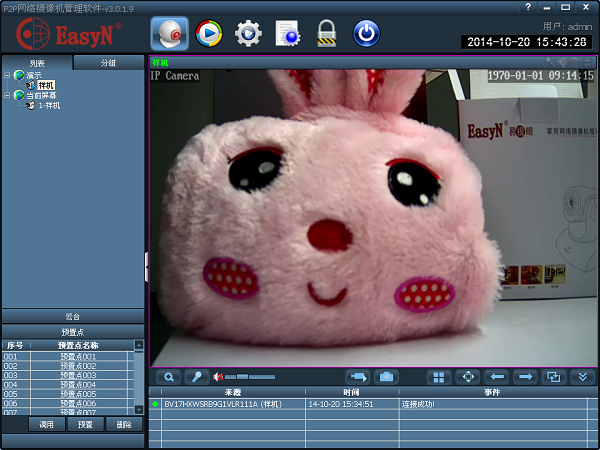
14. Single screen effect:
15. Full screen display effect:
Frequently asked questions about EasyN multi-window software
1. Why can’t Yishiyan connect to the Internet?
1) Please make sure the power supply, network and camera are properly connected
2) If the device can be found, please select the device in the finder device list, click the automatic setting button of the finder, and then try to open the open button of the intranet address through the finder.
2. How to modify the system time of the camera in Easy Eye?
After successfully connecting the camera, run the search configuration tool Ipcamsearch.exe Find the IP address of the camera and obtain the intranet access address of the camera, log in to the camera backend, select the time setting in the system settings, then click "Synchronize to PC time" below and apply and save to complete the time modification.
EasyN multi-window softwareChange log
【New features】
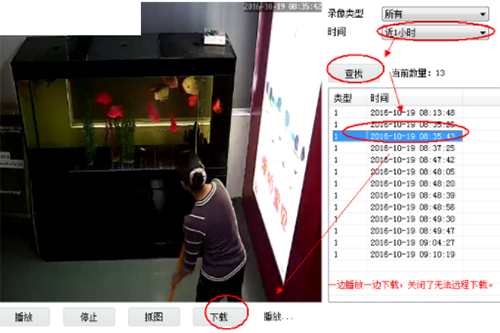
Added memory card recording settings, video playback, and video downloads.
Added PTZ speed adjustment, cruising frequency settings, and automatic cruising.
Added email settings, FTP settings, and time settings.
Added modification of IP and screen parameter settings.
Added the continuous zoom function of the optical zoom function machine
Added computer alarm video, alarm sound, alarm pop-up screen and text pop-up, etc. Welcome to download and use
Suitable for machines with 20-digit UID.
Huajun editor recommends:
EasyN multi-window software is professional, easy to operate and powerful. It is one of the leaders in the software industry. Everyone is welcome to download it. This site also providesYouluoke PC version,Enterprise Fluorite Cloud,Eagle Netcom computer client,Xietong XT800 free remote control software assistant version,Jinwanwei dynamic domain name resolution softwareWaiting for you to download.


it works
it works
it works