Microsoft Word 2013 is the core word processing component in the Office 2013 office suite launched by Microsoft. As a product that connects the past and the future, it not only maintains power and stability in classic document editing functions, but also focuses on introducing modern cloud services and touch-optimized experience. The most notable feature of Word 2013 is its deep integration with OneDrive cloud storage, allowing users to easily save documents to the cloud and seamlessly switch and continue working between different devices. Its new reading mode is optimized for tablet devices, providing a clean, screen-adaptive reading view that makes document browsing more comfortable. Next, let Huajun editor explain to you how to set page numbers in word 2013 and how to set page numbers in word 2013!
first step
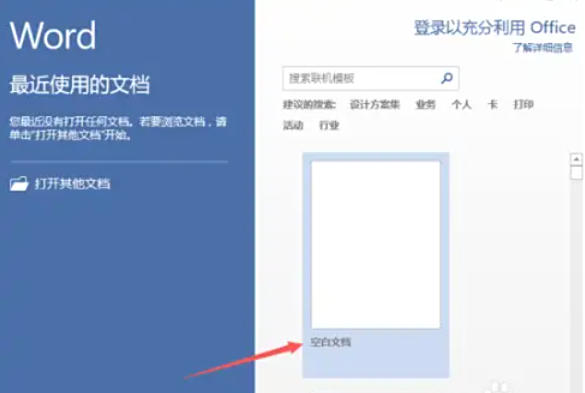
Start the program and create a new document: double-click the Word2013 program icon on the computer desktop with the left button of the mouse, open it, and click the "Blank Document" option to create a new blank Word document.
Step 2
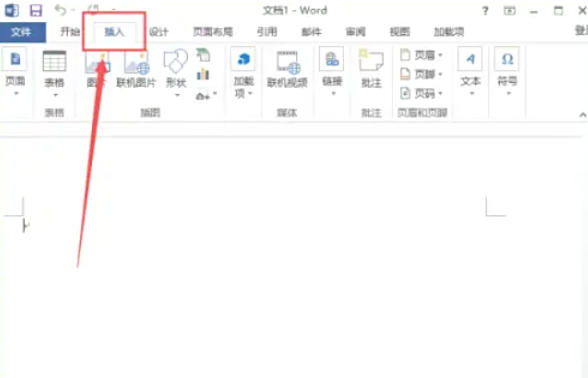
Locate the Insert tab: In the open Word document window, find the "Insert" tab in the title menu tab bar and open it.
Step 3
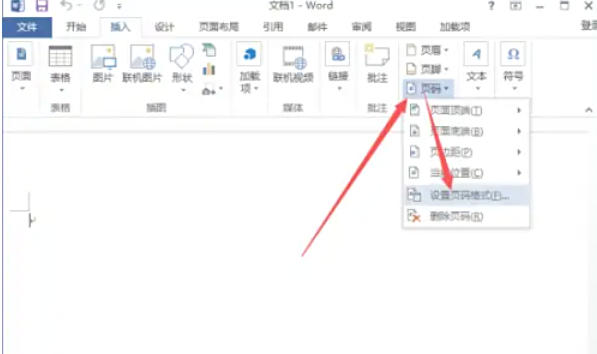
Enter the page number setting entrance: In the "Header and Footer" partition ribbon of the Insert tab, click the "Page Number" - "Set Page Number Format" command option.
Step 4
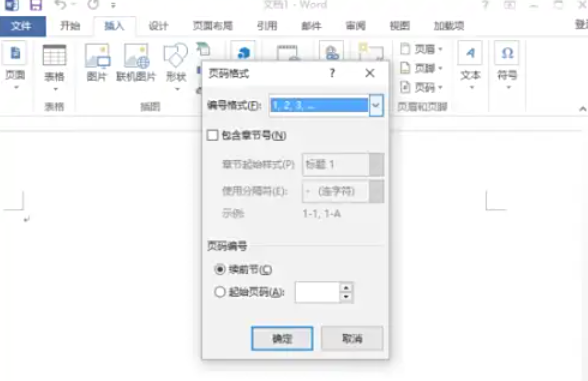
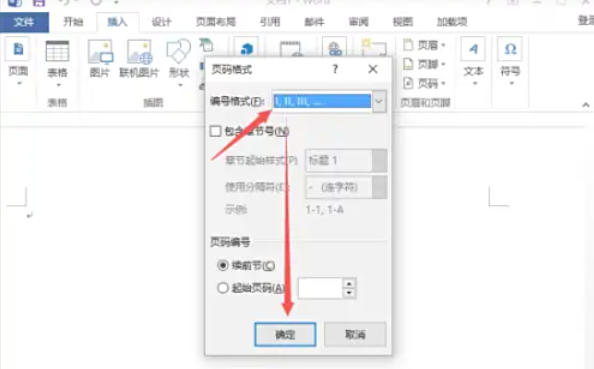
Open the page number format window: After clicking the Set Page Number Format command option, the "Page Number Format" dialog window will pop up.
Step 5
Select the numbering type: In the page number format dialog window, select the numbering type according to actual needs, such as ",..." selected in the example. After selecting, click the "OK" button.
Step 6
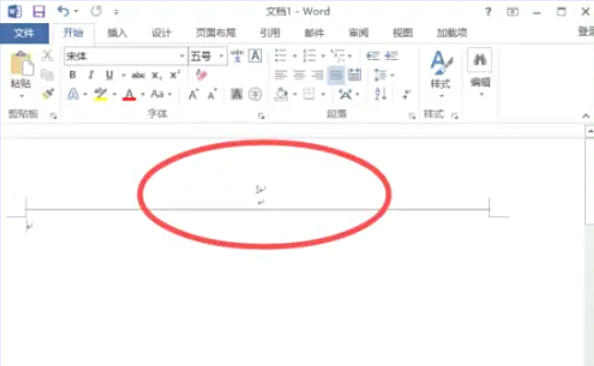
View the effect of the setting: Return to the Word document editing window and you can see the effect of setting the page number.
The above is how to set page numbers in word 2013 and how to set page numbers in word 2013 compiled by Huajun editor for you. I hope it can help you!


