Word 2013 is a core word processing program in the Office suite launched by Microsoft. Released in 2013 as the successor to Word 2010, it brings a new interface design, powerful cloud integration, and a host of innovative tools designed to improve productivity and collaboration. Adopting a "flat" design consistent with Windows 8/8.1 style, the interface is simpler and fresher. Next, let Huajun editor explain to you how to print documents in word 2013 and how to print documents in word 2013!
first step
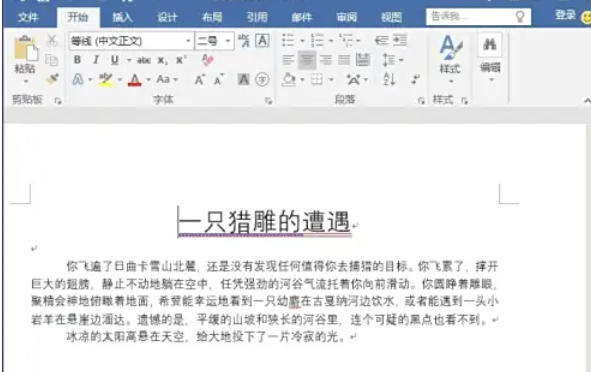
Open the Word document you want to print.
Step 2
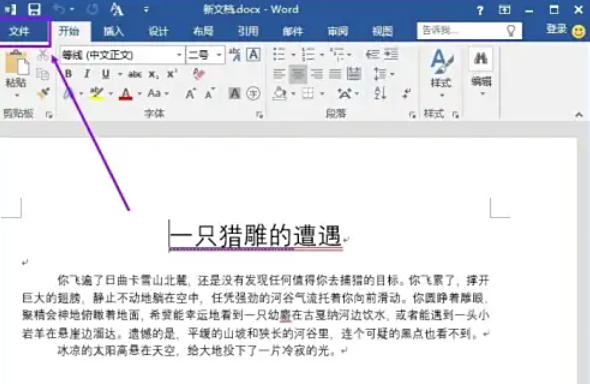
Click the File button in the upper left corner of the Word window to enter the File menu.
Step 3
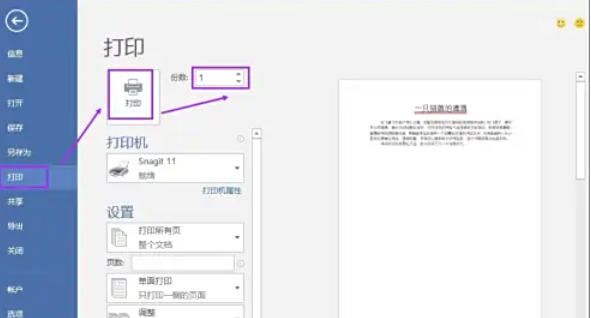
On the File menu, click the Print option. In the "Number of copies" box, fill in the number of copies of the document you want to print. After confirming that the print settings are correct, click the "Print" button to start printing the document.
Step 4
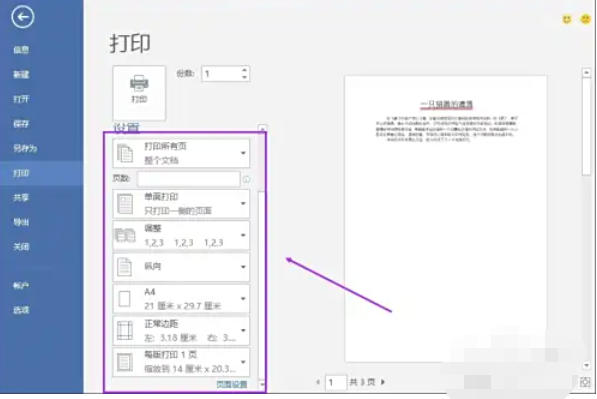
In the "Print" option interface, you can set the pages to be printed. For example, you can choose to print the current page, specify a page range, or print the entire document.
Step 5
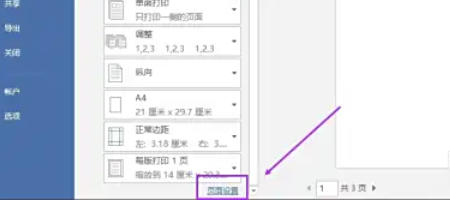
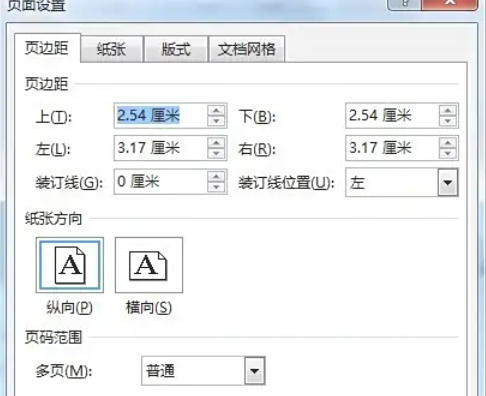
If you need more detailed page setup, click the "Page Setup" link. Opens the "Page Setup" dialog box, in which you can set the page margins, paper orientation, paper size, headers and footers, and other items. After the settings are completed, click the "OK" button to close the "Page Setup" dialog box.
Step 6
After confirming that all print settings meet your needs, click the "Print" button, and Word 2013 will start printing the document according to the settings.
The above is how to print documents in word 2013 and how to print documents in word 2013 compiled by Huajun editor for you. I hope it can help you!
