Microsoft Word 2013 is a powerful word processing software launched by Microsoft, with its new modern interface and deep cloud integration as its core highlights. This version not only saves documents to OneDrive by default, enabling seamless access and editing across devices, but also introduces an excellent "reading mode" and simplified real-time co-creation functions, which greatly improves the document reading experience and team collaboration efficiency. At the same time, it can directly insert online pictures and videos, and supports direct editing of PDF files. It is an office tool that combines efficiency, convenience and collaboration. Next, let Huajun editor explain to you how to convert documents into PDF files in word 2013 and how to print documents in word 2013!
first step
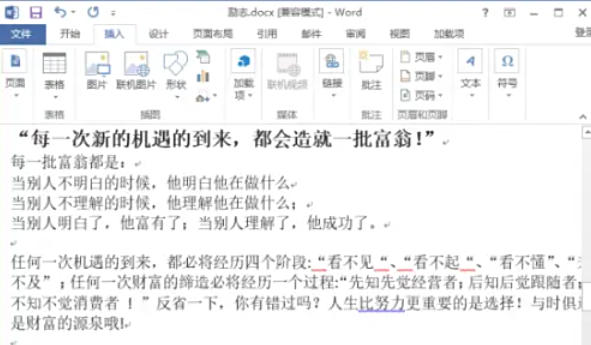
Using the left mouse button, double-click the Word 2013 program icon on your computer desktop to launch the Word 2013 software. In the opened Word 2013 program interface, find and open the Word document we need to format.
Step 2
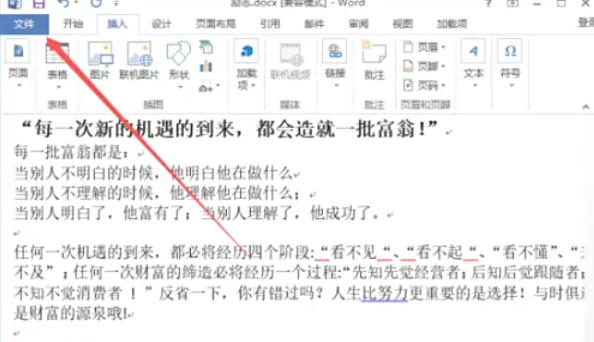
In the open Word document window, move your gaze to the upper left corner and click the "File" option button to enter the file options menu interface.
Step 3
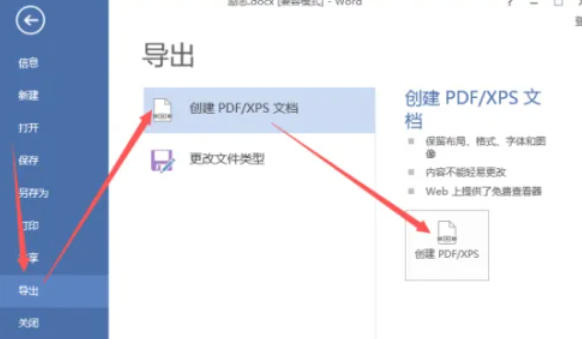
In the file options window interface, click the "Export" option in order, then click the "Create PDF/XPS Document" option, and finally click the "Create PDF/XPS" option command. Through this series of operations, you enter the PDF export settings.
Step 4
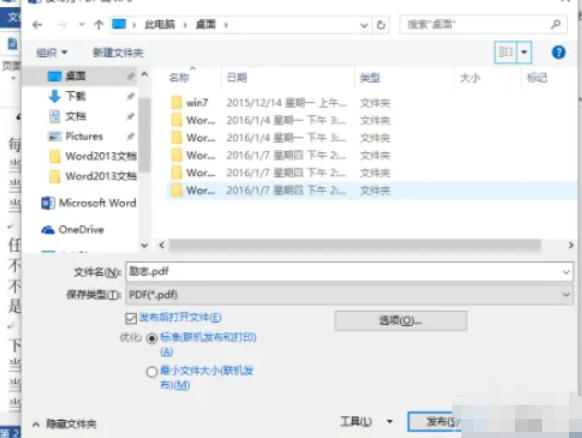
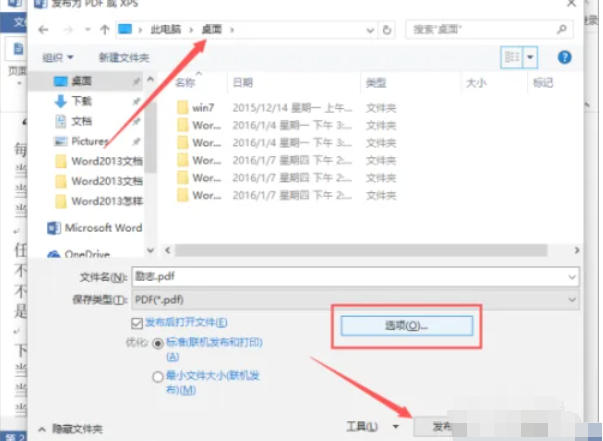
After clicking the "Create PDF/XPS" option command, the system will pop up the "Publish as PDF or XPS" dialog window. In this window, we can make relevant settings for the exported PDF file.
Step 5
Set the save path: In the Publish to PDF or XPS dialog window, find the Save file location settings area. You can choose to save the file to the directory we need. Here we take saving in "Desktop" as an example for demonstration.
Make additional settings (optional): If you need to make more detailed settings for the exported PDF file, such as setting the page range, optimization options, etc., you can click the "Options" button and make corresponding adjustments in the pop-up settings dialog box. After the adjustments are completed, click "OK" to return to the "Publish as PDF or XPS" dialog window.
Publish the file: After confirming that the save path and related settings are correct, click the "Publish" button, and Word 2013 will start converting the document to PDF format.
Step 6
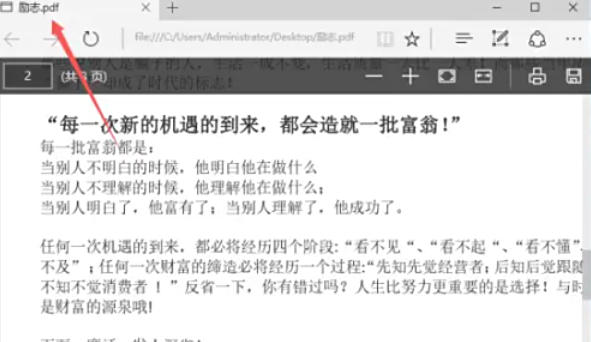
After clicking Publish, wait patiently for the export process to complete. After the export is completed, go to the file storage directory we set previously (such as the desktop), and you will see the files that have been successfully converted into PDF format.
The above is how to print documents in word 2013 and how to print documents in word 2013 compiled by Huajun editor for you. I hope it can help you!


