Hot search terms: 360 Security Guard Office365 360 browser WPS Office iQiyi Huawei Cloud Market Tencent Cloud Store
Hot search terms: 360 Security Guard Office365 360 browser WPS Office iQiyi Huawei Cloud Market Tencent Cloud Store

image processing Storage: 171.08MB Time: 2018-01-04
Software introduction: The Chinese version of GIMP is a distributed picture retouching, image production and processing software that contains almost all the functions required for image processing. It is known as Li...
During the process of using GIMP, many netizens said that they did not know how to change the color of part of the photo. In fact, it is very simple. Here is a simple tutorial on how to change the color of part of the photo with GIMP. After reading this, you can try it too!
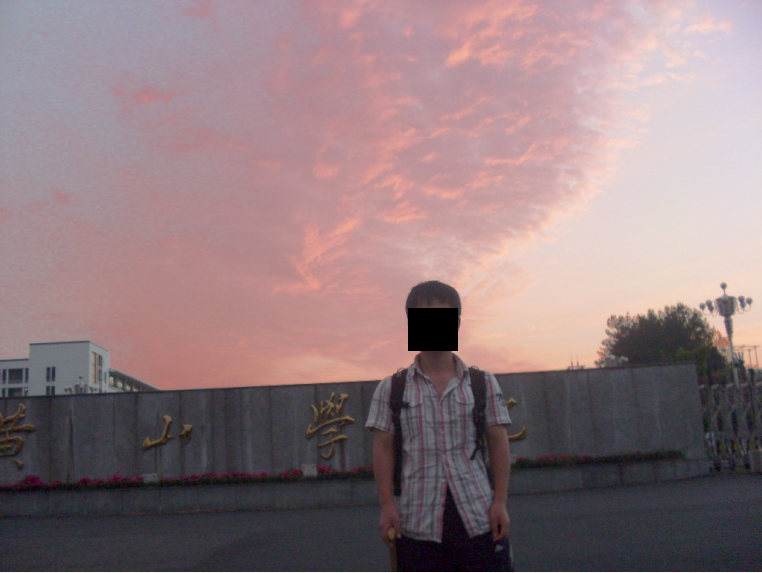
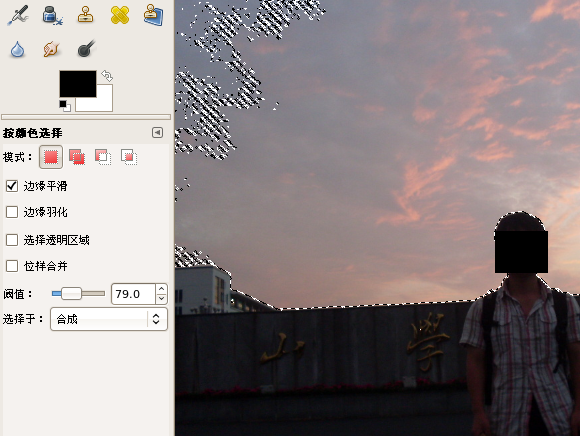
1. After opening the image with GIMP, select the "Select by Color Tool" at the end of the first row of the toolbox, and continuously adjust the threshold until most of the red areas can be selected after clicking on the red cloud.
2. Menu bar - Color - Level tool, open the "Adjust Color Level" dialog box, select "Red" for the channel, move the middle triangle slider under "Output Level", and adjust it to the color you want.
3. After making the adjustment, confirm it. Go to the menu bar - Select - Inverse Selection Tool to select the previously unselected part. In the same menu bar - Color - Level Tool, select "Brightness" for the channel and adjust it to a suitable brightness.
The final output effect is relatively clear.


Dear friends who have just come into contact with the GIMP software, after learning the operation content of GIMP to change the color of part of the photo in this article, do you think it will be easier to operate it in the future?

 Douyin web version link_Douyin web version entrance_Huajun Software Park
 How to enable HTTP server in EveryThing-How to enable HTTP server in EveryThing
 How to filter pictures in EveryThing - How to filter pictures in EveryThing
 How to change the font in EveryThing - How to change the font in EveryThing
 Sohu video player
 WPS Office
 Tencent Video
 Lightning simulator
 MuMu emulator
 iQiyi
iQiyi
 Eggman Party
 WPS Office 2023
 Minecraft PCL2 Launcher
 What to do if there is no sound after reinstalling the computer system - Driver Wizard Tutorial
 How to switch accounts in WPS Office 2019-How to switch accounts in WPS Office 2019
 How to clear the cache of Google Chrome - How to clear the cache of Google Chrome
 How to upgrade the bootcamp driver? How to upgrade the bootcamp driver