
-
Xshell
- Size: 62.3M
- Language: English
- Category: remote control
- System: WinALL


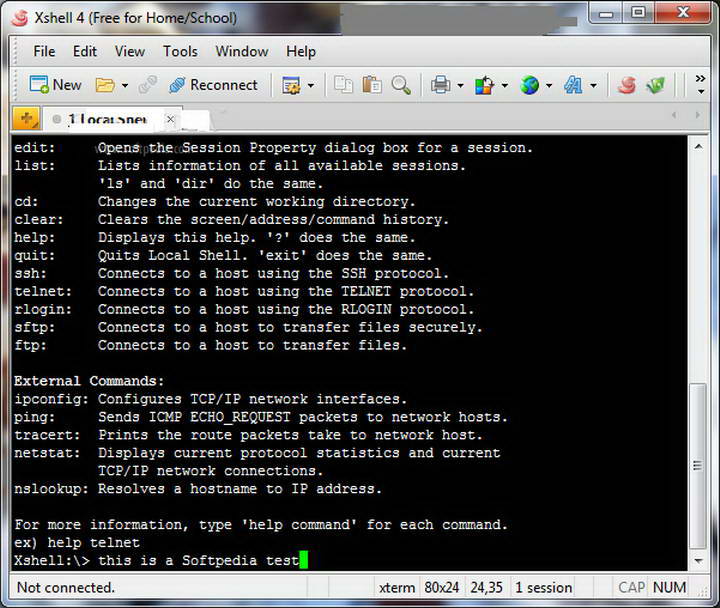


Xshell 6 free versionIt is a powerful secure terminal simulation software that supports SSH1.SSH2 and TELNET protocols. Users can connect through the home network.remoteThe host is convenient for users to handle emergencies at home and allows users to easily manage remote hosts. Xshell6 can also upload and download files, withUnicode encodingSupport, dynamic port forwarding, custom keyboard mapping and other functions are very convenient. Huajun Software Park provides you with free download of Xshell2024. Friends who like Xshell, come to Huajun Software Park to download and experience it!
-
Remote managementView
-
remote collaborationView
-
Computer remote control mobile phoneView
-
Supports multiple IP addressesView

Xshell6 software functions
1. Exclusive greening, integrated internal key to activate the permanent authorized version.
2. Start Xshell6 and remove the copyright protection service installation program.
3. Xshell6 fully simplified Chinese module translation, complete display of simplified Chinese.
4. The default settings have been selected to save personal data in the current directory.
5. Delete multi-language modules, key management, and online upgrade procedures.
6. Xshell6 removes redundant menu items: check for updates, English help, etc.

Xshell6 software features
1. Support IPv6
Whether you use both IPv4 and IPv6 networks or a complete IPv6 network, Xshell6 can fully meet your needs.
2. New client for MIT Kerberos authentication system
Kerberos’ centralized authentication method provides users with more secure and convenient access to the server. In order to meet the needs of enterprise users, Xshell6 has added support for MIT Kerberos authentication.
3. Deal with unsafe Telnet clients
Xshell supports VT100, vt220, vt320, xterm, Linux, scoansi and ANSI terminal emulation and provides various terminal appearance options to replace the traditional Telnet client.
4. Powerful paging environment
Xshell6 introduces the most flexible and powerful paging environment ever seen in a terminal emulator. Xshell tabs can be detached from the original window and recreated as a new window or reattached to a completely different Xshell window.
5. User-defined text editor to edit terminal content
With the help of Xshell6, you can use a third-party text editor to quickly open terminal content. Integrate your workflow more smoothly by using an external text editor such as Sublime or Visual Studio to edit terminal content.
Xshell6 usage tips
How does Xshell6 connect to the server?
1. Open Xshell6 downloaded from this siteSoftware, after opening the software, click the [File] option at the top of the file, select the [New] option in the pop-up menu, open the new window, enter the name, host, and port, and click [OK] after completing the input.

2, return to the link window, you will see an additional test server window, you need to click [Link].
3. A pop-up window will prompt you whether to accept the secret key of the host, click [I accept and save].
4. Enter the username, you can check the option to remember the username, and click [OK] after inputting.

5. Enter the password and click [OK] after completing the input.
6. After passing the authentication, your host information will be displayed.

Xshell6 related issues
How does Xshell6 transfer files?
Upload files
1. Openxshell6 software, after opening the software, connect to the server.

2. Install a tool using yum. #yum install lrzsz -y

3. Enter #rpm -qa |grep lrzsz to check whether the server can be connected. If a prompt as shown in the figure appears, the connection is successful.

4. After the connection is completed, enter #rz, and then the upload file window will open, select the file you want to upload, and click Open.

Xshell6How to download files?
1. Enter the #sz {file} command, and then a window to save the file will pop up. You can choose the location to save the downloaded file.
2. If you want to modify the path of the file you want to save, you can click[File] at the top of xshell, select [Properties] from the pop-up options, open the properties window, click [File Transfer] on the left, and you can modify the storage path of the file you want to download in the right interface. You can also modify the upload file options to make your choice.

How to change the user data folder path?
If there are no special requirements, it is recommended to set the data folder path to the default value. However, if you need to specify a different data folder path when synchronizing the cloud drive, you can use the following method to change the data folder.
Users can select "Tool Item-Change User Data Folder" in the "Menu Bar".
Note: To change the user data folder, you may need to restart the software. Therefore, it is recommended to save the current project before changing the data folder.

After selecting this option, a pop-up box will pop up to inform you of the current user data folder address. Choosing to change will terminate the current program. To continue, please select "Yes".

Then, the system will prompt you to select the new user data folder path, as shown in the figure. Click Next to continue.

If you need to delete the current data folder, please check "Delete original folder".

After confirming the changes, select "Finish".
Huajun editor recommends:
Xshell6 software is a very easy-to-use and powerful terminal simulation software that can help users enjoy their work in complex network environments and improve work efficiency. It is very convenient. Huajun Software Park also provides you withSunflower remote control console,Sunflower remote control controlled terminalWaiting for you to download.
Version: 7.0.73.0 Chinese version | Update time: 2025-11-12
Similar recommendations


Latest updates


Solution to garbled characters when using Xshell in Windows 7
How to set the display status icon in Xshell - How to set the display status icon in Xshell
How to change the interface language in Xshell - How to change the interface language in Xshell
How to set encoding in Xshell-How to set encoding in Xshell
How to conduct multiple sessions in Xshell? -Xshell for multi-session tutorial
How does Xshell connect to the switch? -Xshell connection switch tutorial
How to reset file save location in Xshell? -Xshell reset file save location tutorial
How does Xshell perform paging? -Xshell paging tutorial
How to set full screen mode in XShell - How to set full screen mode in XShell
Xshell review
-
1st floor Huajun netizen 2022-02-11 16:50:13Xshell is very useful, thank you! !
-
2nd floor Huajun netizen 2021-12-10 18:22:02Xshell software is very easy to use, the download speed is very fast and very convenient!
-
3rd floor Huajun netizen 2022-03-14 15:48:01Xshell is awesome! 100 million likes! ! !
Recommended products


- Diablo game tool collection
- Group purchasing software collection area
- p2p seed search artifact download-P2P seed search artifact special topic
- adobe software encyclopedia - adobe full range of software downloads - adobe software downloads
- Safe Internet Encyclopedia
- Browser PC version download-browser download collection
- Diablo 3 game collection
- Anxin Quote Software
- Which Key Wizard software is better? Key Wizard software collection