Many people don’t know how to tilt objects in Adobe Illustrator CS6? The article brought to you today is about Adobe Illustrator If you still don’t know how to tilt objects in CS6, let’s learn it with the editor.
Step 1: Open Adobe Illustrator CS6 on the desktop (as shown in the picture).

Step 2: Find and click [File], [New] in the menu bar (as shown in the picture).

Step 3: Set the parameters in the pop-up window, click [OK] to create a new document (as shown in the figure).

Step 4: Select the object to be tilted (as shown in the picture).

Step 5: Find and click [Object], [Transform], [Tilt] in the menu bar (as shown in the picture).

Step 6: Set the tilt angle in the pop-up [Tilt Window]. If you need to copy a new object, click [Copy]. If you only want to tilt the object, click [OK] (as shown in the picture).
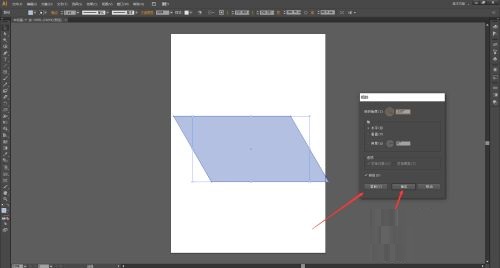
Step 7: After clicking [OK] or [Copy], the object will have a tilt effect (as shown in the picture).

The above is the entire content of how to tilt objects in Adobe Illustrator CS6 brought to you by the editor. I hope it can help you.