The JiRendering platform is a very excellent and practical image cloud rendering software. The official version of JiRendering has powerful functions and can provide users with extremely fast and high-quality image rendering services. The JiRendering software is easy to operate, can simplify the rendering process and improve work efficiency. In addition, JiRender also has a cloud storage function to facilitate users to manage and share their works.

Extreme rendering software features
Real-time preview of the rendering process of Ji Rendering Platform
Real-time preview of the rendering process for multiple subtasks and comprehensive monitoring

Online customer service One-to-one VIP service
Private message function built-in client, customer service 7*24 hours online service
Solve your rendering questions in a timely manner

Exquisite skin dual color definition
More interface style options, classic and fresh options
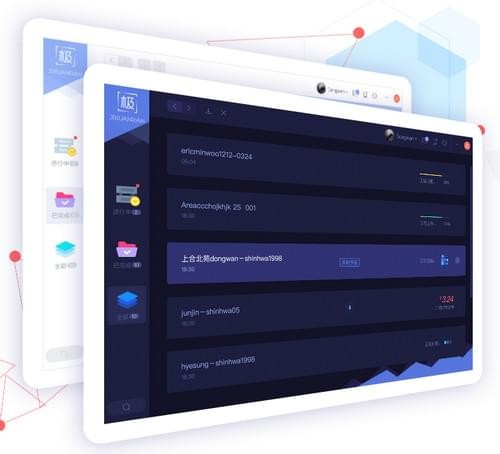
Wonderful sharing between you and me
Rendering works can be shared directly with friends, making transmission convenient and improving work efficiency.
View your works anytime, anywhere

Extreme rendering tutorial
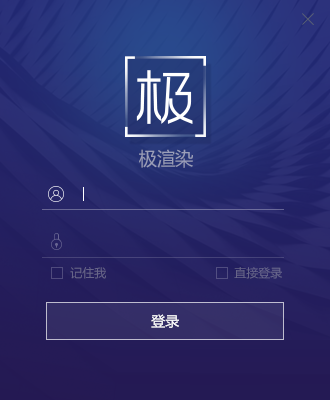
Login client
Enter the username (mobile phone number) and password on this interface. When "Remember me" is checked, the username and password will be remembered. You don't need to re-enter them next time you log in. When "Automatic login" is checked, the username and password will be logged in directly next time. Enter. (Note: Do not check this option on a public computer)
Introduction to client functions
1. The overall interface is as follows
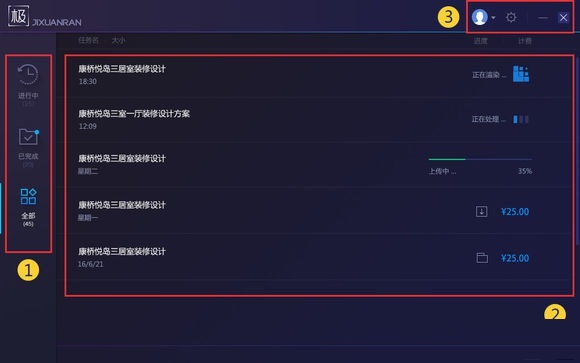
Area 1 is a switching option for tasks in different statuses.
"In Progress" displays tasks that are uploading, queuing, and rendering;
"Completed" displays tasks in rendering completion, cancellation, or error status;
"All" displays tasks in all statuses;
Area 2 is the task list
This list will display the task name, file size, progress, and billing information;
3 areas are functional options
From left to right, they are user, settings, minimize, and close;
2. View task information
In the 2 areas in the above picture, double-click one of the tasks, or right-click

Then click "Task Details", or click the button on the right side of the task to enter the task details page
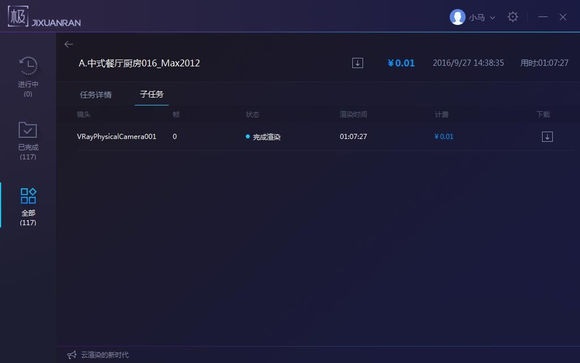
2.1 The task details page displays the detailed information of the submitted task, including amount, rendering time, resolution, rendering camera, frame serial number, etc.
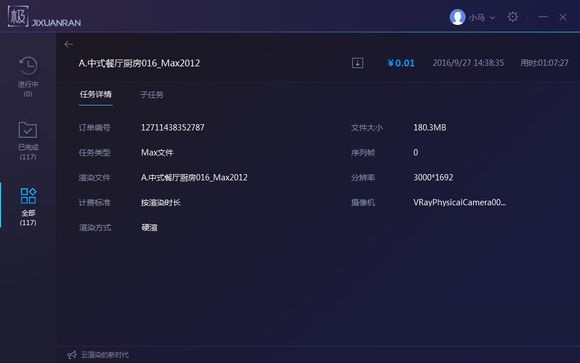
2.2 When switching to "Subtask", display the rendering information of each frame, including the amount and time taken, etc.
3. View and operate user information
When you click on the user name in area 3 above, the balance and the following options will be displayed.
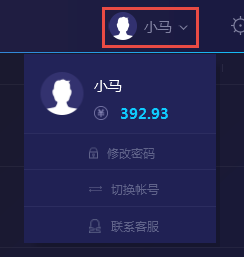
3.1 Click "Change Password" and you will jump to the official website password change interface. Follow the page prompts to complete the password change.
3.2 Click "Switch Account" and you will return to the login interface. At this time, you can change your account and log in again.
3.3 Click "Contact Customer Service" and it will jump to the customer service page. Click the customer service name on the right side. After adding it as a friend, you can get JiRender 7×24 hours online service.
Introduction to plug-in functions
After the client completes the installation, the 3ds Max plug-in will also be installed at the same time. When opening 3ds Max, you can find Extreme Rendering in the menu bar (the plug-in currently supports 3ds Max versions 2010~2016, and the vray version is not higher than 3.20.x)

1. Open the plug-in
Click "Extreme Rendering", then click "One-click Rendering" to open the plug-in interface (please set the renderer to vray, otherwise the plug-in does not support it)
2. Panel function
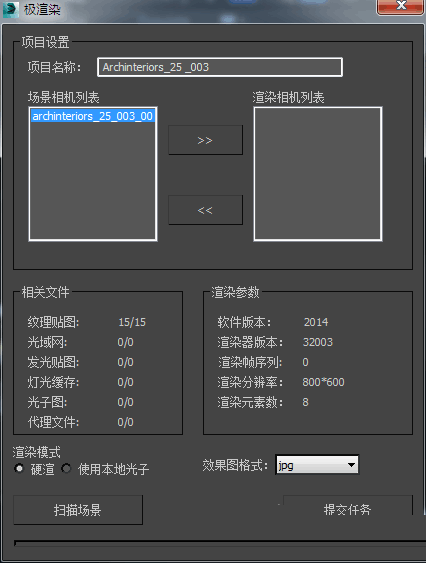
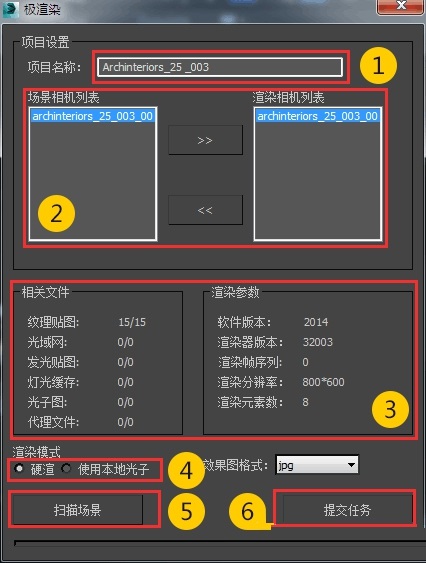
1.1 "Project name" is the name of the submitted task. The default is the name of the max file. It can be changed, but it must be filled in.
1.2 The "Scene Camera List" displays the renderable cameras found in the scene. Please move the camera that needs to be rendered to the "Rendering Camera List" through the ">>" button in the middle.
1.3 "Related files" and "rendering parameters" are automatically obtained by the plug-in. Please check whether these parameters are incorrect.
1.4 "Rendering Mode", when the primary engine and secondary engine modes in global illumination are set to "from file", and the photon file is correct and not lost, you can use local photons, otherwise you can only use hard rendering (multi-frame and multi-frame The camera can only use hard rendering)
1.5 After clicking the "Scan Scene" button, the renderer settings will be scanned. When abnormal settings appear, the user will be prompted to modify them.
1.6 After clicking the "Submit Task" button, the max file will be saved first, then the task will be sent to the client and uploaded to the farm for rendering.
Rendering process
Ji Rendering tries its best to ensure that the rendering process is simple and fast, so that the cloud rendering operation is like local rendering.
1. Plug-in operation
1.1 Open the completed model file in 3ds Max and open the plug-in panel
1.2 Enter the project name and set the camera to be rendered
1.3 Select the rendering mode according to the settings in global illumination
1.4 Click "Scan Scene" to confirm that the scene parameters are correct
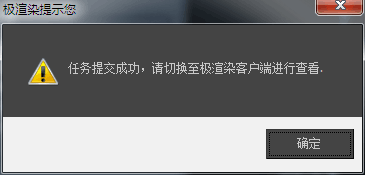
1.5 Click "Submit Task" to submit the file to Farm Rendering. When the message shown in the figure below appears, the task submission is successful. You can switch to the JiRendering client to view the task progress.
The specific sequence of plug-in parameter settings is shown in the figure below
Client operations
After the plug-in successfully submits the task, you can view the task information in the plug-in
2.1 The client will upload the file to JiRender Farm. At this time, the progress will be displayed and the subtasks cannot be viewed.

2.2 After the upload is completed, it enters the queuing state. At this time, the task displays "Processing" and you can view subtask information.
2.3 After queuing ends, the status changes to "Rendering"
2.4 When the task rendering is completed, the client will prompt that the rendering is completed in the lower right corner.

At this time, you can download it in the task list or sub-task list, click

Click the icon to download the renderings locally. After the download is complete, the icon will change to

Click again to enter the folder where the renderings are saved.
Extreme rendering update log
1. Fix bugs in the previous version
2. Optimize some functions
Huajun editor recommends:
Ji Rendering software is a software with excellent performance, which is obvious to all. Huajun Software Park also has Photo BlowUp, Photo BlowUp, .NET and other related software that are definitely worth downloading and using. Come and choose your favorite!


