PhotoshopIt is the abbreviation of what is commonly known as "ps" software. It is a very powerful software developed and published by Adobe.imageprocessing software. Photoshop mainly deals with numbers composed of pixelsimage.PhotoshopincludedNumerous editors andDrawingTools, each tool has a very practical effect and is very practical in many fields. in needPhotoshopCome and download, friends, Huajun Software Park provides you with free downloads.

Photoshop tutorial
How about PhotoshopCutout?
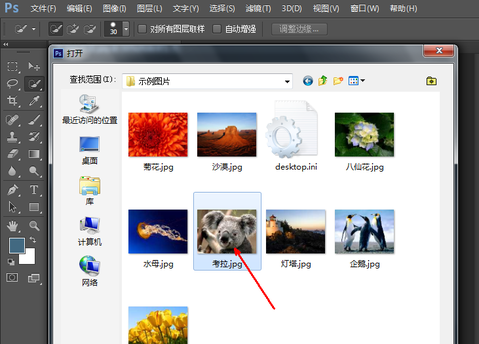
1. First openPhotoshop, select and open the requiredCutoutpictures.

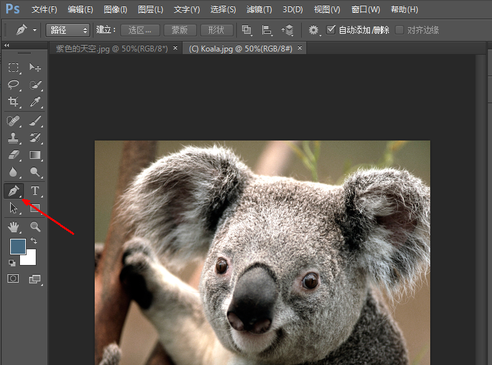
2. Click Select in the left toolbarpenTools.

3. Use the pen tool to follow the edge of the image that needs to be cut out.Stroke, after tracing, press ctrl on the keyboard and press Enter to select.

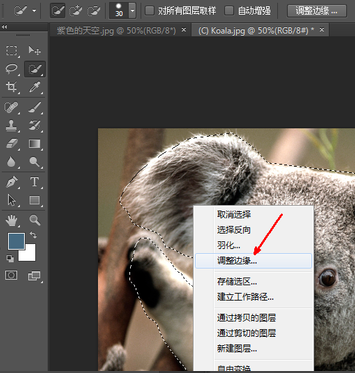
4. Use the mouseRight clickClick on the image and select the "Adjust Edges" option in the drop-down menu.

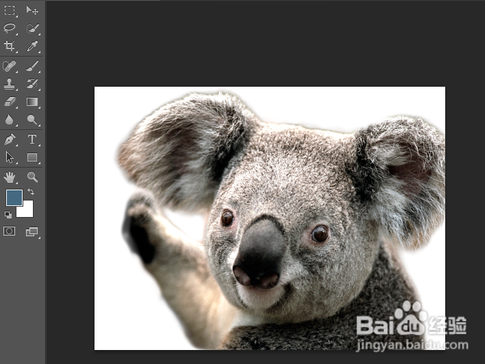
5. Adjusting the edgeswindow, you can set the edge smoothness, feathering value, contrast, etc.numerical value, and can view the adjustment results in real time. When the adjustment results meet the requirements, click "OK" below.

6. That’s it.CutoutYes, come and try it.

1. First create a new blank space in PhotoshopLayers, use the text function to enter the required text.

2. Then use "Ctrl+J"Shortcut keysDuplicate the text layer.

3. Drag the copied layer slightly to the lower right, and click the "Color Module" in the text editing box on the right.

4. It is recommended to change the color togray, and then click "OK".

5. In this way, the three-dimensional effect can be reflected. Come and try it.

How to change words on pictures in photoshop
Method 1. Use repairbrushTools
1. Open the image whose text needs to be modified in PS.
2. Select the Healing Brush Tool and setbrushsize and hardness.
3. Hold down the Alt key and click near the text to be modified to sample.
4. Paint on the text that needs to be modified until the text disappears.
5. Use the text tool to enter the text that needs to be modified.
6. Adjust the size, position and font of the text so that it matches thepicturesThe overall style is consistent.
7. Repeat the above steps until all text that needs to be modified has been processed.
Method 2: Use content-aware filling
1. Open the image whose text needs to be modified in PS.
2. Select the rectangular marquee tool and select the items that need to be modified.text.
3. Select "Edit" -> "Content-Aware Fill" in the menu bar.
4. In the pop-up window, click the "OK" button.
5. PS will automatically identify and fill the content in the selection, covering the original text.
6. Use the text tool to enter the required text in the corresponding position.
7. Adjust the size, position and font of the text so that it fits in with the imagestyleconsistent.
8. Repeat the above steps until all text that needs to be modified has been processed.

How to stitch two pictures together using photoshop?
Step 1: Edit the two pictures to have the same height, then open the two pictures to be put together in PHOTOSHOP.
Step 2: Select "Canvas Size" in "Image".
Step 3: Widen the canvas size to the same width as the other image, and set it as shown below.
Step 4: Place another picture in the windowzoom out.
Step 5: Use the move tool to move the second image into the first image, and adjust the second image to the appropriate position.
Step 6: Merge the two image layers together and press Ctrl+S to save the spliced image.
How to create nostalgic old film effect photos in Photoshop?
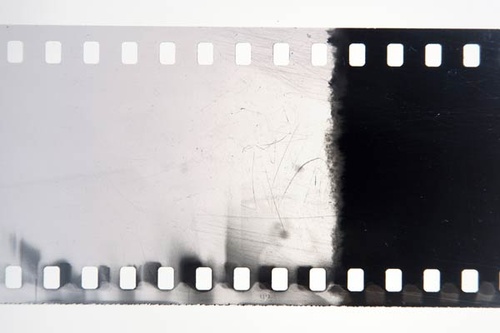
(1) The core of creating nostalgic film picture special effects is to use high-quality film texture materials (such as film perforations and retro grain textures) to enhance the real retro feel of the picture.

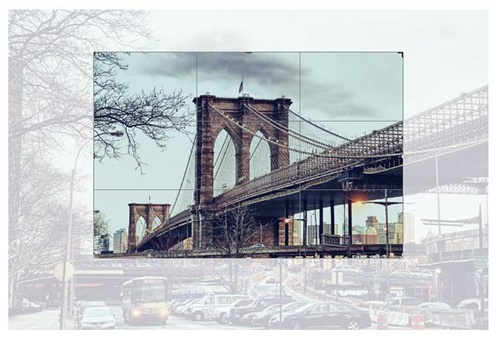
(2) Film special effects are suitable for all types of pictures, among which old photos or scene materials with a sense of age (such as old buildings, retro characters) have better effects. This tutorial takes a photo of the Brooklyn Bridge in New York as an example. Click here to download the corresponding material.

2. Create an old film effect
Open the material provided in the tutorial in Photoshop, select the cropping tool (shortcut key C), and refer to the operation below to accurately crop out the main part of the bridge, so that the modern vehicles in the picture are separated from the bridge, and the core scene is focused.


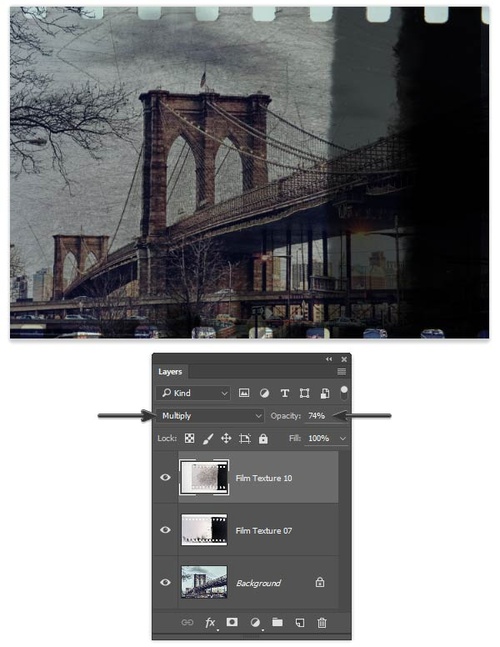
Execute [Select > Select All] (shortcut Ctrl+A), then click [Edit > Copy] (shortcut Ctrl+C); switch to the canvas where the bridge material is located, execute [Edit > Paste] (shortcut Ctrl+V), and paste the film texture on top of the bridge layer.
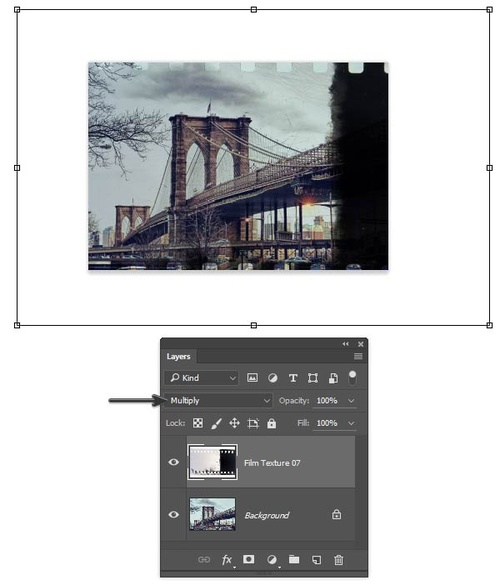
Modify the blending mode of the film layer to "Multiply", execute [Edit > Free Transform] (shortcut Ctrl+T), drag the control points to adjust the size of the film so that it completely covers the bridge layer, and press Enter to confirm after the adjustment is completed.

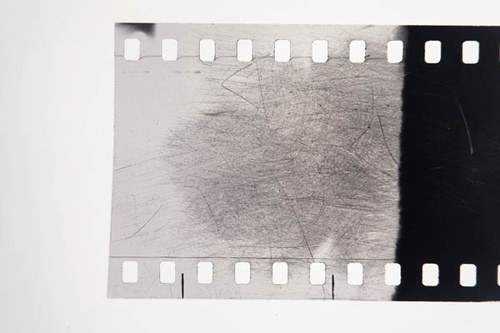
When processing the second film material, repeat the above operations. Note: When adjusting the size, ensure that the perforations of the film are aligned to avoid misalignment of the image; if the texture of the two layers of film is too deep, the opacity of the upper film layer can be appropriately reduced (20%-30% is recommended) to balance the texture.

Since the superposition effect of the second film texture is too strong in the center of the picture, you need to add a mask to this layer: execute [Layer > Layer Mask > Show All] (or click the "Add Layer Mask" icon at the bottom of the layer panel), select a black soft-edged brush (set the hardness to 0%), and lightly apply it in the center area of the picture to weaken the texture effect here.

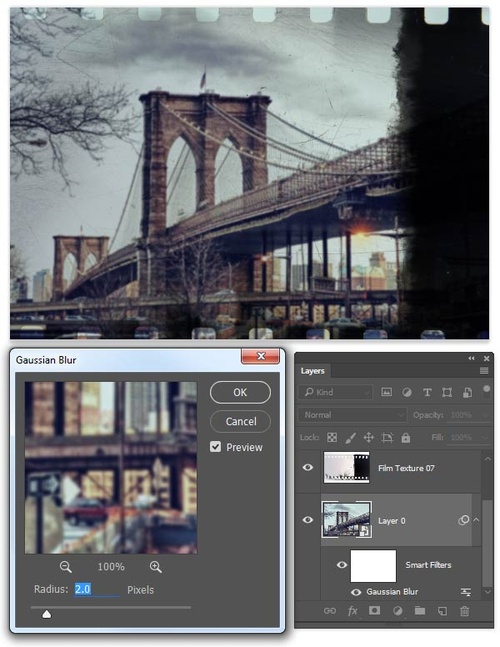
The clarity of the bridge material does not match the texture of the old photos and needs to be softened: select the bridge layer, execute [Layer > Smart Object > Convert to Smart Object] (to facilitate subsequent modification of filter parameters), then execute [Filter > Blur > Gaussian Blur], set the "Radius" to 2 pixels in the pop-up dialog box, and click "OK".

Use the Polygonal Lasso Tool (shortcut key L) to roughly select the area along the outline of the background layer, and then click the "Add Layer Mask" icon at the bottom of the layers panel to add a mask to the background layer.

Select the Brush Tool (shortcut key B), set the brush hardness to 20%-30%, and gently paint along the edge of the background on the mask to give the edge a gradient transition effect, simulating the natural fading of old photos.

At this point, the picture already has a basic nostalgic texture, mainly due to the superposition of film texture and edge fading effects.

3. Further deepen the effect
The above operations can already produce good film special effects, but real old photos usually have color casts and slight light leakage defects. If you want to improve the realism of the effect, you can continue with the following operations.
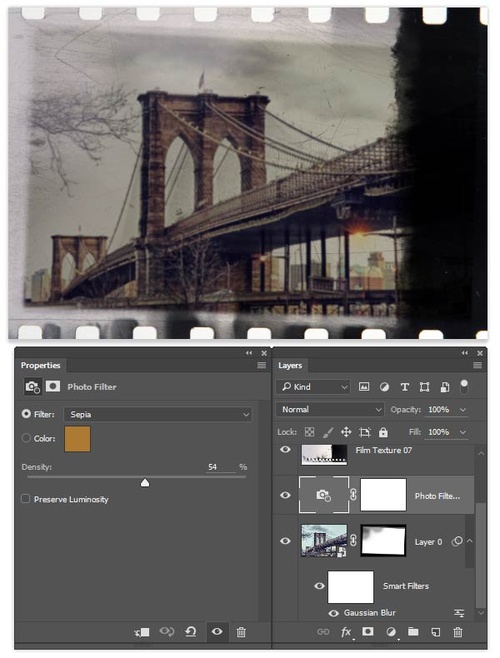
Add a "Photo Filter" adjustment layer to the background layer (click the "Create New Fill or Adjustment Layer" icon at the bottom of the layers panel and select "Photo Filter"). In the properties panel, set the "Filter Color" to brown and the "Density" to 54% to inject the warm texture of retro film into the picture.

Fading is common in old photos, and the overall tone is white. This effect needs to be simulated through curve adjustment: add a "Curves" adjustment layer, refer to the parameters in the figure below, and drag the curve upward slightly to increase the brightness of the picture while retaining the details in the dark areas and restoring the faded and whitened retro feel.

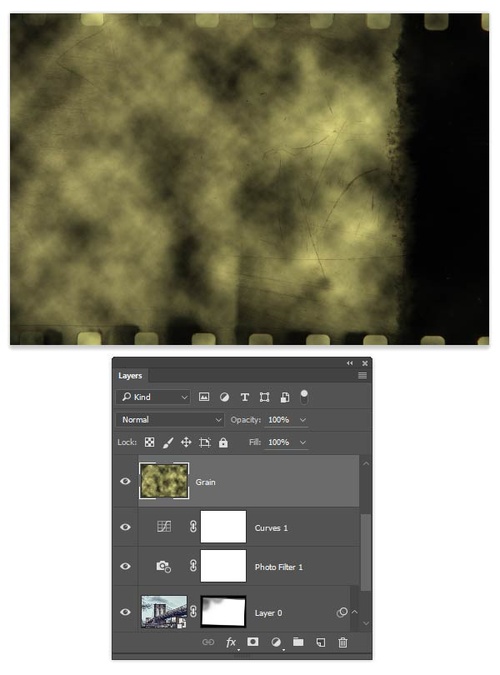
Next, add grain texture to enhance the film texture: Create a new blank layer (shortcut key Ctrl+Shift+N), set the foreground color to black and the background color to light yellow (#ece88c), execute [Filter > Rendering > Clouds] to generate a basic texture.

Continue to add particles to this layer: execute [Filter > Noise > Add Noise], set the "Amount" to 50%, "Distribution" to "Even Distribution" in the dialog box, and check "Single Color"; then execute [Filter > Blur > Gaussian Blur], set the "Radius" to 6.4 pixels, and finally change the layer blending mode to "Overlay" and set the opacity to 60%.

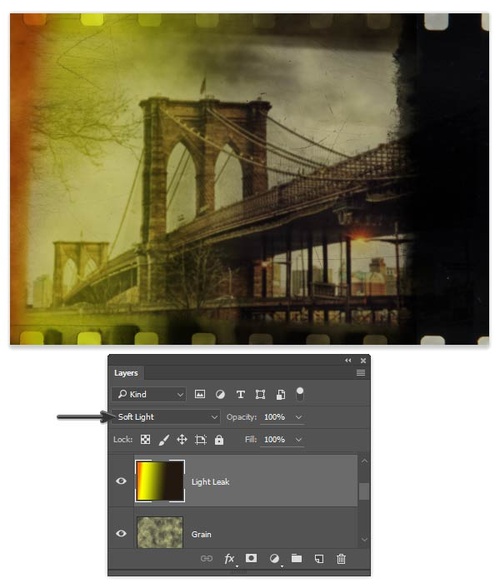
Light leakage is a common flaw in old film cameras and can be simulated through gradients: Create a new blank layer, select the gradient tool (shortcut key G), set the gradient color as shown below in the gradient editor (it is recommended to go from light orange to transparent), and click "OK".

Use a linear gradient, starting from the upper left corner of the screen, and drag diagonally to the lower right corner (slightly tilted downward) to form a natural light and shadow transition. For the effect, refer to the picture below.

After the gradient is complete, change the blending mode of this layer to "Soft Light" to enhance the realism of the light leak.

Add a layer mask to the light leak layer, select the gradient tool and set a "black to white" linear gradient, drag upward from the bottom of the screen, so that the light leak effect gradually fades upward from the bottom, fitting the light and shadow logic of real camera light leaks.

To ensure that all special effects only apply to the main body of the photo, you need to clip the layers: select all adjustment layers and texture layers in the layers panel, right-click the selected layer, select "Create Clipping Mask" (or press the Alt+Ctrl+G shortcut key) to limit the special effects to the background layer.

final renderings
How to remove unwanted things in photoshop?
Let me introduce to you three methods of cutting out images.
1. Mixed channel cutout
1. Open PS, Ctrl+O to open the material, return to the layer panel, double-click the background layer to change it to a normal layer
2. Return to the layer panel, double-click layer 0, bring up the layer style box, change the mixed color band to blue, and adjust this layer. Hold down the Alt key with your left hand, divide the triangle into two halves, and move it to the left.
3. Return to the layer panel, click the adjustment layer below the layer, select the solid color inside, choose a color you like (00fffa), and move it below layer 0
2. Color range cutout
1. Ctrl+O to open the material, Ctrl+J to copy a layer to get layer 1, return to the menu bar, execute [Select]-[colorRange], use the eyedropper tool to absorb the color, adjust the tolerance to the maximum, and click OK
2. Return to the layers panel and press Ctrl+J to copy 4 layers in succession.
3. Return to the layer panel, press the Shift key, select layer 2 to layer 2 copy 3, press Ctrl+E to merge the layers, click the adjustment layer below the layer, select the solid color, and choose a color you like (b5beff)
3. Channel cutout
1. Open a material you like, Ctrl+J to copy a layer, get layer 1, enter the channel, select the blue channel, and then copy a layer of the blue channel
2. From [Menu Bar]-[image]-[Adjustment] Open [Color Levels] to further adjust the color levels
3. Use the brush tool to further darken the brighter colors on the face and clothes. The brush hardness is 100% and the opacity is 100%.
4. Hold down the Ctrl key, left-click the [Blue Copy] thumbnail, return to the [Menu Bar]-[Select]-[Invert Selection], return to the top RGB, click Layer, Ctrl+J to copy a layer, and get Layer 2
5. We can soften the lower edge and hold down the Ctrl key with our left hand.mouse
Version:
v1.0.7 official Chinese version | Update time:
2025-10-23


