Today's computers no longer have built-in optical drives. Servers generally have optical drives but no floppy drives. However, window systems continue to develop, and the installation of some drivers still relies on floppy drives. After using the usbkey tool to format the USB flash drive, it can be simulated as a floppy drive. After installing win2003, press F6 and load scsi, raid, sas and other hard disk array drivers on the simulated floppy drive. Note that this may cause your USB flash drive to become warped. So, don’t try it with your 16G or 32,64G high-end USB flash drive. The U disk virtual floppy drive tool is mainly used in servers where some drivers require floppy drive installation, mainly from Dell servers.
The installation work of floppy drive mainly comes from Dell server.
Load the hard disk control card driver from U disk:
Note: Use the USBKeyPrepA00 version of the software, do not use the A07 version.
1: If you use the tool software in the vista system, you need to right-click USBKeyPrepF6.exe and choose to run as administrator.
2: During the process of making the driver USB flash drive, if the prompt fails, it is recommended to check whether other programs are using the USB flash drive. You can try closing all other programs, re-inserting and unplugging the USB flash drive, and then opening the tool to create it.
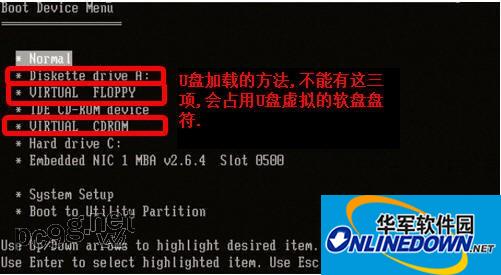
3: Confirm whether there is a remote control card (DRAC). If so, disable virtual media. (Check whether it is disabled, check that there is no virtual floppy or virtual cdrom in the F11 boot menu)
(Disable method: When you see CTRL+E during the self-test, press it to enter the menu. Select Virtual Media Configuration, and then set Virtual Media to Detached.)
4: Confirm that in the BIOS, the floppy drive in Integrated device is set to OFF.
5: Plug in the USB disk first and then turn on the computer
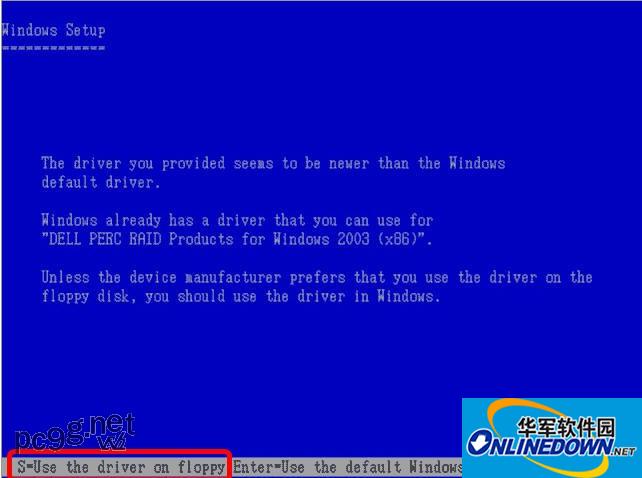
6: It is best to press F6 to load during the installation process. When selecting "S" according to the prompts, you need to press "S" three times and press Enter to confirm the use of the driver in the virtual floppy disk. (See the prompt "S=Use the driver on floppy" and press "S" to confirm loading)
Special attention:
If you are prompted to insert a floppy disk immediately after pressing S, check the precautions 3 and 4.
If you are prompted to insert a floppy disk after formatting the partition and copying files, try to restart and boot from the CD again. Do not press "F6" and try to automatically load from the U disk. (The reason is because the Windows installation CD has SP or not. For For a modified Windows installation CD or an all-in-one installation CD, it is very likely that you will still be prompted to insert a floppy disk even if you press F6 or not. The solution is to replace the original CD with an unmodified one).
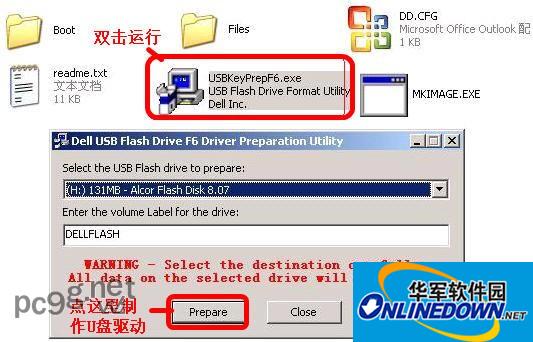
Method for making a U disk driver: (Note that the downloaded tool and decompression should be done on the local hard disk, do not put it on the U disk to run) (If the prompt fails, just click the prepare button and try again twice, usually it will succeed)
Download and unzip it to the desired temporary directory, then enter the unzipped directory and run USBKeyPrepF6.exe.
Place the driver file in the root directory of the "Files" folder to use the tool software in the vista system. You need to right-click USBKeyPrepF6.exe and select Run as administrator.
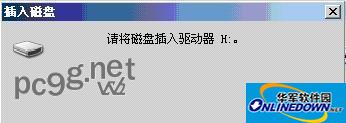
At this time, if you re-insert the U disk and double-click the U disk, you will be prompted to insert the disk drive, indicating that the U disk drive is ready.
If you can still open your USB flash drive and see the files inside, it means you didn't do it well.
U disk simulation floppy drive tutorial:
Unzip the downloaded USBKey and after opening it, you will notice a Files folder. Later driver files will be released directly to this directory.
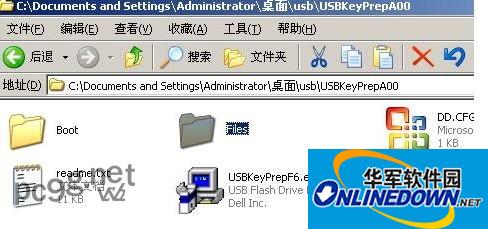
1. Unzip the downloaded disk array card driver (an exe self-extracting file) and directly unzip it to the Files folder in USBKeyPrepA00.

2. Return to the upper menu and run USBKeyPrepF6.exe
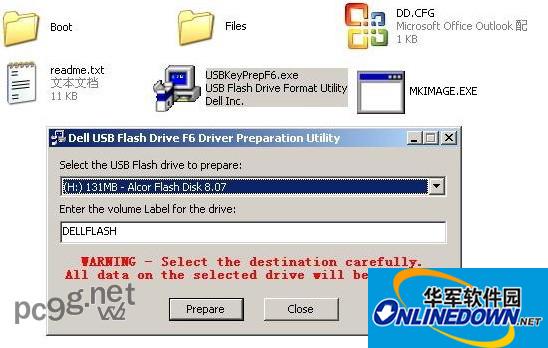
3. Click "Prepare" to start creating the USB drive. "OK" to complete the production.
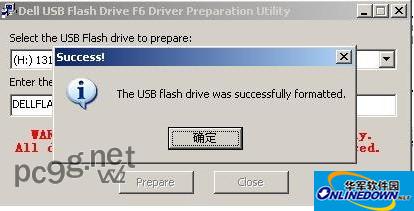
4. At this time, if you double-click the U disk, you will be prompted to insert the disk drive, indicating that the U disk driver is ready. If you can still open your USB flash drive and see the files inside, it means you didn't do it well.

-------------------------------------------------- -------------------------------------------------- ----------------------------
There are many ways to install the array card driver on a server without a floppy drive: the simplest method is to find a U disk that supports dual boot. This U disk has an fdd mode. When plugged in, it is directly recognized as a 1..44M floppy drive, which is very convenient. , but this kind of USB flash drive is not common, so you need to buy it specially, because the general USB flash drive does not support dual boot. The second is to use the following method to make a USB flash drive that simulates a floppy drive. However, there is a risk. Your USB flash drive may be hung. There is another convenient way to use nlite to integrate your commonly used array card and other drivers into the Windows installation file, then make it into an iso, burn it into a CD, and install it directly. This method wastes a CD .... Not much else to say, this article focuses on the second method 1: If you use tool software in the vista system, you need to right-click USBKeyPrepF6.exe and choose to run as administrator. 2: Make a driver USB disk During the process, if the prompt fails, it is recommended to check whether there are other programs using the U disk. You can try to close all other programs, re-insert and unplug the U disk, and then open the tool production. 3: Confirm whether there is a remote control card (DRAC). If so , disable virtual media. (Check whether it is disabled, check that there is no virtual floppy or virtual cdrom in the F11 boot menu) (Disable method: When you see CTRL+E during the self-test, press it to enter the menu. Select Virtual Media Configuration, and then change Virtual Media is set to Detached.) 4: Confirm that in the BIOS, the floppy drive in the Integrated device is set to OFF. 5: Plug in the USB flash drive first and then boot 6: It is best to press F6 to load during the installation process, and select "S" according to the prompts. You need to press "S" three times and press Enter to confirm using the driver in the virtual floppy disk. (When you see the prompt "S=Use the driver on floppy", press "S" to confirm loading.) If you are still prompted to insert the floppy disk, restart and try again. Boot from the CD and try to automatically load from the USB flash drive without pressing "F6".
Method for making a U disk driver: (Note that the downloaded tools and decompression should be on the local hard disk, do not put them on the U disk to run) (If the prompt fails, just click the prepare button and try again twice, usually it will succeed) From the following Link to download the tool corresponding to the array card. Run it directly. Please download the corresponding array card driver yourself: PERC4e_2k3PERC4e_2k3(64bit)sas5i/sas5e/sas5ir/sas6ir_2k3sas5i/sas5e/sas5ir/sas6ir_2k3(64bit)sas5i/sas5e/sas5ir/sas6ir_XPsas5i/sas 5e/ sas5ir/sas6ir_XP(64bitperc5i/perc5e/perc6i/perc6e_2k3perc5i/perc5e/perc6i/perc6e_2k3(64bit)Adaptec39320_2k3_XP_2k3(64bit)Adaptec39320(EMU)_2k3_2k3(64bit)SATA 1.5-6ch _2k3SATA 1.5-6ch_2k3(64bit)PERC 320DC_wk3cerc 2s_2k3cerc 2s_2k3(x64)PERC -S100_S300_2k3PERC-S100_S300_2k3 (X64) download and unzip to the desired temporary directory, then enter the unzipped directory and run USBKeyPrepF6.exe. To use the tool software in the vista system, you need to right-click USBKeyPrepF6.exe and choose to run as administrator.
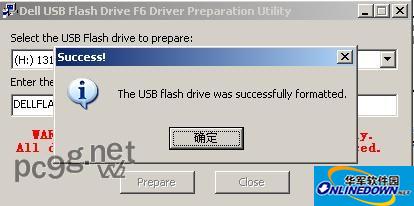
At this time, if you re-insert the USB flash drive and double-click the USB flash drive, you will be prompted to insert the disk drive, indicating that the USB flash drive is ready. If you can still open your USB flash drive and see the files inside, it means you didn't do it well.
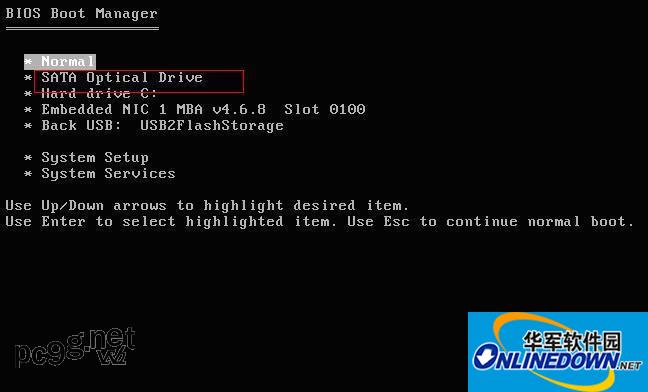
Start installing the server: 1. Insert the U disk into the rear (recommended) USB port of the server to be installed, restart the server, put the system CD in the CD-ROM drive, press F11=Boot Menu, enter the boot menu, and confirm that the U disk has been recognized. Start the installation from the CD as normal.
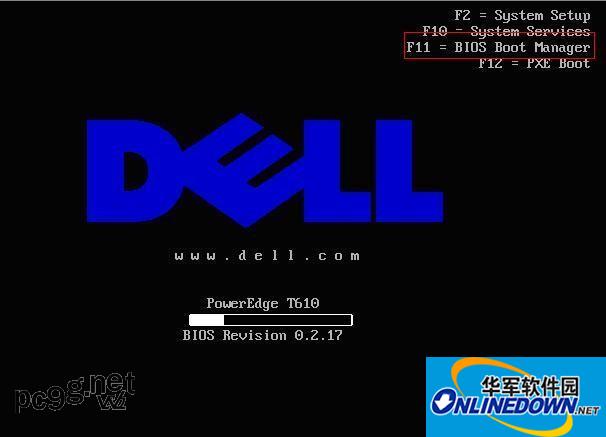
Choose to boot from the optical drive:
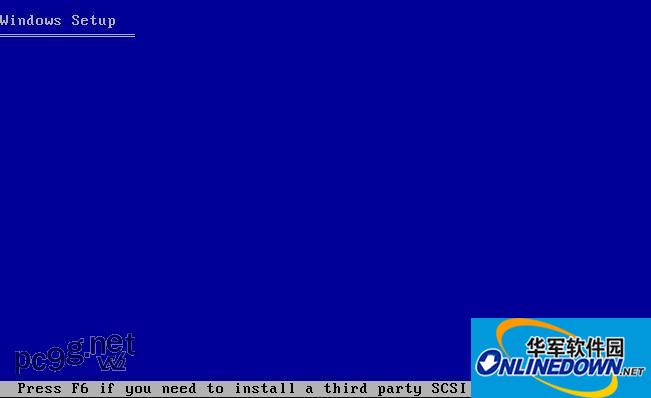
2. When the message: Press F6 if you need to install a third party SCSI or RAID driver appears at the bottom of the screen, press the "F6" key in time.
3. After pressing "F6", the installation program will continue to load the module. This is normal. After a while, you will see the following message: Setup could not determine the type of one or more mass storage devices installed in your system, or you have chosen to manually specify an adapter.
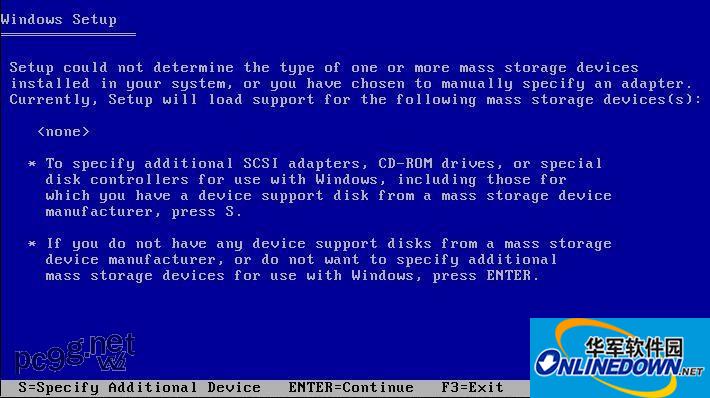
4. Click "S" and the driver name in the USB flash drive appears.
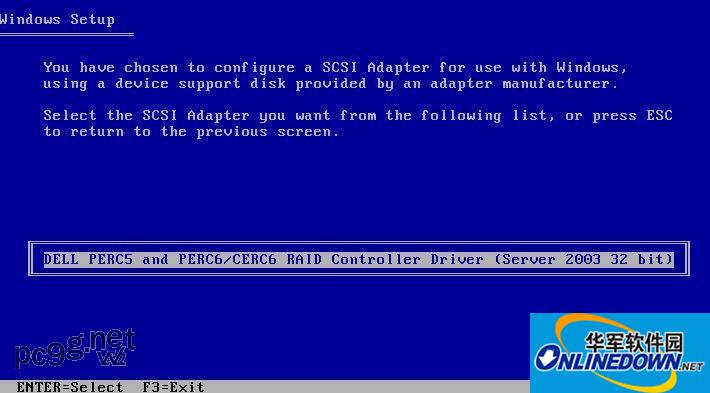
5. Press Enter to confirm. The information in the red box indicates that the driver is loaded. Press Enter to continue installation. See the picture below and press the S key to confirm, and then it will actually load.
6. The hard disk is recognized:
