How to use the autocad2009 action recorder? Some friends may not know how to use it, so today the editor will bring you how to use the autocad2009 action recorder. Friends who don’t know how to do it can come and take a look.
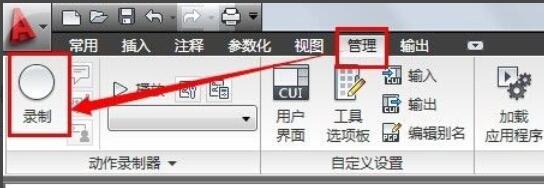
First, open autocad2009. Switch its workspace to 2D Sketch and Annotation, then click [Manage]. The first group in the menu is the action recorder.

Next, the editor uses an action recorder to record the drawing of a roughness symbol, so that everyone can better understand the use of the action recorder.
Click Record, we will see a red button appear on the interface, this button means that the recording is in progress.
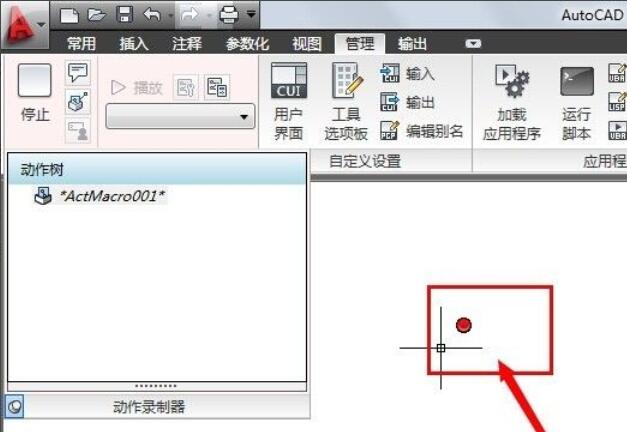
To draw roughness symbols, just follow our usual drawing method; after the recording is completed, we will see that the actions we just drew are recorded in the action tree.

Click [Stop] and the [Action Macro] dialog box will pop up.
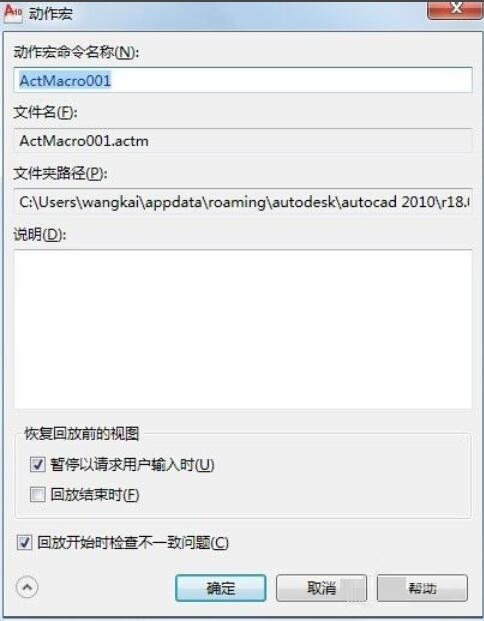
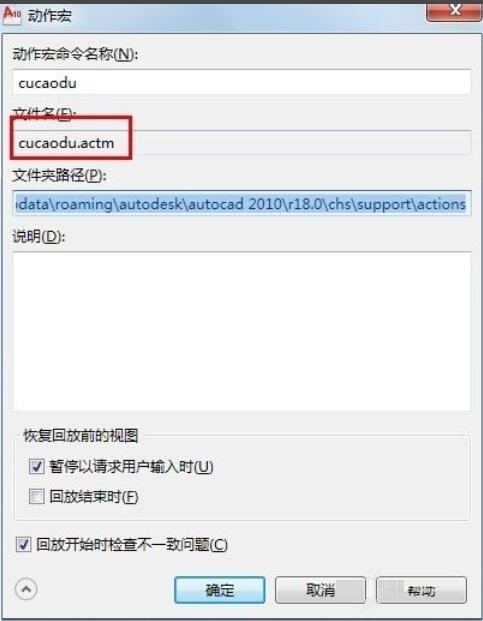
Enter the action macro name in the dialog box: cucaodu; the generated file is cucaodu.actm; and the file is saved in C:Userswangkaiappdataroamingautodeskautocad 2010r18.0chssupportactions.
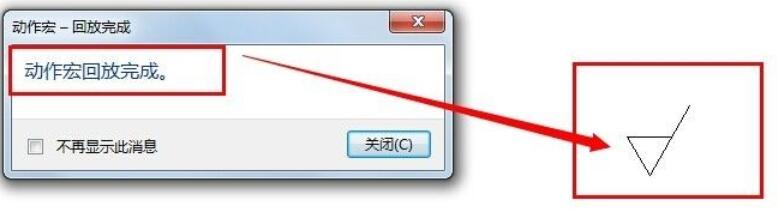
Click [OK] to exit the dialog box; we will see cucaodu under [Play] in the action recorder group. When we click [Play], a roughness symbol will appear, and then a dialog box will appear to prompt that the action macro playback is completed. We only need to click [Close].
The above is the method of using the autocad2009 action recorder brought by the editor. Friends who don’t know how to do it don’t miss it.