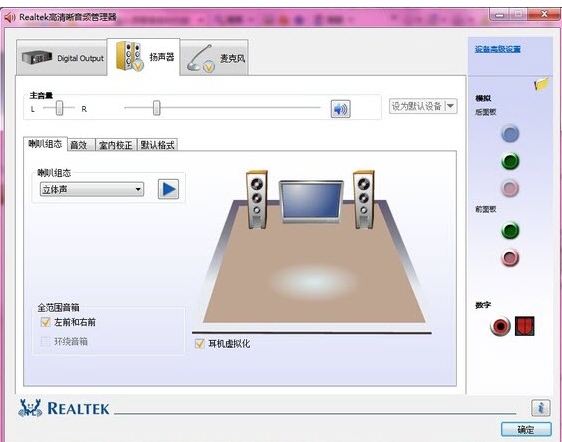
The RealTek High Definition Audio Manager software interface is simple and intuitive, divided into three modules: "Master Volume", "Sound Effects" and "Advanced Device Settings". Users can adjust the volume through the graphical slider, switch audio output devices (such as headphones, speakers), and quickly enable "intelligent sound enhancement" or "virtual surround sound". Its feature is that it can switch preset scene modes (such as music, movies, games) with one click, and can adapt to different usage needs without complicated configuration. Next, let the editor of Huajun explain to you how to set up the microphone speaking speaker in RealTek High Definition Audio Manager and how to set up the microphone speaking speaker in RealTek High Definition Audio Manager to produce sound!
first step
Find the small speaker icon in the lower right corner of the desktop and right-click it. Select "Recording Device" in the pop-up menu and click to open the sound settings window.

Step 2
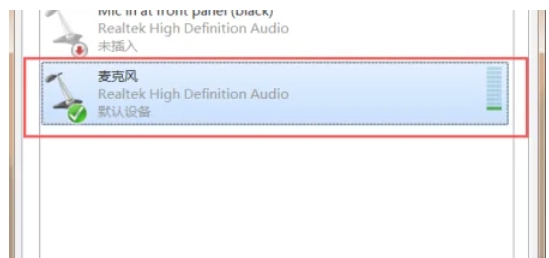
In the sound settings window, switch to the "Recording" tab. Find the microphone device (usually shown as "Microphone" or the specific model name) and right-click it. Select "Properties" to open the microphone property setting window.

Step 3
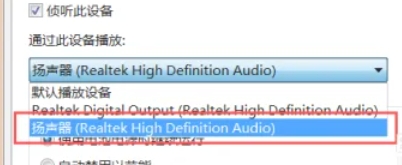
In the Microphone Properties Settings window, switch to the "Listening" tab. Check the "Listen to this device" radio box to enable microphone listening.

Step 4
Under "Listen to this device," there's a drop-down menu for selecting which device to play the heard sound through. Select your audio device (such as "speakers" or specific audio model) to ensure that the microphone sound is played through the audio.

Step 5
Click the "OK" button at the bottom of the page to save the settings and close the window.

The above is how the editor of Huajun compiled for you how to set up the microphone to speak and sound in the RealTek high-definition audio manager and how to set up the microphone to speak and sound in the RealTek high-definition audio manager. I hope it can help you.


