How to divide the drawings quickly in CAD? Many users are asking this question? Let's take a look at the tutorial steps of quickly viewing the drawings in CAD. Friends who need it can refer to it.
We first use CAD Quick View to open the drawing, click the VIP button to select the "CAD Drawing Split Export" function, or you can right-click on the drawing, a right-click menu will appear, and select the function.
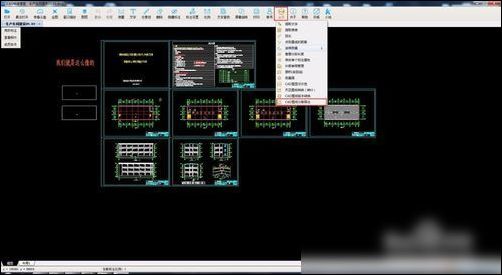
At this time, after we select, a dialog box will pop up and click "Select Area".

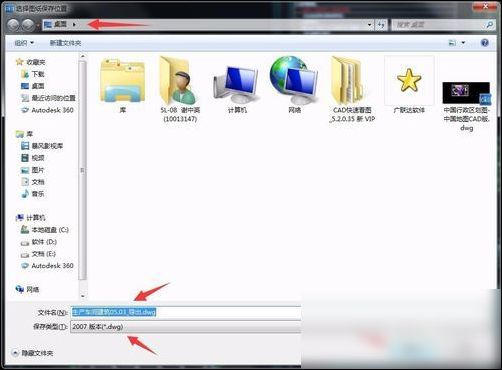
Use the left mouse button to select the range to be divided into images. Then click "Export Drawing".


At this time, a dialog box will pop up. We can choose the location, name, and drawing version to save after dividing the drawing, and click the save button. After clicking, we are prompted to save successfully.

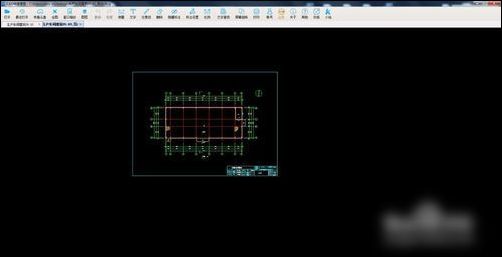
At this point, you can find the separated drawings in the saved location.

In the last step, after we open the drawing, we can see that the required parts have been exported. It is very simple.
Based on the detailed operation process of quickly viewing and dividing drawings in CAD described above, you should hurry up and practice it yourself!