Hot search terms: 360 Security Guard Office365 360 browser WPS Office iQiyi Huawei Cloud Market Tencent Cloud Store
Hot search terms: 360 Security Guard Office365 360 browser WPS Office iQiyi Huawei Cloud Market Tencent Cloud Store
64 bit Storage: 5.63G Time: 2025-05-06
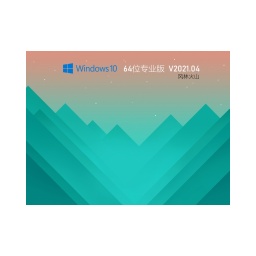
Software introduction: Fenglinhuoshan Win10 64-bit Extreme Professional Edition V2021.04 is an operating system that combines efficiency, stability, and security, and is suitable for a wide range of users...
The TPM-free version of Win11 23H2 64-bit Professional Lite is an operating system version optimized for older devices with limited hardware conditions. Currently, there are many computers on the market that do not support the minimum hardware requirements of Win11, so they cannot be upgraded to the Win11 system. The editor provides you with the Win11 64-bit Professional Lite Edition for older machines, which uses Microsoft's latest Windows 11 23H2 64-bit. The professional version has been optimized and streamlined. The patch has been updated to 2024.7, maintaining the authenticity of the original version. It supports 4K alignment of SSD solid state drives, updated with the latest patch, TPM-free version, perfectly compatible with new and old models, and the system partition occupies about 9.9 GB after installation. Friends who want to know how to install Win11 23H2 64-bit Professional Lite Edition TPM-free version, please read on.

1. Preparation
Download system image
Obtain the TPM-free image file of Win11 23H2 64-bit Professional Lite from a trusted third-party website or community to ensure that the file is complete and has not been tampered with.
Prepare USB boot disk
Use Rufus and other tools to create a boot disk:
Insert the USB flash drive (capacity ≥8GB) and run Rufus.
Select the downloaded image file in Rufus and check the "Remove TPM 2.0 requirement" option (or other similar options to bypass hardware restrictions).
Click "Start" to create a boot disk. The U disk will be formatted during the process, so please back up your data in advance.
Back up important data
Installing the system will clear the target disk data, so be sure to back up important files such as the C drive and desktop in advance.

2. BIOS setup and startup
Enter BIOS
Restart the computer and press the corresponding keys (such as F2, F12, Del, etc., depending on the motherboard model) when the startup screen appears to enter the BIOS setup interface.
Adjust the startup sequence
Find the "Boot" or "Startup" option in the BIOS and set the USB disk as the first boot device.
Save the settings and exit the BIOS. The computer will restart and boot from the USB flash drive.

3. System installation process
Start the installer
After the computer starts from the USB flash drive, it enters the Win11 installation interface. Select language, time and currency format, etc., and click "Next".
Click "Install Now". If you don't have a product key, you can select "I don't have a product key" (can be activated later).
Select installation type and partition
Select "Custom: Install Windows only (Advanced)".
Select the target disk partition (usually the C drive). If you need a new installation, you can delete the original partition and then create a new one (this operation will clear the data).
Click "Next" to start the installation.
Bypass hardware detection (if an error is reported)
If you are prompted with hardware incompatibility errors such as "This computer cannot run Windows 11" during the installation process, you can try the following methods:
Registry modification method:
Press Shift + F10 on the installation interface to open the command prompt, enter regedit and press Enter to open the Registry Editor.
Navigate to HKEY_LOCAL_MACHINESYSTEMSetup and create a new item "LabConfig".
Create two new DWORD (32-bit) values under "LabConfig":
名称BypassTPMCheck,值数据设为1。
The name BypassSecureBootCheck and the value data are set to 1.
Close the Registry Editor, return to the installation interface and click "Return" to try again.
Replacement file method (applicable to some versions):
Unzip the ISO image, enter the sources folder, delete or replace the appraiserres.dll file with a blank file.
Reload the modified image for installation.
4. Post-installation configuration
Complete initial setup
After the system installation is completed, follow the prompts to complete the region, network connection, account settings and other steps.
Activate the system
Use a legitimate key or activation tool to activate the system (the streamlined version may have built-in activation methods, follow the prompts).
Install drivers and updates
Use tools such as Driver Wizard to update the hardware driver, or download the adapter driver from the notebook manufacturer's official website.
Go to "Settings-Windows Update" to check and install system updates.
System optimization and security settings
Adjust system performance options, privacy settings, etc. according to needs.
Install anti-virus software to ensure system security.
The above is the relevant content about how to install the Win11 23H2 64-bit Professional Lite Edition TPM-free version. I hope it will be helpful to you.
 Sohu video player
 WPS Office
 Tencent Video
 Lightning simulator
 MuMu emulator
 iQiyi
iQiyi
 Eggman Party
 WPS Office 2023
 Minecraft PCL2 Launcher