Hot search terms: 360 Security Guard Office365 360 browser WPS Office iQiyi Huawei Cloud Market Tencent Cloud Store
Hot search terms: 360 Security Guard Office365 360 browser WPS Office iQiyi Huawei Cloud Market Tencent Cloud Store

video editing Storage size: 6.9MB Time: 2022-06-24
Software introduction: Adobe Premiere Pro CS6 is a super powerful video editing software developed by Adobe. Adobe Premiere Pro...
out of Adobe Premiere Pro CS6 editor Adobe Premiere Pro CS6 how to create a camera shutter to take pictures? Here is the Adobe Premiere Pro for everyone Friends in need can learn more about how to make a camera shutter to take pictures in CS6.
Step 1: First we open Adobe Premiere Pro CS6 software and import picture materials. Double-click the PR shortcut, open it, and complete basic operations such as creating a new sequence. Double-click the project panel and import the required materials into the PR project file or drag the required materials directly into PR (as shown in the figure).

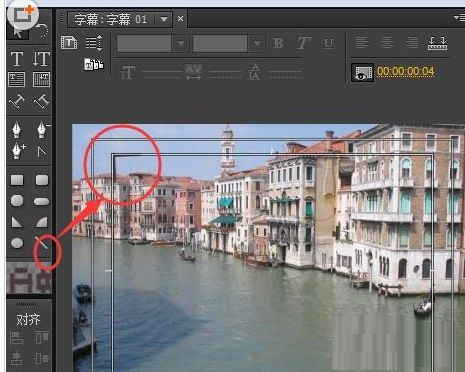
Step 2: Then we create the camera “viewing frame”. Open "New Subtitles", or you can directly use the shortcut "Ctrl+t" to open the subtitles panel. Then select the "Straight Line Tool" on the toolbar to the left of the subtitle box and draw the four corners of the camera viewfinder. You can draw one and then copy and paste it. Turn off the subtitles and drag them to the video track three (as shown).
Step 3: Then add the "flash" special effect. After drawing the viewfinder, find the "Flash" effect in "Stylization" in the video special effects, then drag the "Flash" effect onto the subtitle material, then find the drop-down triangle of the "Flash" effect in the effect controls, and adjust the flash color to black. At this point, the flash effect comes out (as shown in the picture).

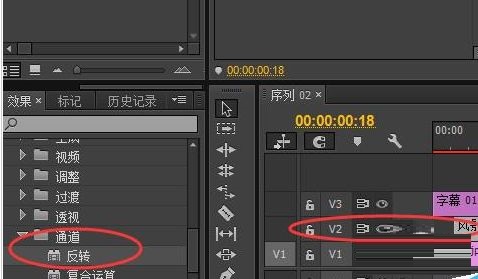
Step 4: Create the negative effect again. Drag the original material to the second video track again, right-click "Duration" to change the material to 4 frames (you can adjust it as needed), select "Reverse" or "Invert" in the "Channel" in the video effects menu (the names of different PR versions are different), and you can adjust the effect of the negative in the "Effect Control" (as shown in the picture).
Step 5: Finally we add camera sound effects. Drag the downloaded shutter sound effect to the first audio track and align it with the film on the second video track. Adjust the length of the sound effect according to your needs (as shown in the picture).

The above is the entire content of how to create a camera shutter to take pictures in Adobe Premiere Pro CS6 brought to you by the editor. I hope it can help you.

 How does coreldraw generate barcodes - How does coreldraw generate barcodes
How to correct pictures with coreldraw - How to correct pictures with coreldraw
 How to split cells in coreldraw - How to split cells in coreldraw
 How to center the page in coreldraw - How to center the page in coreldraw
 How to customize symbols in coreldraw - How to customize symbols in coreldraw
 Sohu video player
 WPS Office
 Tencent Video
 Lightning simulator
 MuMu emulator
 iQiyi
iQiyi
 Eggman Party
 WPS Office 2023
 Minecraft PCL2 Launcher
 What to do if there is no sound after reinstalling the computer system - Driver Wizard Tutorial
 How to switch accounts in WPS Office 2019-How to switch accounts in WPS Office 2019
 How to clear the cache of Google Chrome - How to clear the cache of Google Chrome
 How to upgrade the bootcamp driver? How to upgrade the bootcamp driver