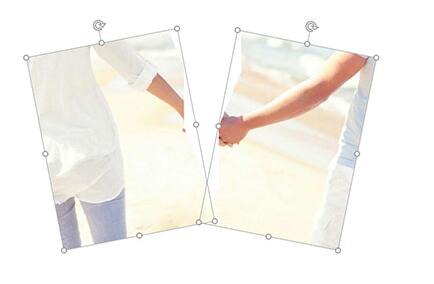
Basic steps to create photo tearing effect in PPT
Time: 2022-02-08Source: Huajun Software TutorialAuthor: Qingchen
I believe that many novice friends who use PPT say they are not familiar with the operation of creating photo tearing effects. Today, the editor has brought you the basic steps of creating photo tearing effects in PPT. Friends in need should not miss it.
Insert the picture into the PPT, then insert a rectangular shape, copy this rectangle multiple times, adjust the left and right positions, and arrange them vertically.

Select these rectangles, click the Merge Shape in the drawing tool format above, then set the fill to white and the line to none.

In this way, the tearing effect of the photo is completed. If you want to have an animation effect, you can first select the picture, then select the rectangle, and click the merge shape - [Split] in the drawing tool format above again. In this way, the picture will be split into two parts, and you can add animation effects to the two pictures separately.

The above article explains the basic steps for creating photo tearing effect in PPT. I hope friends in need can learn it.
Popular recommendations
-
PDF reader
Version: 14Size: 37.53 MB
Extremely fast PDF reader official version
The official version of Extremely Fast PDF Reader is a PDF reading tool suitable for mobile phones. Extremely fast PDF reader and Foxit Reader...
-
Easy for Chinese to live
Version: 4.0.3.8Size: 63.72 MB
Huaren Yiju is an intelligent house sharing platform APP launched by Huaren Yiju Information Technology Co., Ltd. It mainly provides B&B, hotel and short-term rental booking services, covering the whole country...
-
new forces
Version: v2.2.3Size: 46.0 MB
The New Force app is mainly used for functions such as personnel management, pending shipment, shipped, order inquiry, etc. Users can also check their performance income based on orders. If...
-
ES file browser root version
Version: V4.2.8.1Size: 42M
The root version of ES File Browser can be said to be my favorite file management software. One of its more useful functions is that it can extract ap...
-
Remember overtime assistant
Version: 3.2.1Size: 20.98 MB
The Overtime Assistant APP is an intelligent overtime management tool specially designed for modern professionals. Users can record overtime time, duration and working hours at any time...


