1. Add photo frames to videos
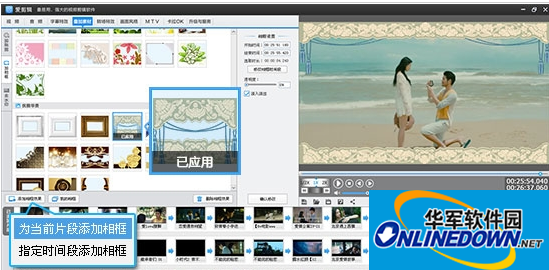
1. Click the "Add Photo Frame" column in the "Overlay Materials" panel, and in the photo frame list in this column, select the photo frame you want to apply.
2. At the bottom of the photo frame list, click the "Add Photo Frame Effect" button, and in the pop-up drop-down box, select "Add Photo Frame to Current Clip" (when selecting this option, please make sure you have selected the video clip to which the photo frame needs to be applied in the "Added Clips" list at the bottom) or "Add Photo Frame to Specified Time Period". At this time, the selected photo frame will be displayed as "Applied".
love clips
2. Make detailed settings for the added photo frame
In the "Photo Frame Settings" column between the photo frame list and the video preview box, we can also personalize the "Start Time", "End Time", "Transparency", "Fade", etc. of the photo frame.

love clips
3. Index and modify added photo frames
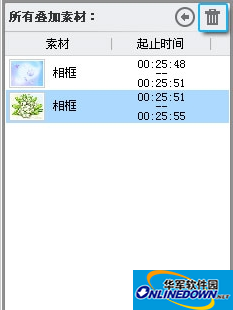
In the "All Overlay Materials" column in the lower right corner of the "Overlay Materials" panel, we can see all the materials we overlay for the entire video. Select the photo frame item that needs to be modified in the list, and the software will automatically locate the photo frame modification point. In the photo frame list, the photo frame to be modified is shown as "Applied". Next to the photo frame list, you can modify it in the "Photo Frame Settings" column.

love clips
4. Delete photo frame
If you need to delete the added photo frame, after indexing the photo frame that needs to be deleted in "All Overlay Materials", click the "Trash Can" button in the upper right corner of the "All Overlay Materials" column, or click the "Delete Photo Frame Effect" button below the photo frame list.
love clips