Users of Win8 system often encounter compatibility check problems when using Excel. Especially when using different versions of Office software to make modifications and save them as lower versions, the "Microsoft Excel Compatibility Checker" prompt box pops up. . It happens like this every time, and it feels so troublesome. So, how to cancel the compatibility check? Today, the editor of Huajun brings you a simple and easy-to-understand solution. I hope you will support and share the carefully selected content. If you like it, hurry up and get it!
The steps are as follows:
1. Cancellation of compatibility check
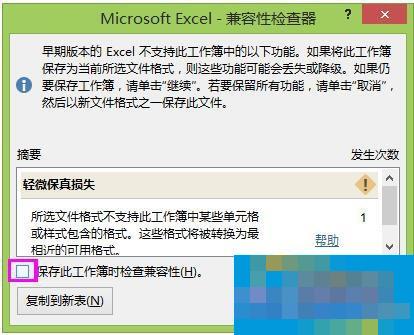
When a compatibility check appears when saving a document, check "Do not check compatibility when saving this workbook", and then click the "Continue" button. The compatibility check will not be performed when saving in the future.

2. Compatibility check and recovery
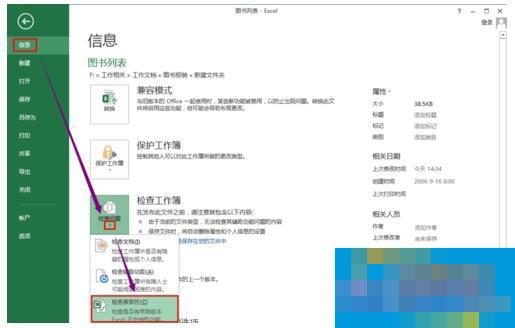
1. Click the "File" button in the upper left corner of the document interface.

2. Click "Check Compatibility" in the drop-down menu of the check problem in the "Information" option.

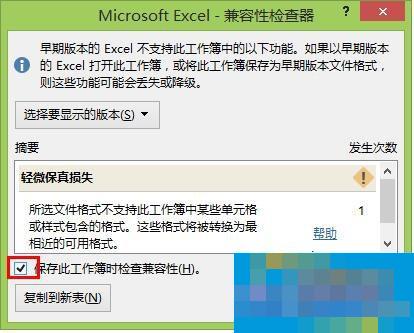
3. In the compatibility checker, check "Check compatibility when saving this workbook".

This is the introduction to how to cancel the compatibility check in Excel 2013 on Win8 system. It is really troublesome when the compatibility check dialog box appears, and sometimes the document cannot even be saved. Then you might as well try the above method. After solving the problem, the compatibility check dialog box will not pop up.


