Friends, do you know how to adjust the burning speed in Nero9? Today I will explain the tutorial on adjusting the burning speed in Nero9. If you are interested, come and take a look with me. I hope it can help you.

1. Quick setting steps for “nero burning speed”
After adding the files to be burned → Next → Click the "black triangle" on the left → Select "Writing Speed".
2. Detailed setting steps for "nero burning speed" (burning DVD)
1. Open nero and select the "Rip and Burn" tab, as shown in Figure 1:
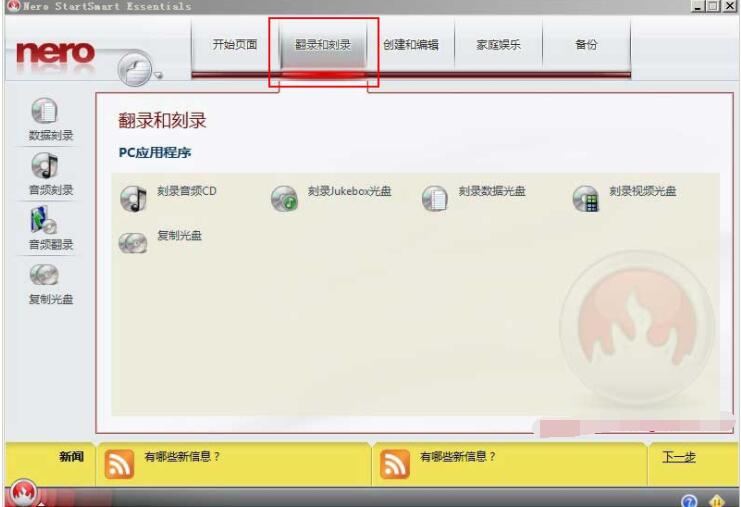
2. Select the data type to be burned. There are 5 types in total, namely: burn audio CD, burn Jukebox disc, burn data disc, burn video disc and copy disc. If you select "Burn Video Disc", the window will open as shown in Figure 2:
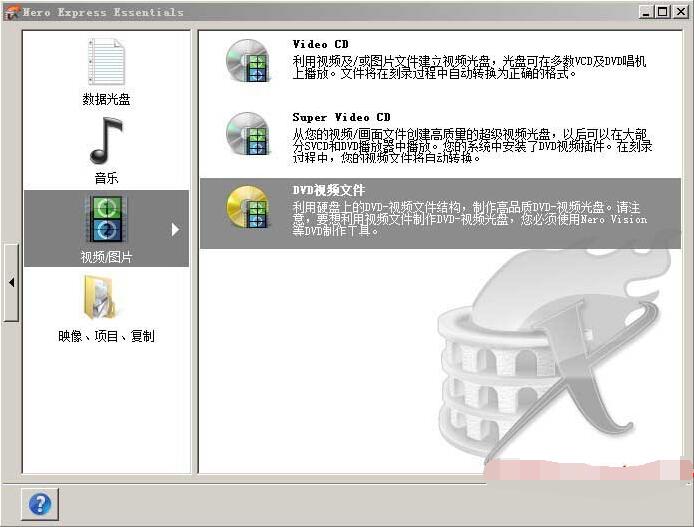
3. There are 3 video options in the picture, namely: VCD, SVCD and DVD. If you select DVD, the window will open as shown in Figure 3:
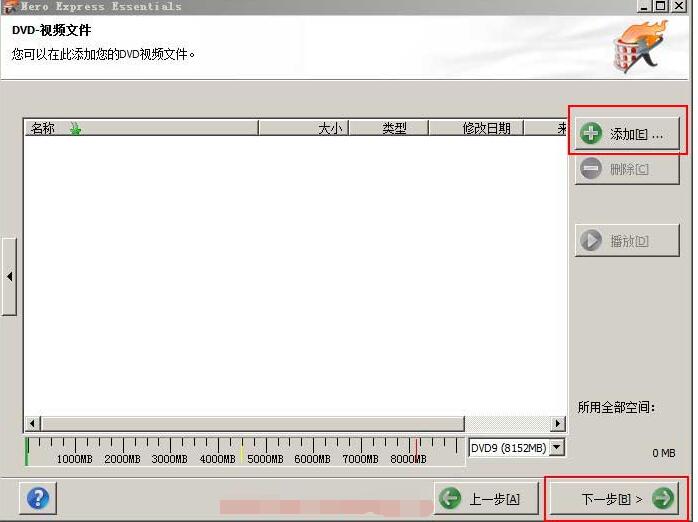
4. Click the "Add" button to add the video files to be burned, and then click "Next" to open the window as shown in Figure 4:
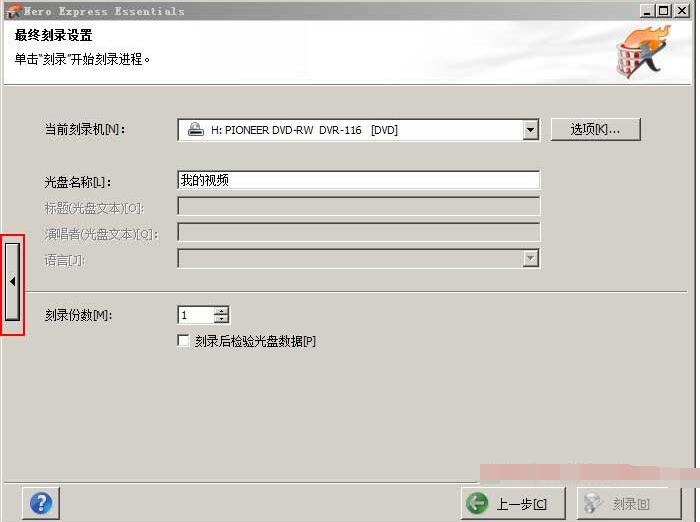
5. Click the "little black triangle" on the left to open the window as shown in Figure 5:
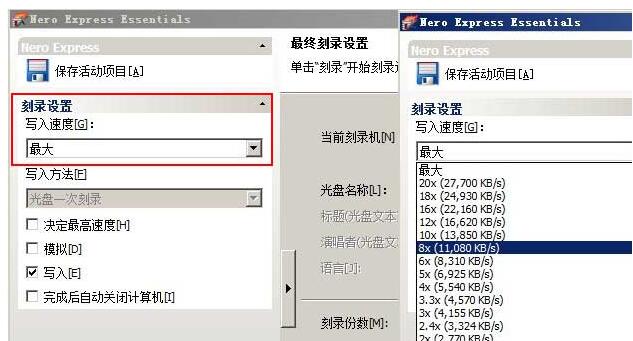
6. Click the drop-down list box under "Write Speed" and select the burning speed. The right one in Figure 5 is 8x. Of course, if you only play it by yourself, as long as the DVD player supports it, try to choose a higher point. The higher the burning speed, the shorter the burning time and the faster the reading speed (the faster the copying speed).
7. After setting the burning speed, click the "Burn" button to start burning. Don't forget to put the DVD into the optical drive. Depending on the selected burning speed and computer configuration, burning will usually be completed in 4-8 minutes.
8. Tips: Not all burning speeds can be selected. Only the DVD placed in the optical drive supports it (not gray). If DVD only supports up to 8x, you cannot select a burning speed higher than 8x. You can only select a burning speed of 8x and below.
The above is the tutorial for adjusting the burning speed of Nero9 brought to you by the editor.All the content, I hope it can help everyone.