Many friends are not familiar with the system boot repair tool (EasyBCD), and the editor below will explain the specific operation process of the system boot repair tool (EasyBCD). I hope it will be helpful to you.
When installing, be sure to select the relevant "Personal Version" and run it after completion.
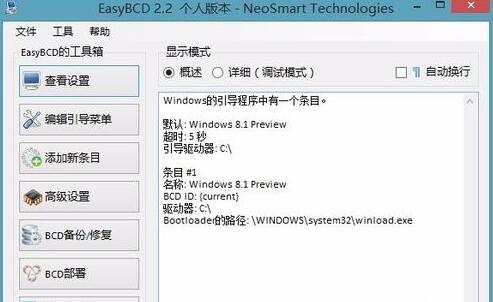
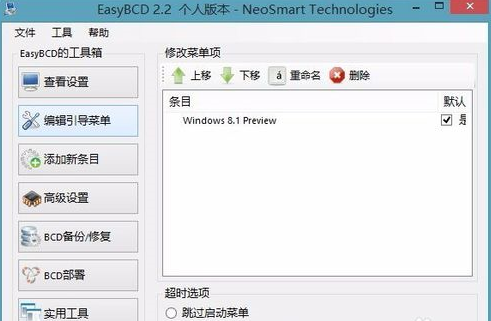
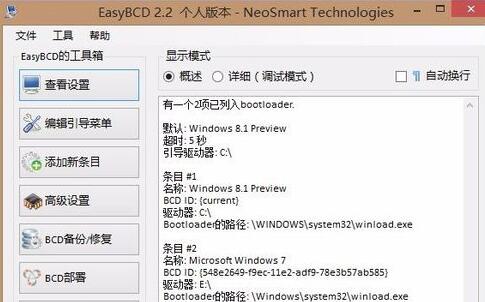
To view "System Boot Startup Items", click "Edit System Boot Menu".
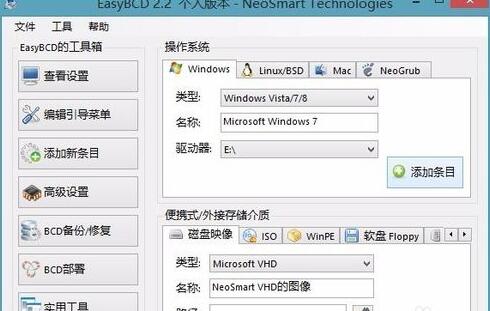
If you want to add "System Boot Selection", please click "Add New Entry", as shown in the figure. Operating system, set the type to Windows Visita/7/8, set the drive to E (please select your system and the name of the starter where the system is located here), and finally click "Add Entry".
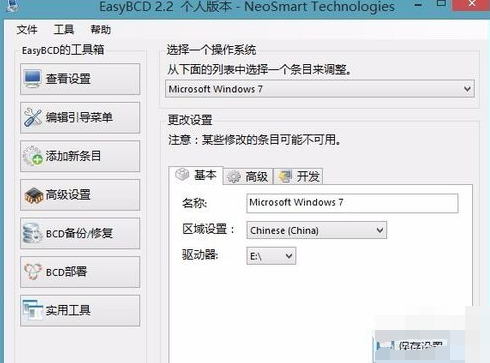
Click "Advanced Settings", as shown in the picture, select an operating system, Microsoft Windows 7, change settings, set the region to "Chinese (China)", and finally click "Save Settings".
Click "View Settings" to see if there are any changes. As shown in the figure, the name under entry #2 is Microsoft Windows 7, indicating that the system boot selection has been added successfully.
Of course, you can also click "Edit Boot Menu" to view the new system boot options. Be careful not to adjust the countdown (seconds) smaller. Generally, it only defaults to 5. Or call up "System Configuration" to view it.
Friends who don’t know how to use the system boot repair tool (EasyBCD), don’t miss this article brought by the editor.