Contents of advanced settings of Beaver All-in-one Video Converter:
The advanced settings of Beaver Video Converter are mainly to set the audio and video parameters of the output file to achieve the best playback effect. The parameters include audio and video encoder, audio and video quality, video size, bit rate, frame rate, sampling rate, channel and aspect ratio. The editor finally found it while searching slowly and wanted to share it with everyone.
How to set the advanced settings of Beaver Video Converter?
The first step: Of course, open the "Beaver All-in-One Video Converter", enter your account and password to log in, and enter the main interface;

Beaver All-in-One Video Converter Advanced Settings
Step 2: Add video files, click the "Add Video" button in the upper left corner of the main interface, and import the files to be converted (any format or quantity) into the converter. Beaver All-in-one Video Converter supports conversion between almost any audio and video formats.

Beaver All-in-One Video Converter Advanced Settings
Step 3: Before proceeding with advanced parameter settings, we must first select the output format. (For those who are new to Beaver Nest, you can also keep the default settings without setting advanced parameters. But for better results, I still teach you how to set them up like this);

Beaver All-in-One Video Converter Advanced Settings
Step 4: If the video format supported by the playback device happens to be in the preset scheme, you can directly select the output format and convert it. There is no need to set additional advanced parameters. If it doesn't fit, we can set it up in advanced settings. Click the "Advanced Settings" button behind "Preset Scheme" to enter the settings.
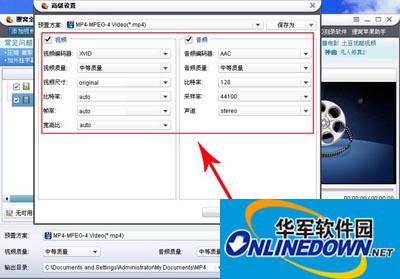
Beaver All-in-One Video Converter Advanced Settings
Here you can set the video you want. After setting up, click OK and you can convert the format. It is very simple. You can try it too!