Hot search terms: 360 Security Guard Office365 360 browser WPS Office iQiyi Huawei Cloud Market Tencent Cloud Store
Hot search terms: 360 Security Guard Office365 360 browser WPS Office iQiyi Huawei Cloud Market Tencent Cloud Store

Utility tools Storage size: 9.16 MB Time: 2025-02-17
Software introduction: Coder is a series of generative models developed by the DeepSeek team, focusing on improving efficiency through large-scale training and intelligent algorithms. It is based on 2...
1. Introduction
DeepSeek-VL2, an advanced family of large-scale mixed expert (MoE) visual language models that significantly improves on its predecessor DeepSeek-VL. DeepSeek-VL2 Demonstrated excellence in a variety of tasks, including but not limited to visual question answering, optical character recognition, document/table/diagram comprehension, and visual fundamentals. Our model range consists of three variants: DeepSeek-VL2-Tiny, DeepSeek-VL2-Small and DeepSeek-VL2, with 1.0B, 2.8B and 4.5B activation parameters respectively. Compared with existing open source dense and MoE-based models, DeepSeek-VL2 Competitive or state-of-the-art performance is achieved with similar or fewer activation parameters.
2. Deployment process
Minimum requirements for basic environment:

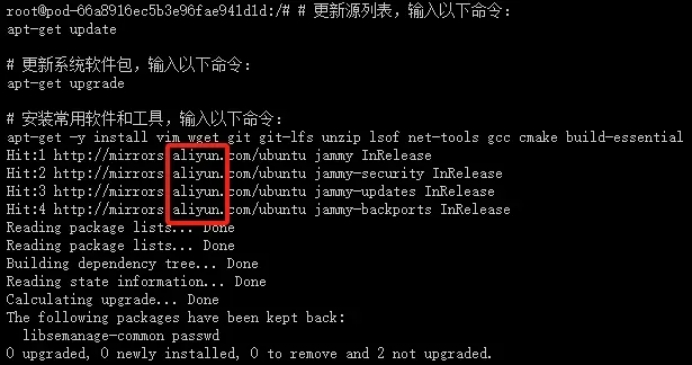
1. Update basic software packages
View system version information

Configure apt domestic source
This command is used to update the local package index. It retrieves the latest package list information from all configured sources, but does not install or upgrade any packages. This is a recommended step before installing a new package or performing a package upgrade, as it ensures that you are getting the latest version of the package.
This command is used to install the Vim text editor. The option means to automatically answer "yes" to all prompts so that manual confirmation is not required during the installation process. vim It is a very powerful text editor that is widely used for programming and configuration file editing.
For safety reasons, back up the current sources.list file before modifying it:
This command copies the current file into a backup file named. This is a good practice because editing An error may occur while downloading the file, preventing the package from being installed or updated. With a backup, if something goes wrong, you can easily restore the original files.
This command opens the file using the Vim editor so that you can edit it. This file contains APT (Advanced Package Tool) A list of software sources for installing and updating software packages. By editing this file, you can add new software sources, change the priority of existing software sources, or disable certain software sources.
In Vim, you can use the arrow keys to move the cursor, the i key to enter insert mode (you can start editing text), the Esc key to exit insert mode, the :wq command to save changes and exit Vim, or The :q! command exits Vim without saving changes.
Edit sources.list file, make sure you know what you are doing, especially if you are adding new software sources. Wrong sources may cause package installation failures or system security issues. If you are unsure, it is best to search and find reliable sources of information or consult an experienced Linux users.
Use the Vim editor to open the file, copy the following code to replace all the codes in it, and configure the apt domestic Alibaba source.
Install commonly used software and tools
The following page appears, indicating that the domestic apt source has been successfully replaced and apt software and tools can be installed normally.
2. Install NVIDIA CUDA Toolkit 12.1
· Download CUDA Keyring:
This command is used to download the CUDA GPG keyring, which is used to verify the signature of the CUDA package. This is an important step in ensuring the security of your software package.
· Install CUDA Keyring:
Use to install the downloaded keyring. This is necessary to be able to verify the signature of packages downloaded from NVIDIA repositories.
· Delete the old apt key (if necessary):
This step may not be necessary unless you know that is an old key related to CUDA and you want to remove it from your system to avoid confusion. Typically, if you just install CUDA and use With the latest keyring provided by NVIDIA, this step can be skipped.
· Update apt package list:
Update apt's package list to include the packages from the NVIDIA repository just added via .
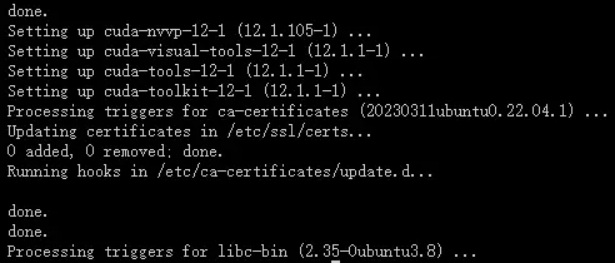
· Install CUDA Toolkit:
The following page appears, indicating that NVIDIA CUDA Toolkit 12.1 is successfully installed.
NOTE: There may be a problem here. The package directly named cuda-toolkit-12-1 may not be included in the official NVIDIA Ubuntu repository. Typically, you would install a program called A metapackage for cuda or cuda-12-1 that pulls in all components of the CUDA Toolkit as dependencies. Please check NVIDIA official documentation or repository to confirm the correct package name.
If you are looking to install a specific version of the CUDA Toolkit, you may need to install a package like cuda-12-1 (if available), or download it from NVIDIA's official website CUDA Toolkit's .run installer for manual installation.
Please make sure you check NVIDIA’s official documentation or Ubuntu’s NVIDIA CUDA repository for the most accurate package names and installation instructions.
· If the above situation occurs, you need to configure NVIDIA CUDA Toolkit 12.1 system environment variables
Edit ~/.bashrc file
Insert the following environment variables
Activate ~/.bashrc file
View cuda system environment variables
3. Install Miniconda
· Download the Miniconda installation script:
· Use the wget command to download the Miniconda installation script from Anaconda’s official repository. Miniconda is a smaller Anaconda A distribution that contains the core components of Anaconda for installing and managing Python packages.
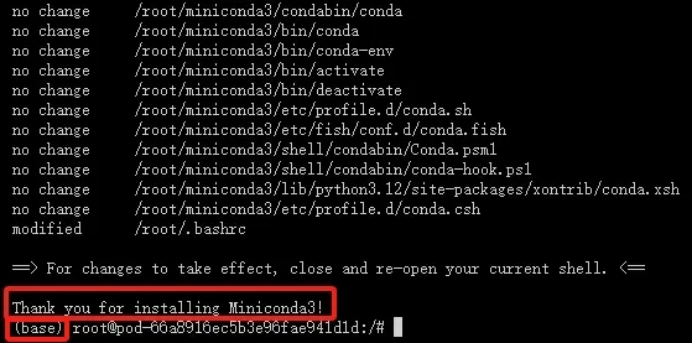
· Run the Miniconda installation script:
· Use the bash command to run the downloaded Miniconda installation script. This will start the Miniconda installation process.
Press the Enter key (enter)
Enter yes
Enter yes
The installation is successful as shown in the picture below
pip configure Tsinghua source acceleration
Add the following code
Things to note:
· Please make sure your system is the Linux x86_64 architecture, as the downloaded version of Miniconda is designed for this architecture.
· Before running the installation script, you may need to use chmod +x Miniconda3-latest-Linux-x86_64.sh The command gives execution permission to the script.
· During the installation process, you will be prompted to agree to the license agreement and whether to initialize Miniconda. Normally select "yes" to complete the installation and initialization.
· After the installation is complete, you can use the conda command to manage the Python environment and packages.
· If the link cannot be accessed or fails to be parsed, it may be due to network problems or problems with the link itself. Please check your network connection and make sure the link is up to date and working. If the problem persists, please visit Anaconda The official website to get the latest download link.
4. Clone the project from the github repository
· Clone the repository:
5. Create a virtual environment
6. Install model dependency libraries
· Switch to the project directory, activate the trellis virtual environment, and install the requirements.txt dependency
7. Download the pre-trained model
· Download pre-trained weights
8. Run the grdio_demo.py file
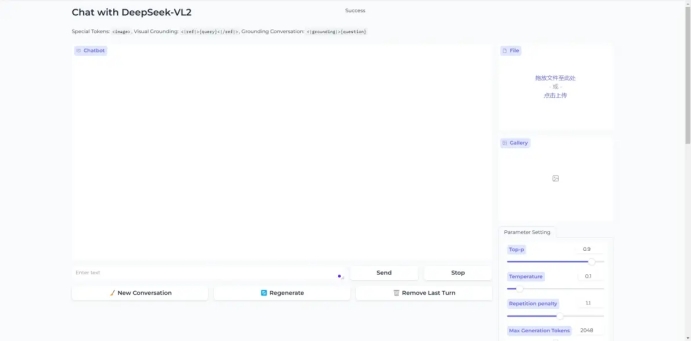
3. Web page demonstration
When the following Gradio page appears, the model has been built.

 Bleach vs Naruto online free to play - Bleach vs Naruto web version online free to play
 Zhihu is down: computers and mobile phones can’t be used! Latest situation~~
 Windows 10 will be “out of service” soon!
 Youyi Teaching Web Version Entrance-Youyi Teaching Resource Network Online Entrance
 Chaoxing Xuetong web version login portal - Chaoxing online student login portal
 Sohu video player
 WPS Office
 Tencent Video
 Lightning simulator
 MuMu emulator
 iQiyi
iQiyi
 Eggman Party
 WPS Office 2023
 Minecraft PCL2 Launcher
 Recommended collection of summer games
 How to work from home during the epidemic-Introduction to home office software
 How to set Chinese for teams-How to set Chinese for teams
 How to convert pdf to word-How to convert pdf to word
 How to type the comma on the keyboard? How to enter comma on keyboard