Everything is an extremely efficient file search tool specially built for Windows systems. What's revolutionary is its lightning-fast search speed - unlike traditional searches that require a long wait, Everything presents results almost as soon as you enter characters. This is due to its innovative design: it does not scan file contents, but directly indexes the metadata of the NTFS file system to establish a real-time mapping of the entire disk. Whether your hard drive stores hundreds of thousands or millions of files, it can achieve millisecond response, completely changing the way you find files, and becoming an indispensable assistant for programmers, designers and all those who pursue efficient work. Next, let Huajun editor explain to you how to set up excluded folders for EveryThing and how to set up excluded folders for EveryThing!
first step
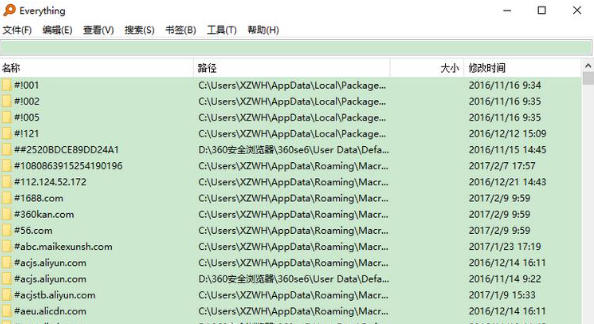
Start the Everything software and click [Tools] on the menu bar at the top of the main interface.
Step 2
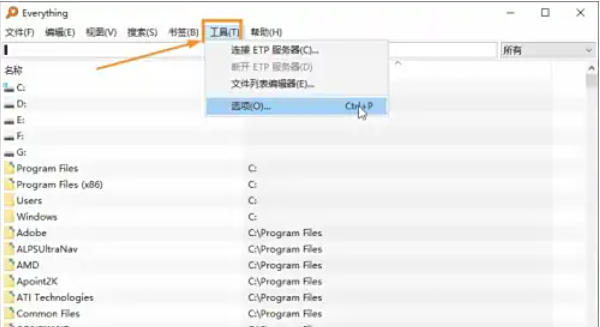
Select [Options] in the drop-down menu (or press the shortcut key Ctrl+P) to open the settings window.
Step 3
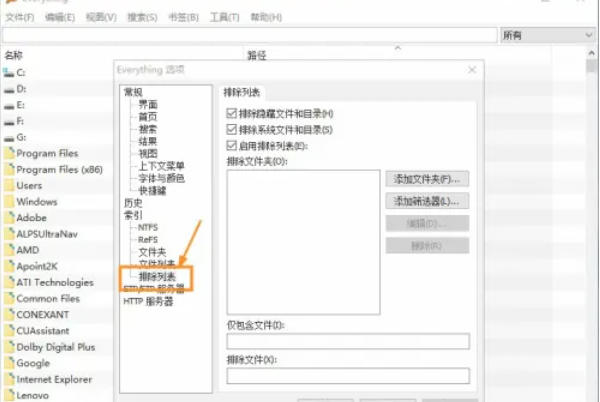
In the left navigation bar, find and click the [Exclude List] option (usually in the middle of the list). Or directly enter the exclusion list in the search box to quickly locate (supported by some versions).
Step 4
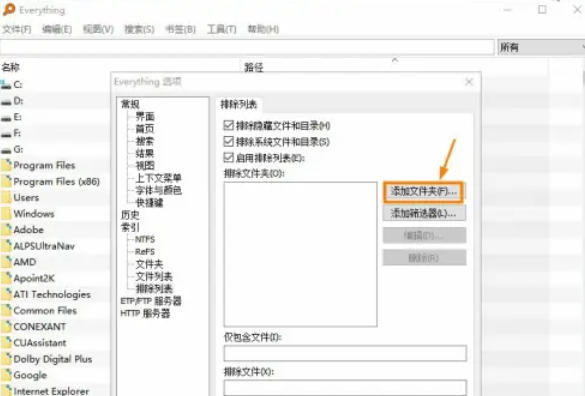
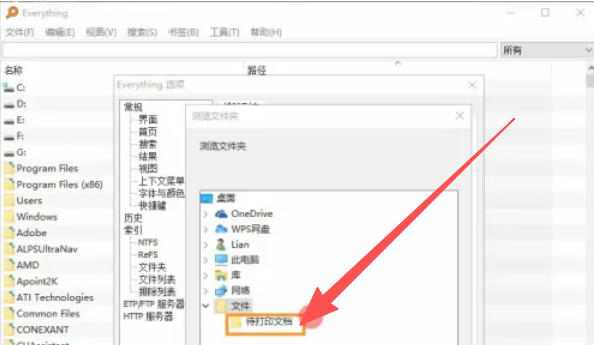
On the exclusion list page on the right, click the [Add Folder] button. In the pop-up browsing window, navigate to the folder that needs to be excluded (such as the temporary file directory, system disk, etc.). After selecting the folder, click [OK] to confirm your selection.
Step 5
Once added, the folder path appears in the exclusion list. Make sure the exclusion type is Folder (the default option) and not File or Wildcard.
Step 6
Click [OK] or [Apply] to save the configuration. Everything will take effect immediately and the contents of the folder will no longer be indexed.

The above is how Huajun editor compiled for you how to set up excluded folders for EveryThing and how to set up excluded folders for EveryThing. I hope it can help you!


