CorelDRAW is a vector graphics design software developed by the Canadian company Corel. Since its launch in 1989, it has become an iconic tool in the field of graphic design. With powerful vector editing, precise layout and rich creative functions as its core, it is widely used in fields such as logo design, printing and typesetting, advertising production, UI design and vector illustration. The software integrates intuitive drawing tools, intelligent special effects, advanced color management and a seamless bitmap-vector collaboration process. Together with components such as PHOTO-PAINT, it can meet complete design needs from conceptual conception to finished product output. Next, let the editor of Huajun explain to you how to center the page in coreldraw and how to center the page in coreldraw!
first step
Start CorelDRAW and open the CDR file to be edited.

Step 2
Use the selection tool (arrow icon) to click or select the graphic object that needs to be centered.

Step 3
Method 1: Click "Object" → "Alignment and Distribution" → "Alignment and Distribution" panel in the top menu bar.
Method 2: Find the "Alignment and Distribution" button directly in the property bar on the right (the icon resembles two overlapping rectangles).
Method 3: Shortcut key Alt+A+A to quickly bring up the panel.

Step 4
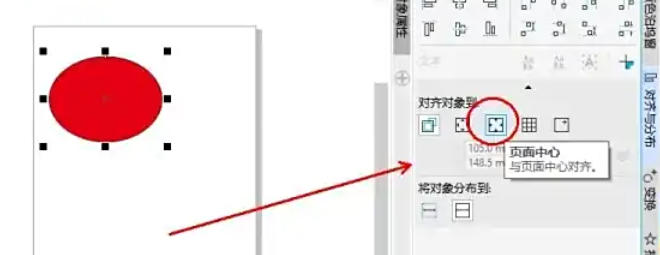
Find the "Align objects to" option in the panel and select "Page Center" from the drop-down menu.

Step 5
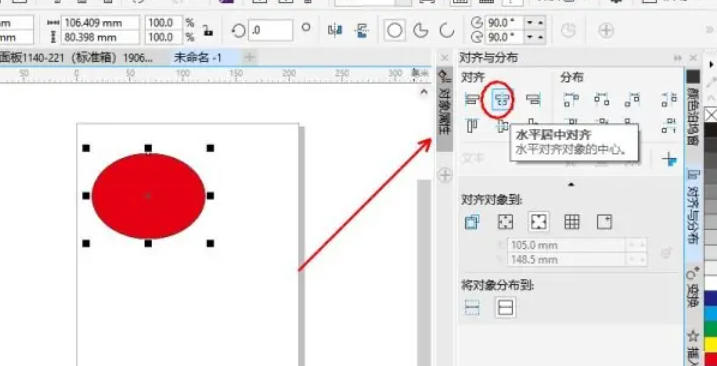
Click the "Horizontal Center Alignment" button in the panel (the icon is aligned in the middle of two horizontal lines).

Step 6
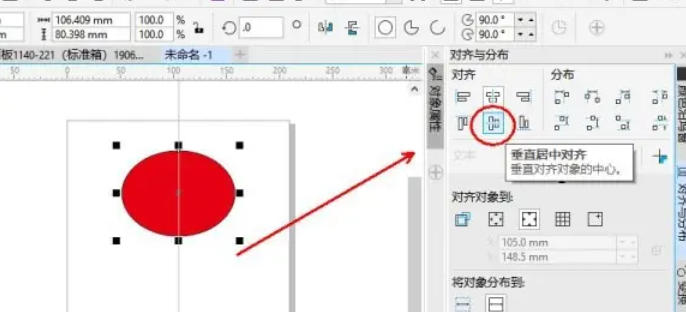
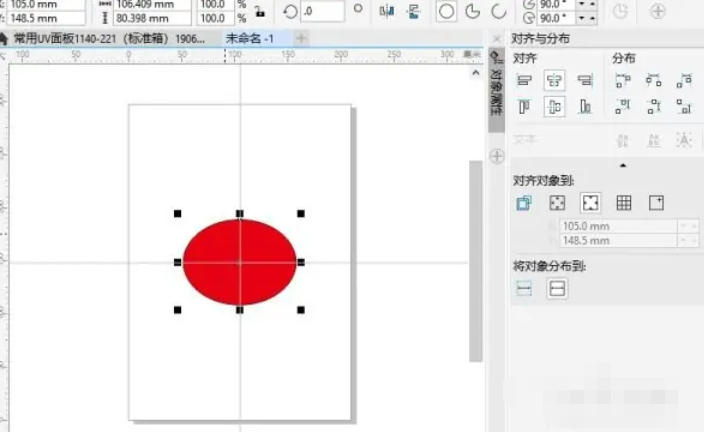
Click the "Vertical Center Alignment" button in the panel (the icon is two vertical lines aligned in the middle). Return to document view and the target graphic will be automatically centered on the page.
The above is how to center the page in coreldraw and the method of centering the page in coreldraw compiled by Huajun editor for you. I hope it can help you!


