Adobe Photoshop CS6 is a version of the classic image processing software launched by Adobe in 2012. It is regarded as an important milestone in the modernization of the Photoshop series. This version has achieved dramatic improvements in performance, interface and tools. The new dark interface is not only full of professionalism, but also allows users to focus on creation; the revolutionary "content-aware" toolset (such as content-aware movement and patching) greatly simplifies complex retouching operations and can intelligently identify and fill image content; thanks to the powerful Mercury Graphics engine, even large-scale operations such as liquefaction and deformation are extremely smooth. Next, let the editor of Huajun explain to you how to cut out pictures in Photoshop CS6 and how to cut out pictures in Photoshop CS6!
first step
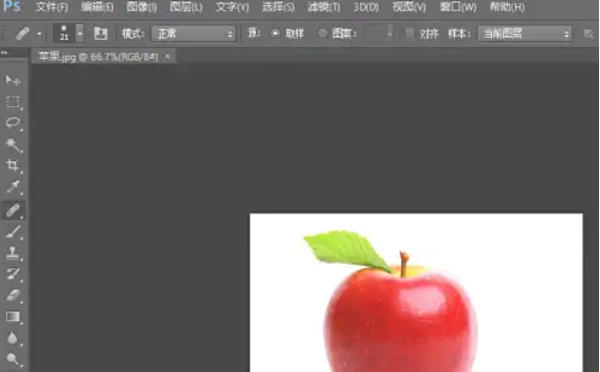
Start Photoshop CS6, click File → Open, and select the Apple picture. Double-click the Background layer in the layers panel on the right, and click OK in the pop-up window to unlock it as an editable layer (the name changes to Layer 0).
Step 2
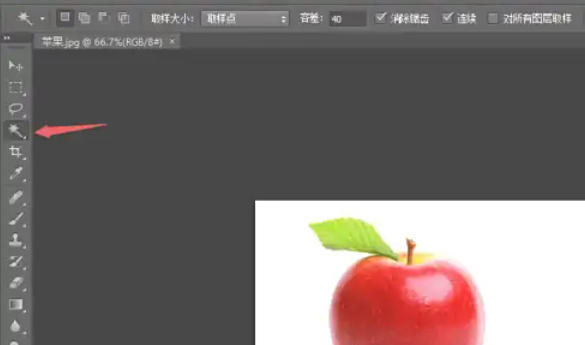
Find the Magic Wand Tool (shortcut key W) in the left toolbar, and right-click the tool group to switch to the Magic Wand.
Set parameters in the top options bar:
Tolerance: 30-50 is recommended (the larger the value, the wider the selection range, which is suitable for pictures with natural color transitions).
Check Contiguous (select only connected areas of similar color).
Step 3
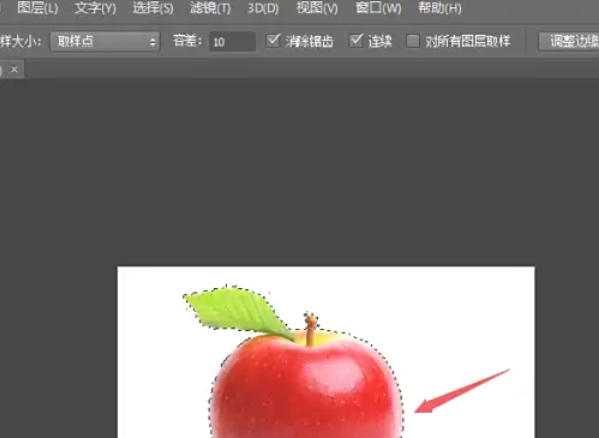
Use the magic wand to click on the apple background (non-apple part), and the background area will be selected (the ant line flashes).
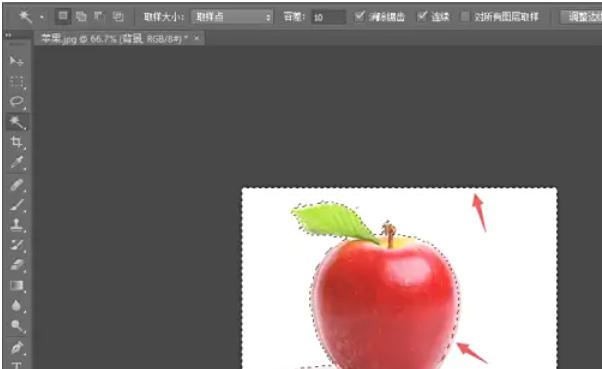
If the selection is incomplete:
Shift-click an unselected background area to add it to the selection.
If you select the Apple part by mistake, hold down the Alt key and click to deselect it.
Step 4
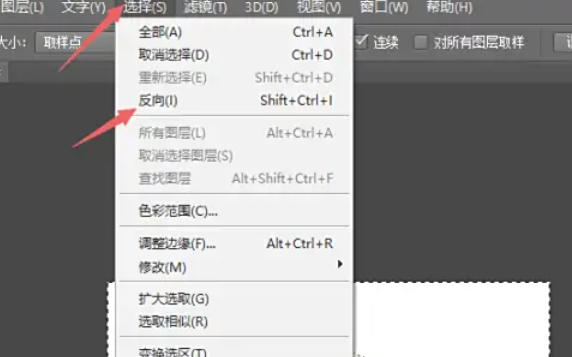
Click the top menu bar Select → Inverse (shortcut Ctrl+Shift+I), and the selection will change to the main body of Apple. Check the selection: Enlarge the image (Ctrl++) to see if the edges fit the outline of the apple. If there are any missing parts, you can adjust them manually.
Step 5
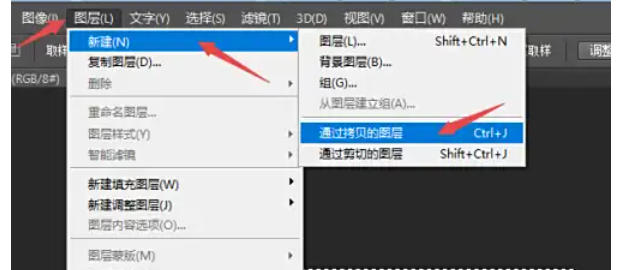
Click the top menu bar Layer → New → Layer via Copy (shortcut Ctrl+J). The layer panel on the right will generate layer 1, which is the cut out apple layer.
Step 6
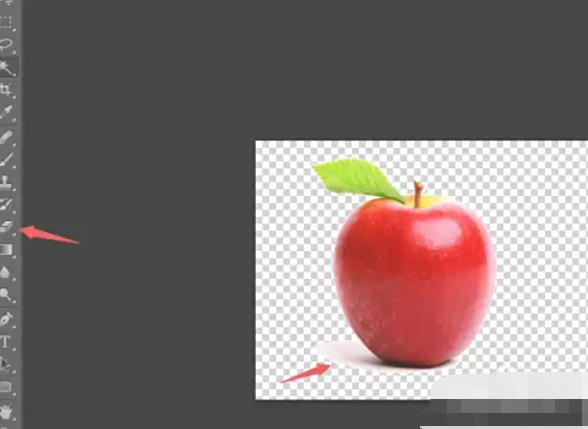
Click the eye icon in front of layer 0 to hide the background layer and only show layer 1.

Fix edge imperfections:
If there is residual background on the edge of the apple (such as the lower left corner), select the Eraser Tool (shortcut key E):
Set the soft-edged brush in the top options bar and adjust the size ([/] key to zoom).
Gently wipe over blemish areas to blend edges.
More fine adjustments: Click Select → Modify → Contract (enter 1-2 pixels) and delete the excess.
The above is the editor of Huajun who has compiled for you how to cut out images in Photoshop CS6 and how to cut out images in Photoshop CS6. I hope it can help you!