WPS Office provides a simple and intuitive interface design, easy to operate, and is suitable for users who do not need too many advanced functions. It has basic functions such as word processing (WPS text), form creation (WPS form) and presentation (WPS presentation) to meet daily office needs. It provides a simple and intuitive interface design, which is easy to operate and suitable for users who do not need too many advanced functions. Next, let the editor of Huajun explain to you how to make an attendance sheet in wps office and how to make an attendance sheet in wps office!
first step
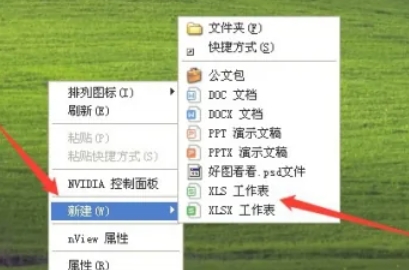
Right-click an empty space on the desktop. Select the "New" option in the pop-up menu. Select "WPS table" or "Excel worksheet" (usually compatible with Excel format) in the new submenu, and name it "Attendance Sheet".
Step 2
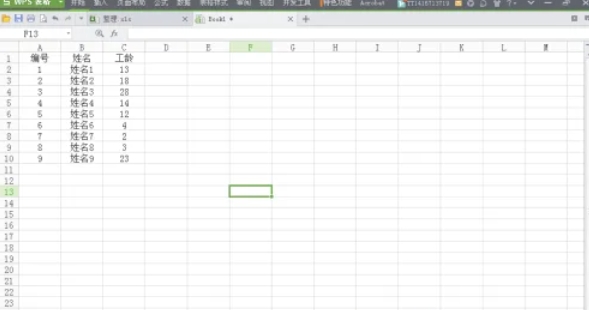
Double-click the "Attendance Sheet" file on the desktop to open the WPS form. Select the number of rows for which the row height needs to be adjusted (it can be one row or multiple rows). Right-click the mouse and select "Row Height" in the pop-up menu. In the pop-up row height setting dialog box, enter the appropriate row height value, and then click "OK".
Step 3
Select the number of columns for which the column width needs to be adjusted (it can be one column or multiple columns). Right-click the mouse and select "Column Width" from the pop-up menu. In the column width setting dialog box that pops up, enter the appropriate column width value, and then click "OK".
Step 4
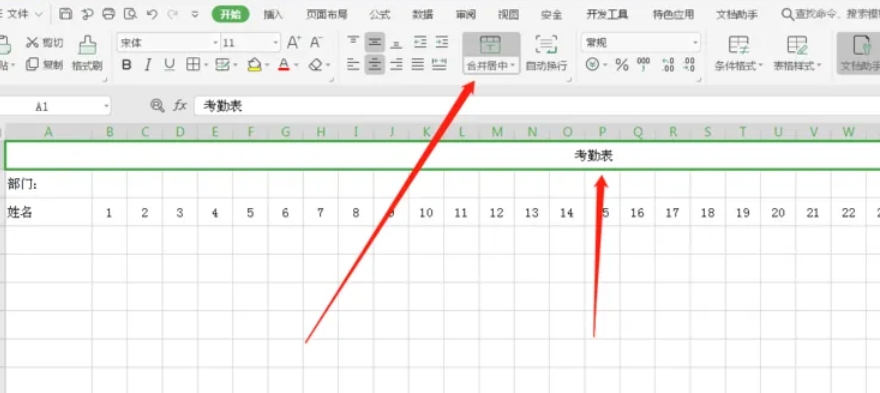
Enter "Attendance Sheet" as the header in the first box of the first row. Select the number of columns where the table header is located (usually the entire first row). Find the "Merge and Center" menu function above the table, click it and select "Merge Cells and Center". Enter "Department" in the first space of the second line. Enter "Name" in the first space of the third line. Add dates in the following cells in sequence, such as "2023-10-01", "2023-10-02", etc., and adjust the column width as needed.
Step 5
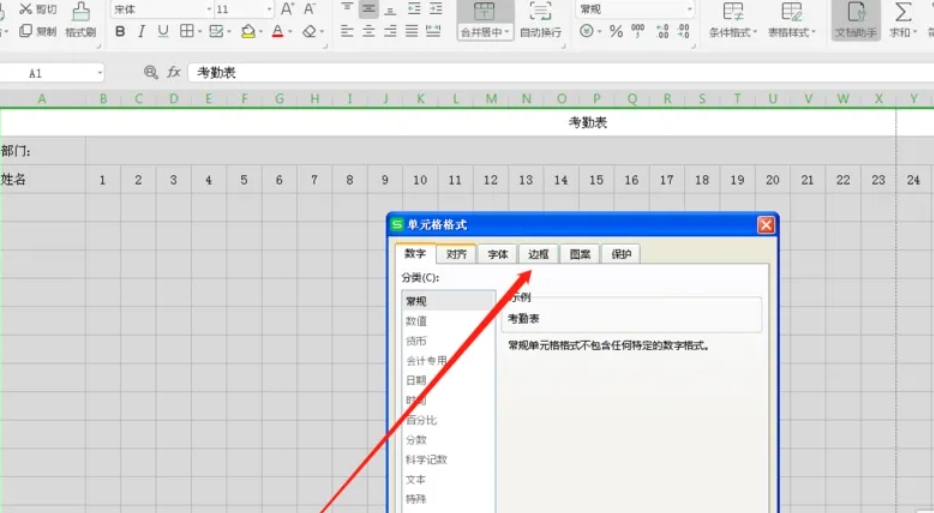
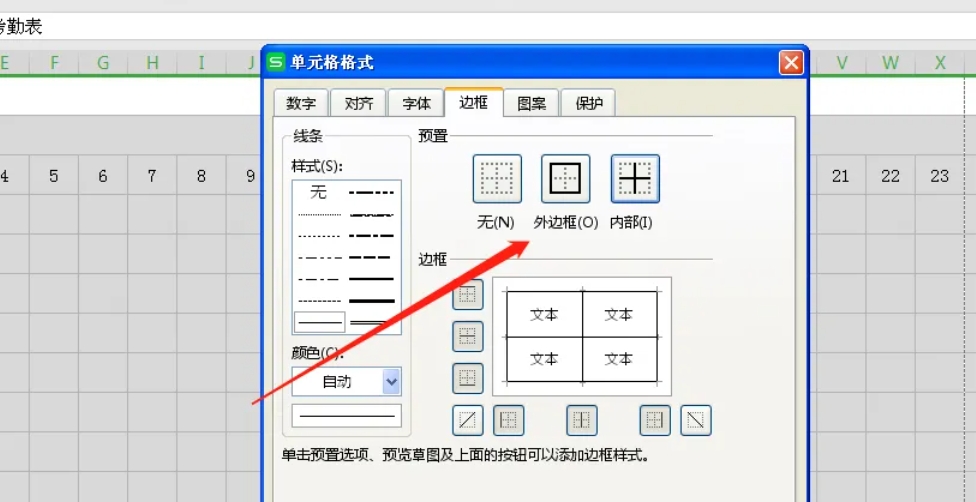
Click the "Select All" button (usually a small triangle) in the upper left corner of the table, or press the Ctrl+A shortcut key to select all cells. Right-click the mouse and select "Format Cells" from the pop-up menu. In the pop-up Format Cells dialog box, select the "Border" function. Click the "Outer Borders" and "Inner Borders" buttons to make sure all borders are selected. Click the OK button to apply the settings.
Step 6
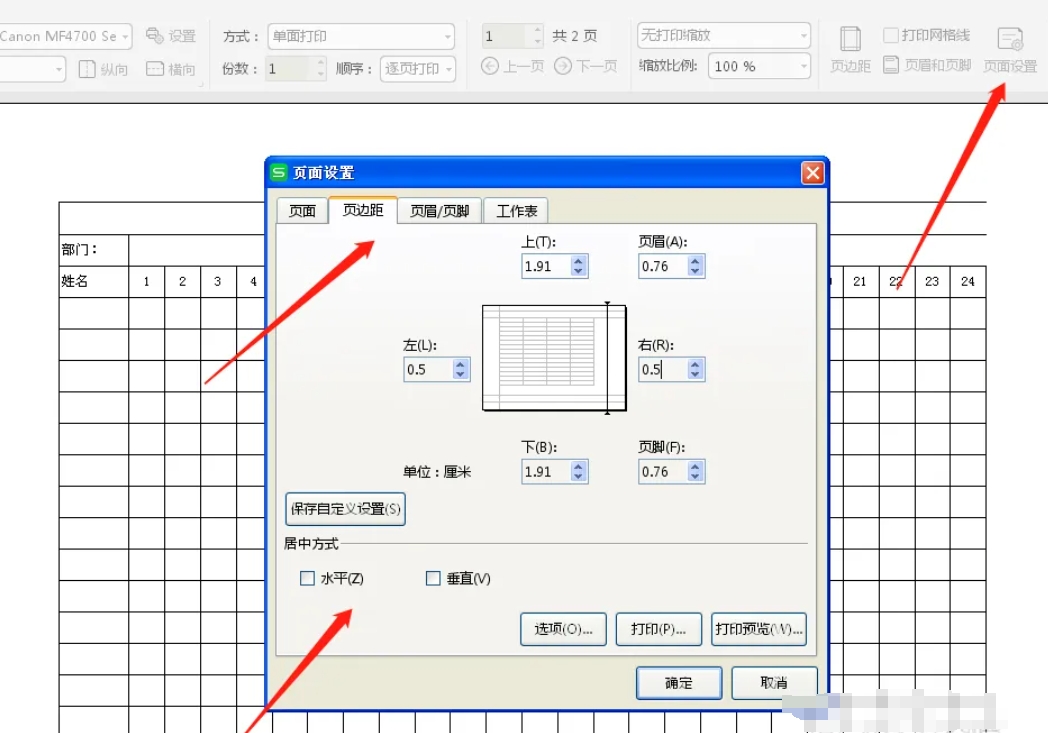
Click the "Print Preview" button above the document and find the "Page Setup" option in the print preview interface. After clicking "Page Setup", you can adjust parameters such as page margins and paper size. After adjusting the appropriate margins as needed, click the "OK" button to complete the settings.
The above is how the editor of Huajun compiled for you how to make an attendance sheet in wps office and how to make an attendance sheet in wps office. I hope it can help you!


