Recently, some friends have consulted the editor about how to add ripple effect subtitles in Adobe premiere pro CC2019? Here is the Adobe premiere pro for you Friends who need it can learn more about how to add ripple effect subtitles in CC2019.
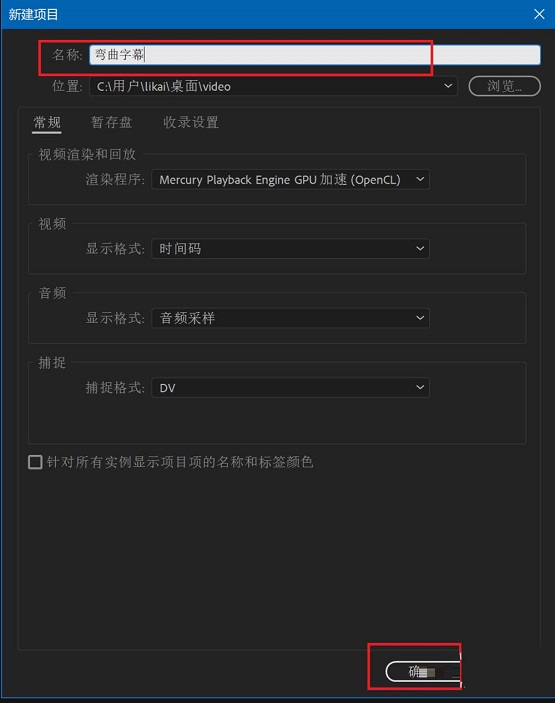
Step 1: First create a new project and name it (as shown in the picture).
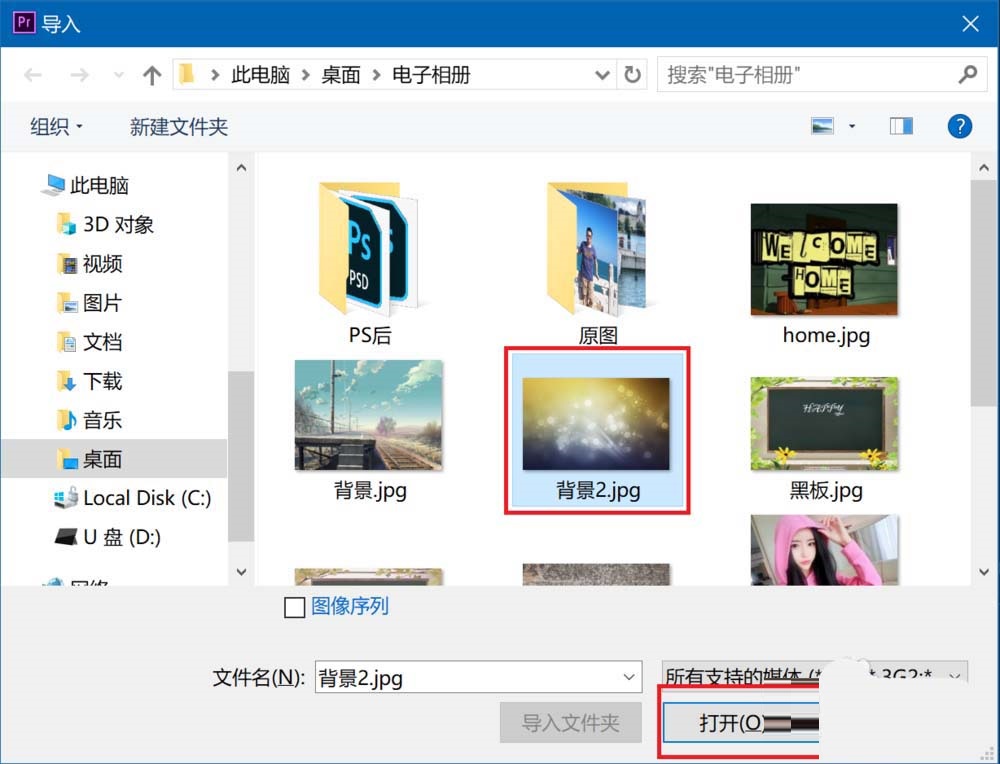
Step 2: Press the shortcut key Ctrl+I to open the material import dialog box, select the background material to be imported and click Open (as shown in the figure).
Step 3: Right-click on the imported material and select New Sequence from Clip (as shown in the picture).

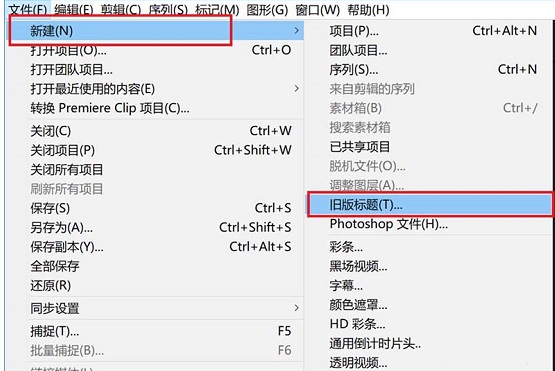
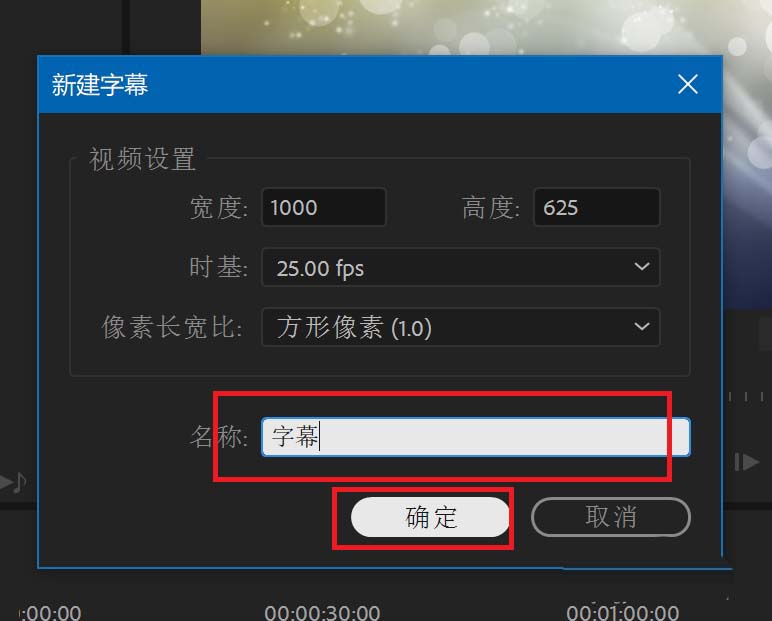
Step 4: Click File, New, select the old version of the title, then enter the subtitle name and click OK (as shown in the picture).
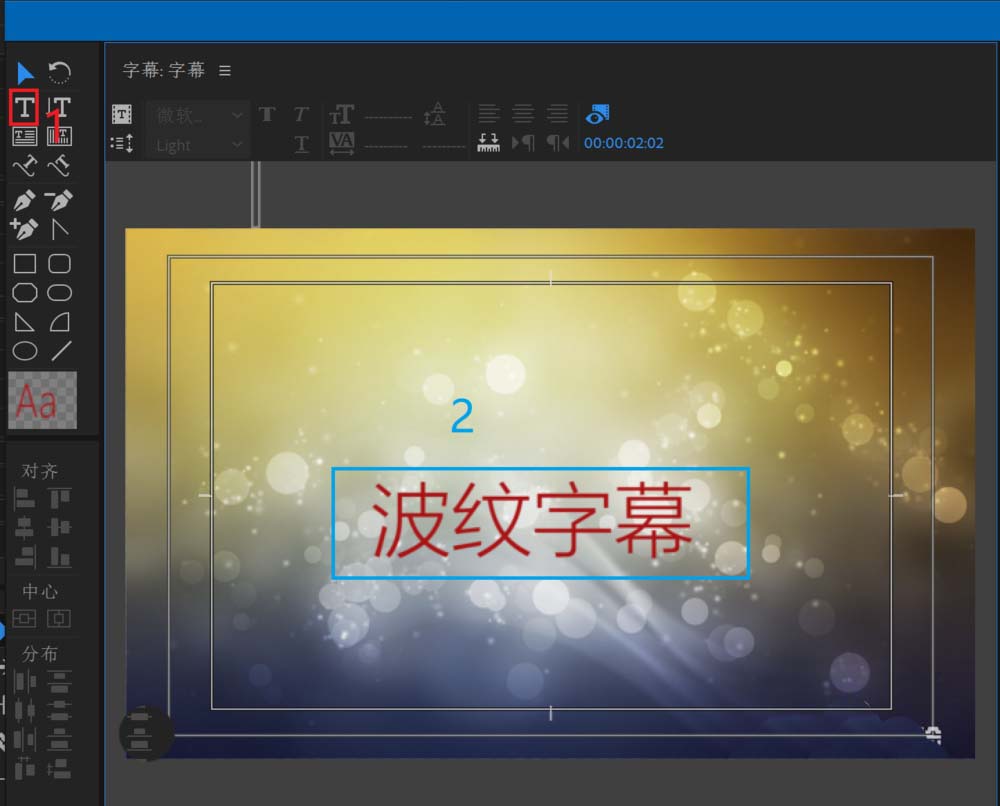
Step 5: Use the text tool to input text at the appropriate location (as shown in the picture).
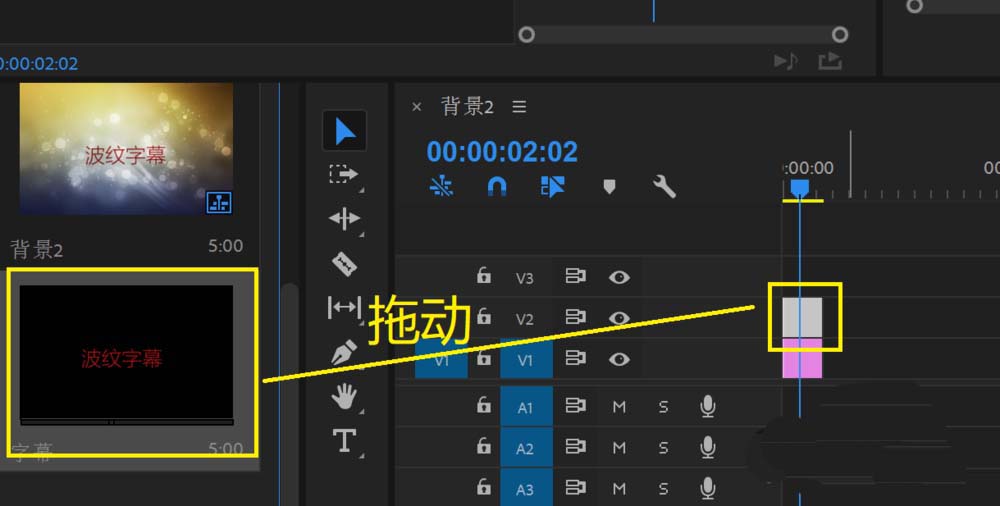
Step 6: Close the subtitle editing window, then find the newly created subtitle in the material management window and drag it to video track 2 of the timeline (as shown in the figure).
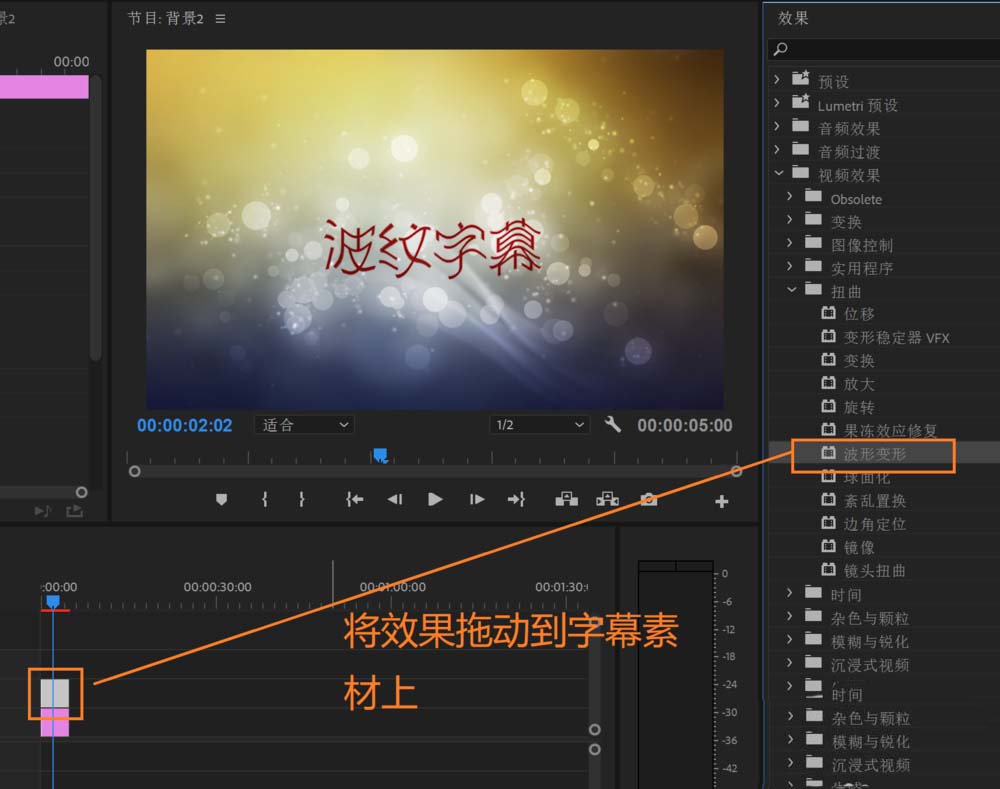
Step 7: In the video effect, find the distortion and ripple deformation, and then drag it to the subtitle material (as shown in the picture).
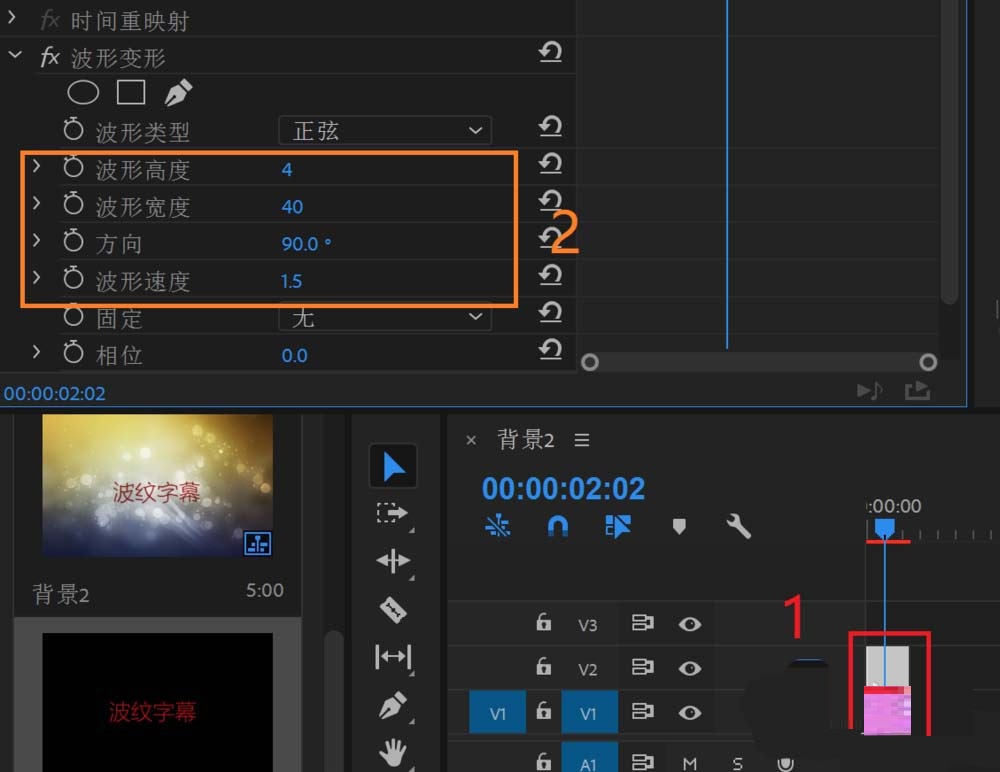
Step 8: Select the subtitle material, and then change the corresponding parameters in the red box in the picture (as shown in the picture).
The above is the entire content of how to add ripple effect subtitles in Adobe premiere pro CC2019 brought to you by the editor. I hope it can help you.