Recently, many friends have expressed that they still don’t know how to adjust the fill texture angle in Su2016. Below, the author will bring you the method of adjusting the fill texture angle in Su2016. Friends who are not sure yet can come and take a look. I hope it can help you.
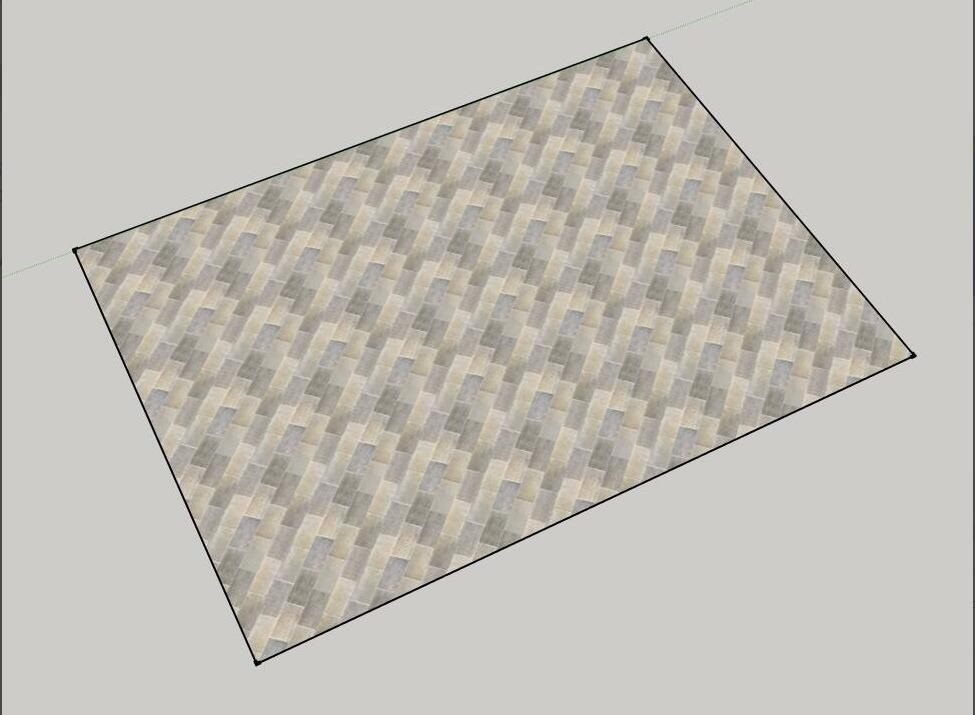
First, fill the surface with material. You can see that the angle of the texture is not what we need and is not parallel to the boundary.
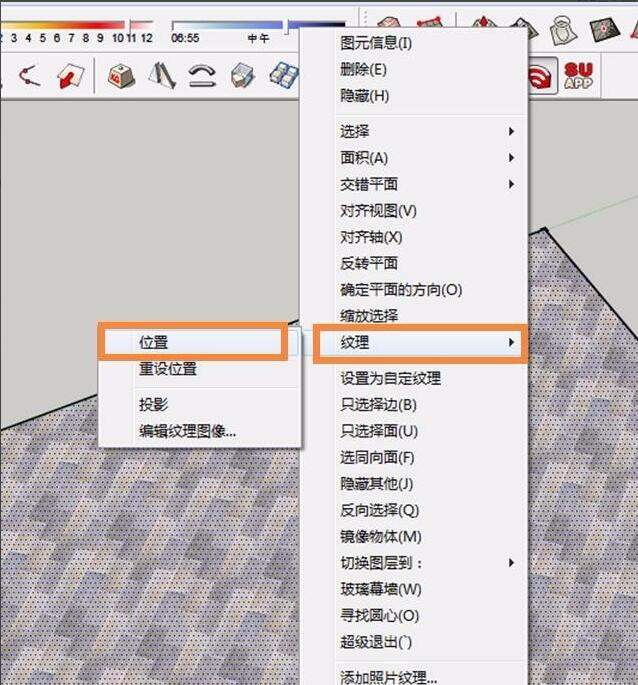
Right-click on this face and select Texture-Position.
Note: The expression in other versions will be different, it may be expressed as "Texture - Adjust Texture", usually in the right-click menu.
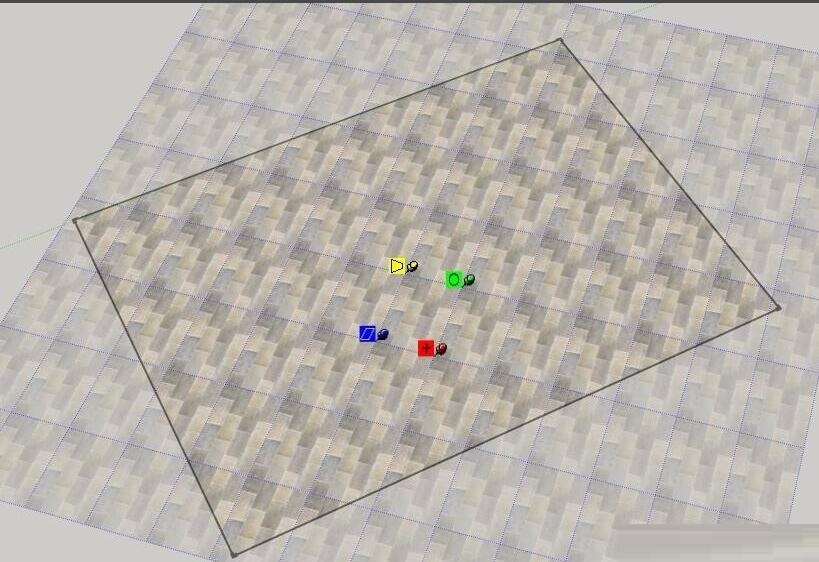
Four push pins will appear, the more commonly used ones are green and red push pins. Green - adjust the angle and size; red - move the map position.
Drag the green thumbtack to rotate the texture to the desired position.
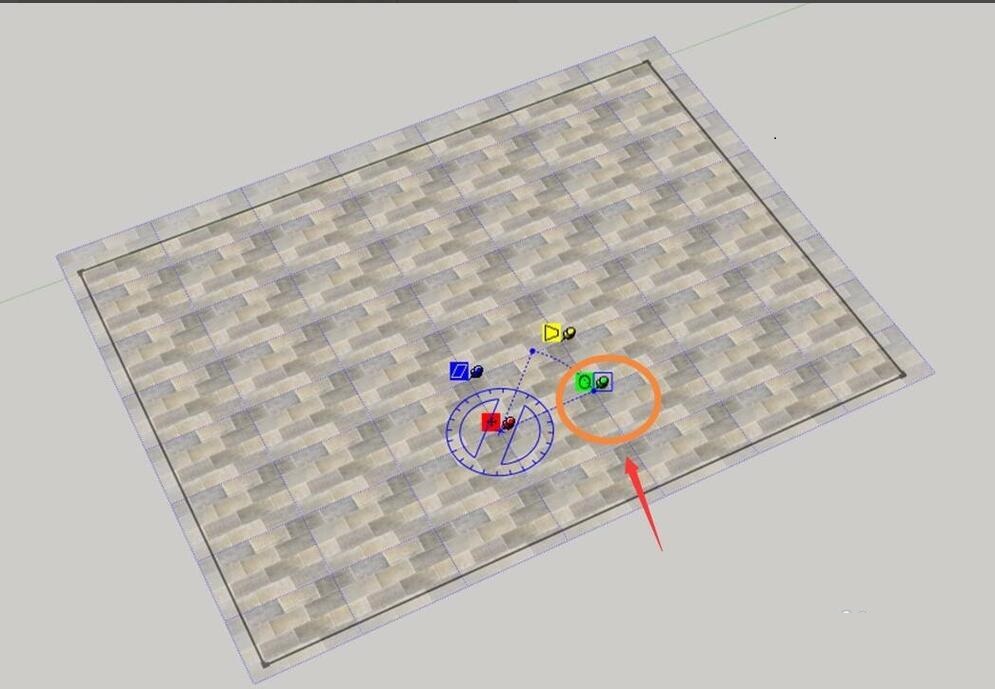
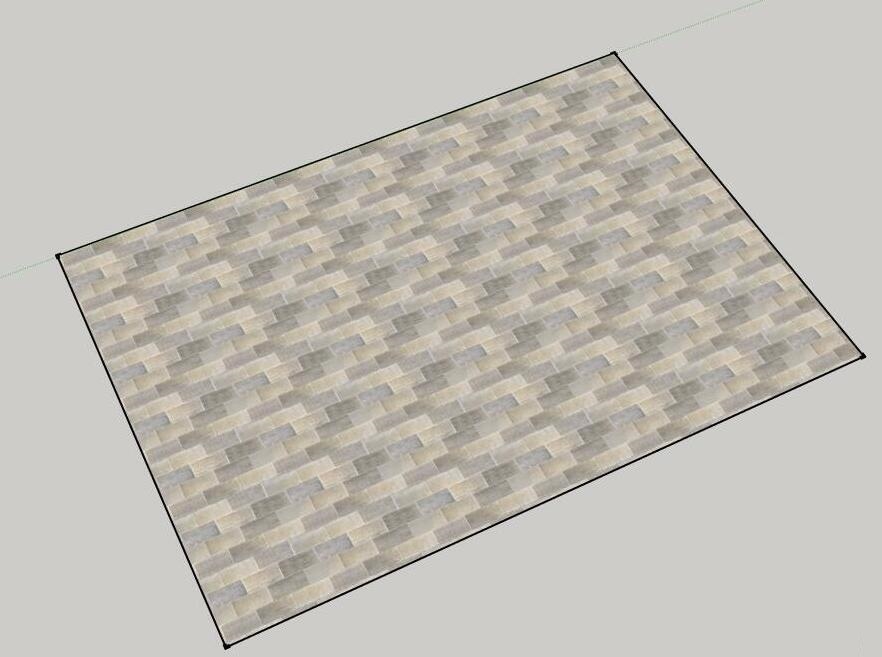
The rotation is completed.
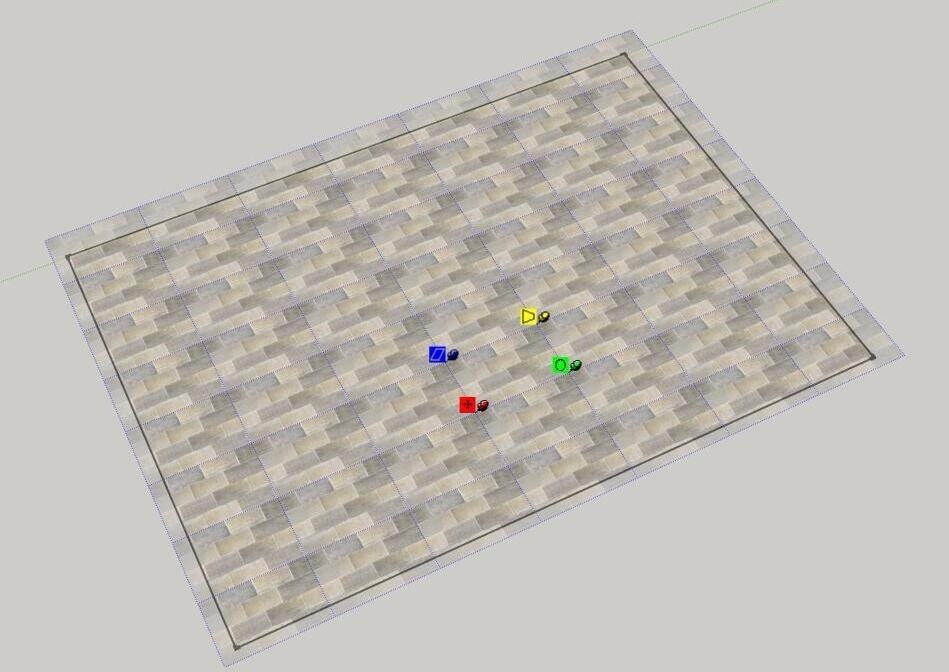
Click the Enter key to confirm.
The above is the method of adjusting the fill texture angle in Su2016 brought by the editor. Friends in need can take a look.