In the process of using moviemaker for movie production, how to add subtitles? For those who don’t know yet, come and learn how to add subtitles in moviemaker with the editor. I hope that this tutorial can help everyone understand moviemaker better.
First, you need to import the video. Open Movie Maker and click "Video" in the import menu in the left column. If the video file is on a digital camcorder, click "From Digital Camcorder." The Import Media Items dialog box opens.
Locate a video file on your computer's hard drive or digital camcorder and double-click the file to import it into Movie Maker. Videos now appear in Favorites between the task menu and preview display just above the editing timeline. Video files have been imported.
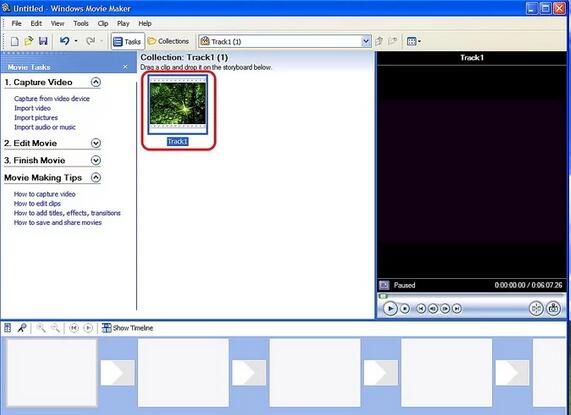
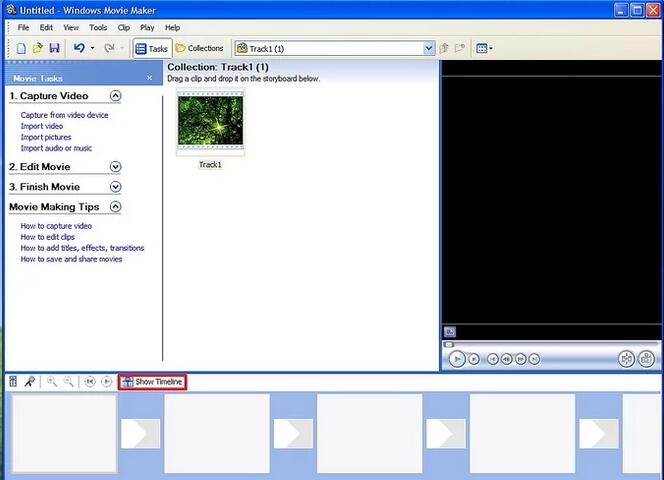
Change from Storyboard view to Timeline. In order to adjust subtitle position or timing, the application window view needs to be set to Timeline. Click the View tab on the menu bar and confirm that the Timeline option on the menu is selected. Application view settings are set to Timeline view.
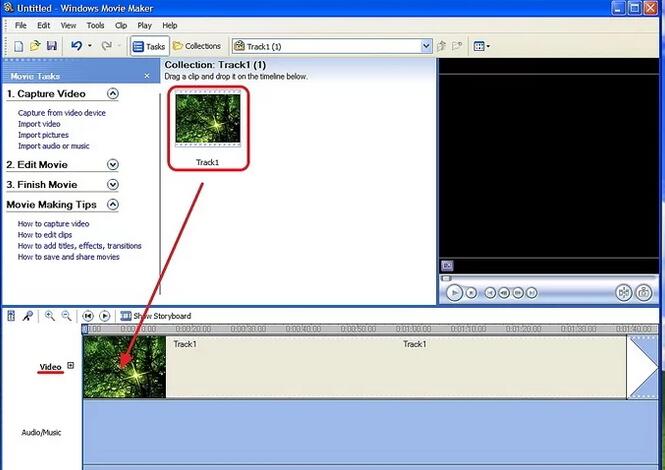
Insert video files into the video editing timeline. Notice that there are now three editing timelines across the bottom of the application window, one on top of the other. The top editing timeline is labeled "Video," the next one is labeled "Audio," and the bottom one is labeled "Title Overlay." Click on the video file in the favorites folder and drag it to the "Video" editing timeline. The video is now in the video editing timeline.
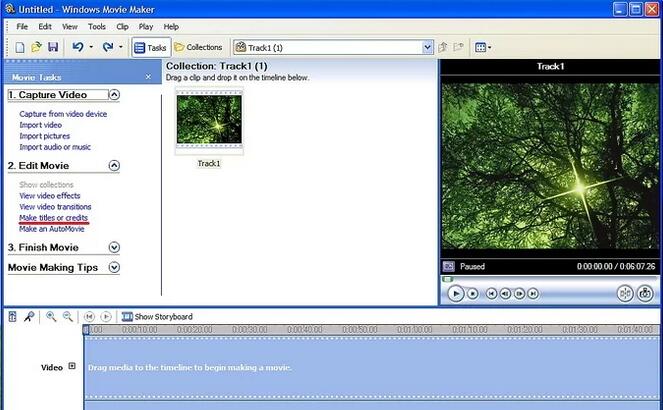
Insert a title overlay for the first set of subtitles. Inserted title overlays can be repositioned anywhere within the time limit. Click Intro and Ending in the Edit menu on the left. You will be asked for the location of the title. Select "Title on selected clip" from the list of available options. When prompted for title text, type the first set of subtitles you want to add to the video.
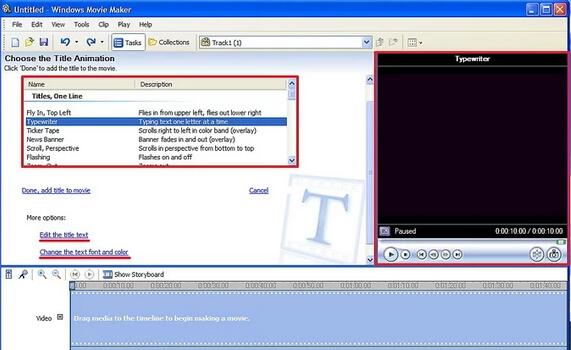
After entering the text, select the "Edit Title Animation" option. The title animation menu will appear. Scroll down the list of available animations and click "Subtitles." In More Options, click the option to change text and font color. The font menu will appear. Select a simple and easy-to-read font from the font menu, such as Song Dynasty or Block Kai. The selected font will now be displayed in the preview display on the right side of the application window.
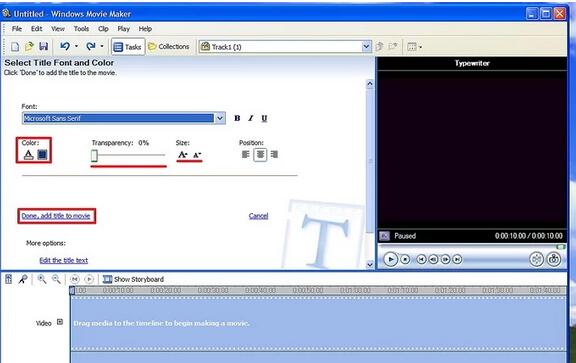
If necessary, adjust the font size using the up or down arrows under the Font menu. Font color, transparency level and positioning can all be adjusted from this menu. Experiment with different adjustments to suit your specific needs or preferences. When you're ready, click the "Add Title" button. Title overlays will now appear in the Title Overlay editing timeline at the bottom of the application window. The title overlay for the first set of subtitles has been inserted.
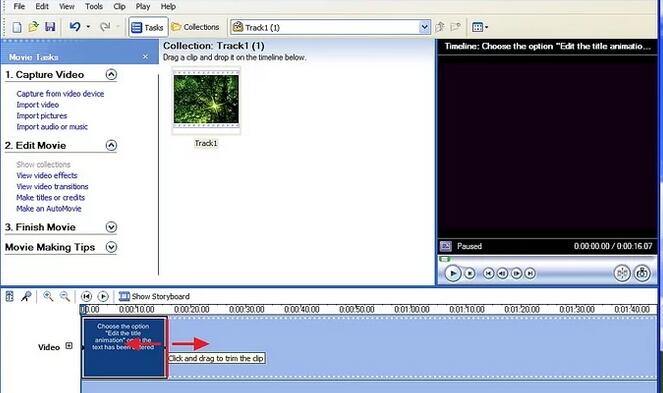
Move the first set of subtitles into place. Determine where on the video you want the subtitles to begin. Click and drag the title overlay to anywhere in the editing timeline. Click the Play Schedule arrow above the video editing timeline on the far left side of the application window to preview the positioning of the first set of subtitles. Drag the title overlay left and right to adjust the position of the first set of subtitles. The subtitle position of the first group.
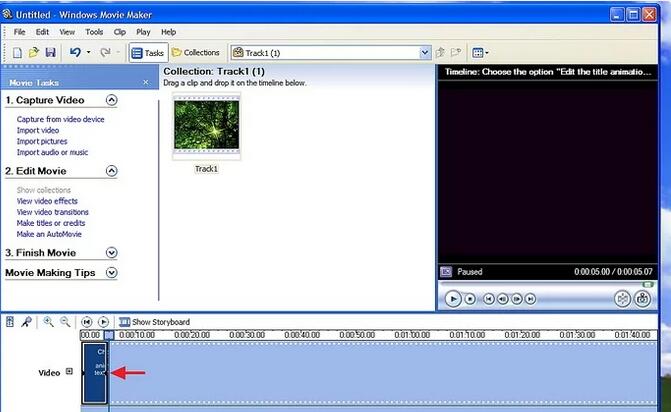
Adjust the length of subtitles. The length of time the subtitles remain on the screen can be adjusted by dragging the edge of the title overlay to the left to shorten it or to the right to lengthen it. Adjust the title overlay to match the length of the video clip. The subtitle length has been adjusted.
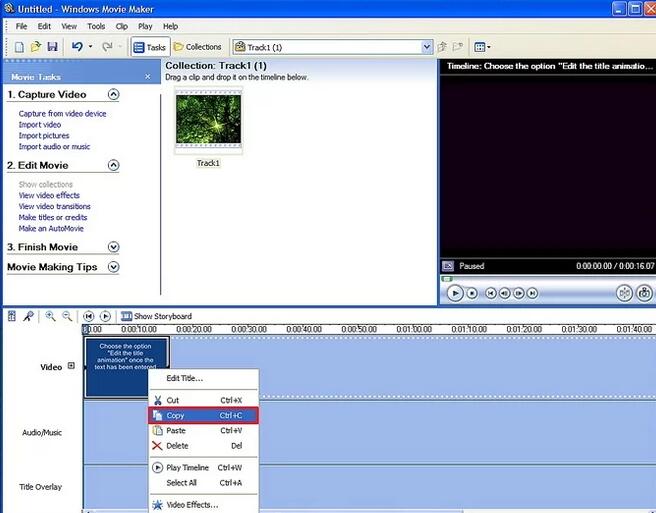
Create a second set of subtitles. Right-click on the first set of subtitles and select "Copy" from the drop-down menu. Click the title to cover the empty space in the editing timeline, just to the right of the first set of subtitles, and click Paste. A copy of the first set of subtitles now appears in the Title Overlay editing timeline. Double-click the copy. The title overlay edit menu will open in the application window.
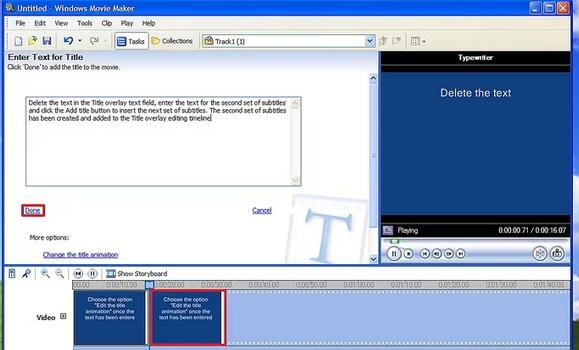
Delete the text in the Title Overlay text field, enter the text for the second set of subtitles, and click the "Add Title" button to insert the next set of subtitles. A second set of subtitles has been created and added to the edit title overlay timeline. Adjust the necessary position of the second set of subtitles. The second set of subtitles has been created.
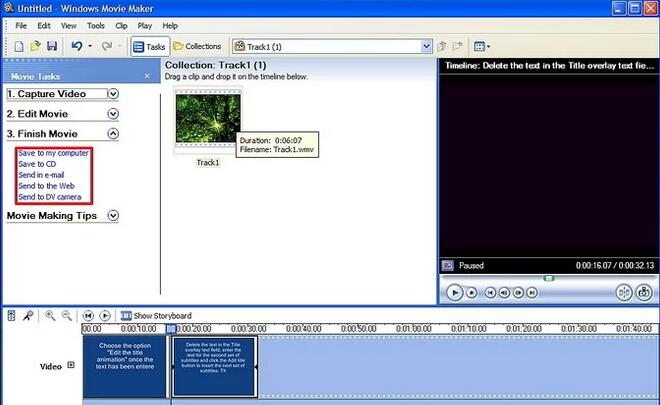
Finished adding subtitles. Continue, if necessary, until all the video subtitles you want to add have been formatted, inserted and moved to the correct location. Save the file on your computer as a movie-making project, or export the file as a Windows Media Video that can be uploaded to the Internet. All subtitles have been added to the videos with Movie Maker.
The above is the operation method of adding subtitles in moviemaker shared by the editor. Friends in need can read this article.


