The production process of U disk for Android system:
Partition of U disk
Nowadays, 2GB, 4GB or even 32GB USB flash drives can be seen everywhere, but the disk space occupied by the Android system is less than 100MB. In order to prevent the prepared Android system USB flash drive from affecting your own use, you must partition the USB flash drive to separate the Android system partition and data storage area. Using DiskGenius, you can easily complete the partitioning operation of U disk.
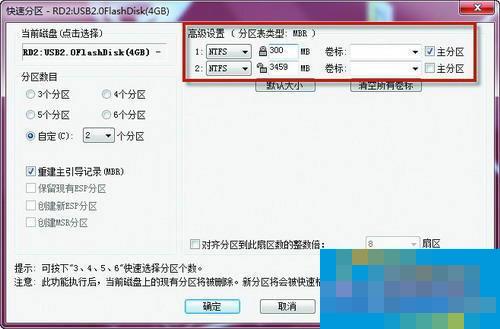
▲Set up partitions
First insert the U disk into the USB interface of the computer, then download "DiskGenius", unzip and run it; then click the menu "Hard Disk → Quick Partition" on its main interface to open the "Quick Partition" dialog box; then check the Custom radio button and select 2 partitions, and then determine the format of the U disk partition as NTFS and the Android system partition (300MB size is appropriate) and the size of the data storage partition according to your own needs; finally click the "OK" button.
DiskGenius (disk partition software) V4.6.2 Green Edition
Download address: http://www.xitongzhijia.net/soft/17539.html
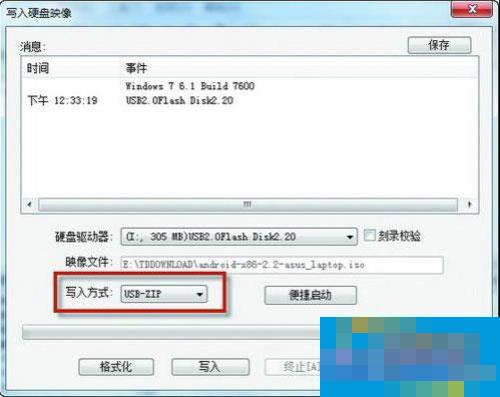
Make USB flash drive for Android system
Download the green version of UltraISO and run it, then click the menu "File → Open" command to open the downloaded ISO format Android system image file "android-x86-2.2-asus_laptop.iso"; then click the menu "Start" Disc → Write Hard Disk Image" command to bring up the "Write Hard Disk Image" dialog box; then click the drop-down arrow to the right of "Writing Method" and select "USB-ZIP"; finally click the "Write" button to write all the files in the Android system image you just opened to the USB flash drive.
UltraISO PE (floppy disk pass) V9.5.3.2901 Simplified Chinese green single file version
Download address: http://www.xitongzhijia.net/soft/18987.html
▲Write the system to the USB flash drive
After completing the above operations, deactivate and unplug the USB flash drive, then re-insert the USB flash drive into the USB port of the computer, restart the system and set the USB flash drive as the preferred boot device by modifying the BIOS. After booting the system with the USB flash drive, we will soon be able to see the Android system boot menu; select the first menu option and press Enter, and you will see the familiar Android system desktop.
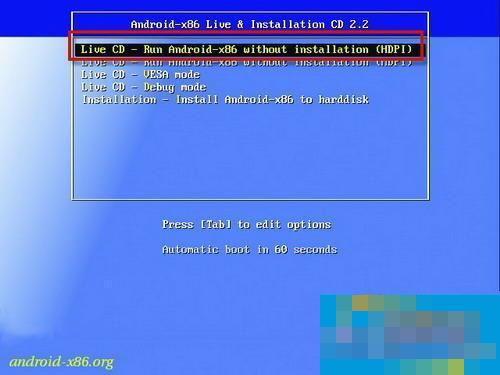
▲Startup interface
Tips: The default interface text of the Android system is in English. Drag the "lock"-shaped slide bar upward to coincide with the upper "speaker"-shaped slide bar to unlock the Android system. Then select "Settings→Language & keyboard→Select Language→Chinese (Simplified)" in the main interface of the Android system to change the default English of the Android system to Simplified Chinese.
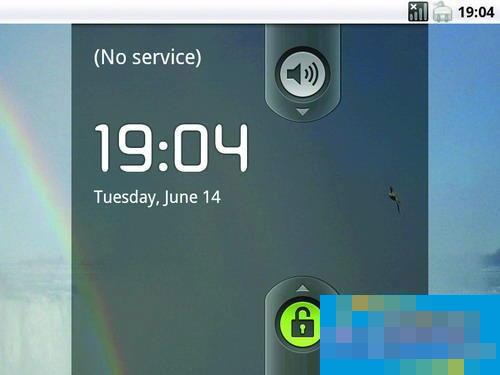
▲Enter Android system
The above is the entire process of making a USB flash drive for Android system. I hope it can help everyone.