How to use quicktime player? Quicktime player can not only record and edit videos, but also change the video format to a format compatible with various players. Below, the editor will share the tutorial for downloading and using quicktime player, let’s experience this powerful application together!
I believe many people don’t know that the built-in quicktime player in the Mac system also has a screen recording function. In fact, quicktime player has a screen recording function in the 10.6 era, but the function is very simple and not many people use it. Moreover, this software has not been updated. It has not been upgraded at all since the release of version 10. However, in the Lion system, quicktime player has finally been updated to version 10.1.
screen recording
Go directly to the topic, start quicktime player, click File in the menu bar - New Screen Recording. If you want to highlight the location of the mouse click during the recording process, you can check the inverted triangle on the right side of the control interface and check "Show mouse clicks during recording". Of course, you can also set the microphone input here. For example, when recording a tutorial, if you record while explaining, you can check "Built-in Input: External Microphone", and you can also set the quality of video recording, etc.
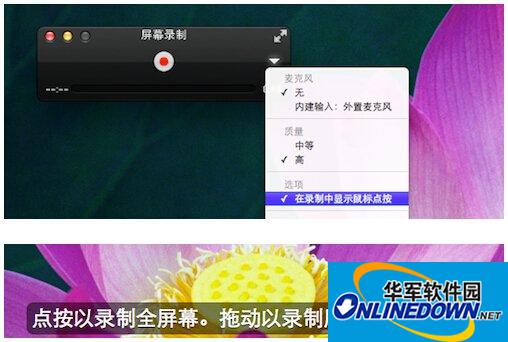
After setting these parameters, you can click the red button. At this time, the program will ask if you want to record in full screen or a selected area. If you want to record in full screen, just click the mouse. If you want to record a selected area, just drag an area with the mouse, and then the recording will officially start.
After the recording is completed, the video will be saved directly in the "Movies" folder (~/Movies) and will automatically start playing.

video editing
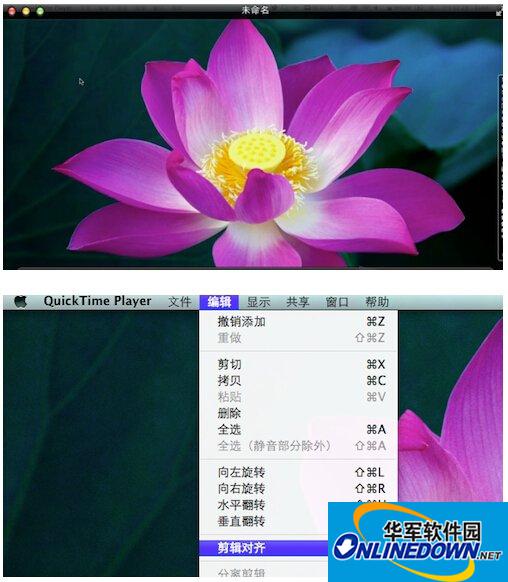
The above is the process of screen recording, but one thing that you may easily overlook is that there are some very convenient "editing" functions built into quicktime player. You can find these functions from the edit menu, including video trimming (removing unnecessary clips from the beginning and the end of the video), video merging (just drag the videos you want to merge into the quicktime player window), video flipping (flip the video vertically and horizontally in editing mode) and many other functions. You can try these editing functions yourself, which will definitely bring you great convenience.
Video export/share
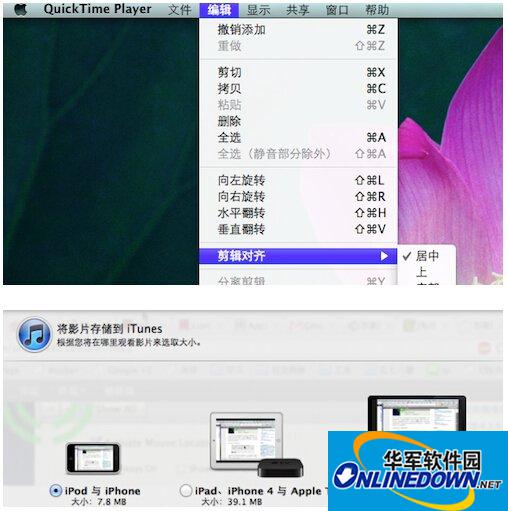
After recording and editing are completed, it is natural to export/share the video. At this point, quicktime player10.1 also provides very complete functions. You can easily export the video into a format compatible with the Web and various mobile devices (including iOS devices and Apple TV). You can also directly export the video to a 480P, 720P or 1080P version; you can even share the video directly through Youtube, Facebook, Vimeo, email and other channels.
Software tutorial editor recommends:
What functions does QuickTime have?
How to detect whether the Shockwave and Quicktime video plug-ins are installed in the browser