Not everyone may be familiar with QuickTime Player, so it may be difficult to operate it for the first time. What's more, novices who want to use it to convert formats often have no idea where to start. Now, let me tell you how to use QuickTime Player to convert formats!

Quicktime player
screen recording
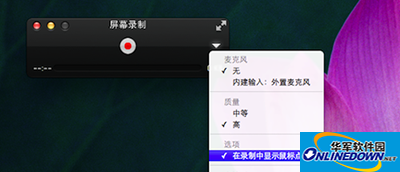
Start QuickTime Player, click File in the menu bar - New Screen Recording. If you want to highlight the location of the mouse click during the recording process, you can check the inverted triangle on the right side of the control interface and check "Show mouse clicks during recording". Of course, you can also set the microphone input here. For example, when recording a tutorial, if you record while explaining, you can check "Built-in Input: External Microphone", and you can also set the quality of video recording, etc.


Quicktime player
After setting these parameters, you can click the red button. At this time, the program will ask if you want to record in full screen or a selected area. If you want to record in full screen, just click the mouse. If you want to record a selected area, just drag an area with the mouse, and then the recording will officially start.
After the recording is completed, the video will be saved directly in the "Movies" folder (~/Movies) and will automatically start playing.

Quicktime player


