WPS Office 2019 is an efficient and intelligent office suite launched by Kingsoft Office Software, which integrates the three core applications of word processing, spreadsheets, and presentations. The software is deeply compatible with Microsoft Office formats, supports cross-platform seamless editing and real-time collaboration, uses a lightweight design to significantly reduce memory usage, and increases startup speed by 30%. Innovatively integrates PDF advanced toolkit, 100,000+ free online template library, cloud document synchronization and multi-person collaborative annotation functions, and also provides enterprise-level data encryption management and AI intelligent typesetting services. It is suitable for Windows/Mac/Linux multi-platforms, comprehensively covering daily office, academic research, corporate reporting and other scenarios, and has become the office solution chosen by more than 200 million domestic users. Next, let Huajun editor explain to you how to create a directory in WPS Office 2019 worksheet and how to create a directory in WPS Office 2019 worksheet!
first step
Start WPS Office 2019 and open the Excel workbook where you need to create a directory (the file must contain multiple worksheets).
Step 2
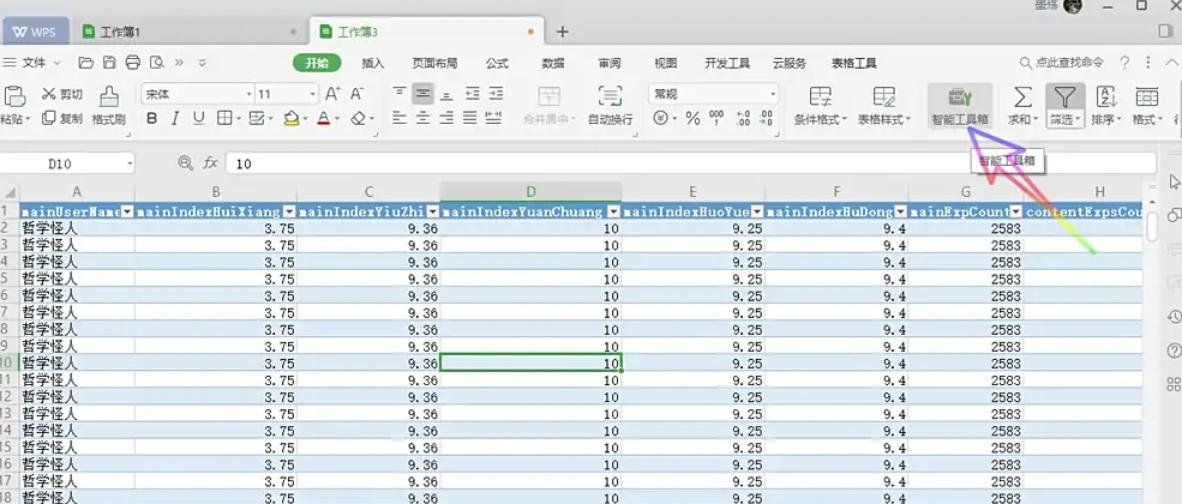
Click the "Smart Toolbox" tab in the upper right corner of the WPS form interface (the icon is an orange toolbox pattern).
Step 3
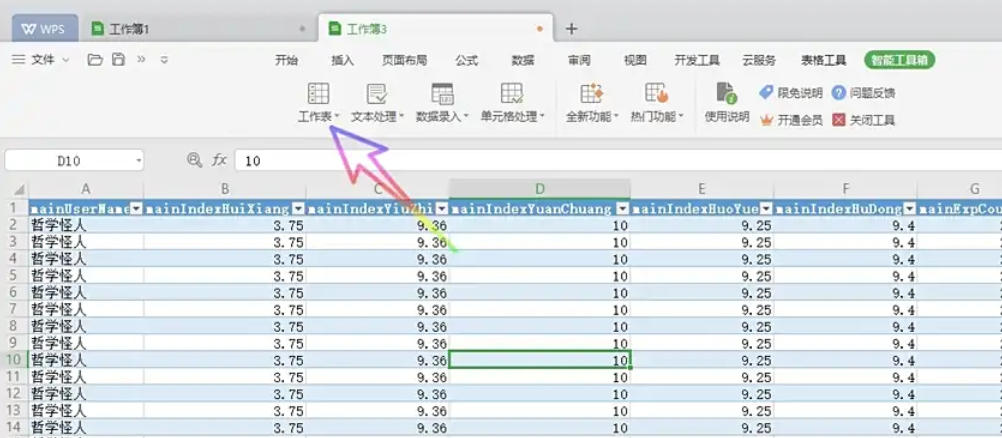
In the "Smart Toolbox" ribbon, find the "Worksheet" group.
Step 4
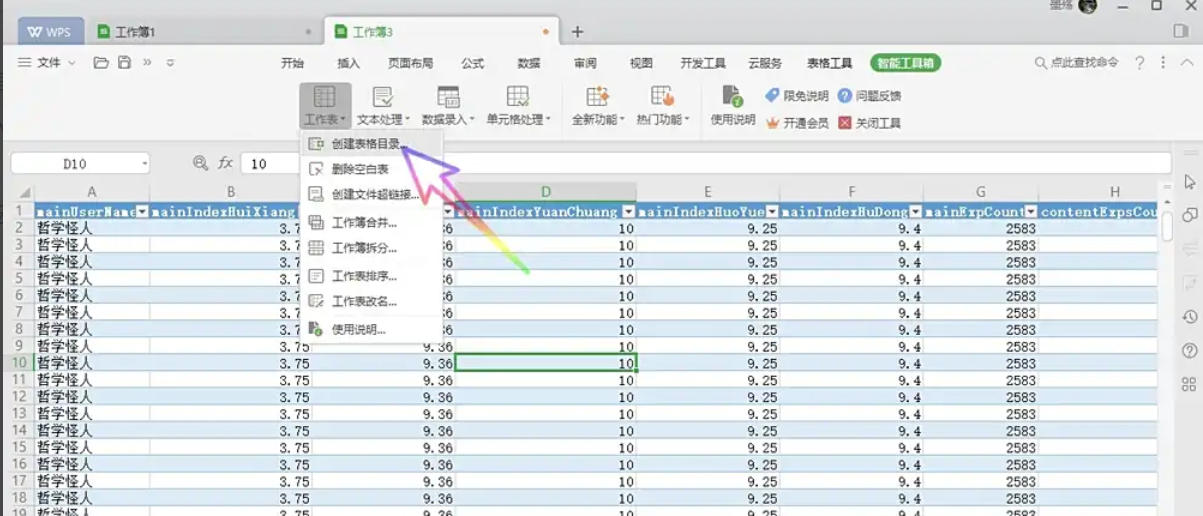
Click the "Create Table Directory" button.
Step 5
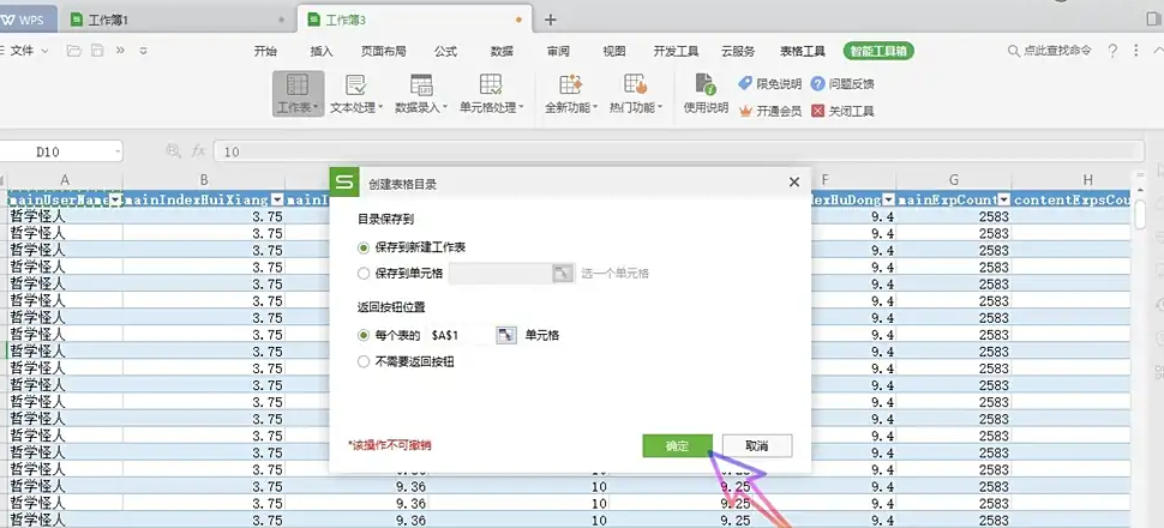
Check "Save to new worksheet" in the dialog box (the default option). Click the OK button at the bottom of the dialog box.

Step 6
In the generated table of contents sheet, click any sheet name (such as Sheet2).
The above is the editor of Huajun who has compiled for you how to create a table of contents in the WPS Office 2019 worksheet and how to create a table of contents in the WPS Office 2019 worksheet. I hope it can help you!


