Many people don’t know how to change the default output directory of the universal video format converter? The article brought to you today is how to modify the default output directory of the universal video format converter. If you still don’t know, let’s learn it with the editor.
Step 1: Double-click to open the "Universal Video Format Converter" software. See picture below

Step 2: On the main interface of Universal Video Format Converter, click the "Browse" button. See picture below

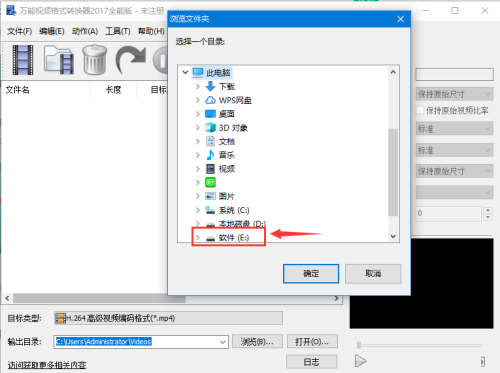
Step 3: In the "Browse for Folder" window that opens, click the drive letter (in this case, drive E). See picture below

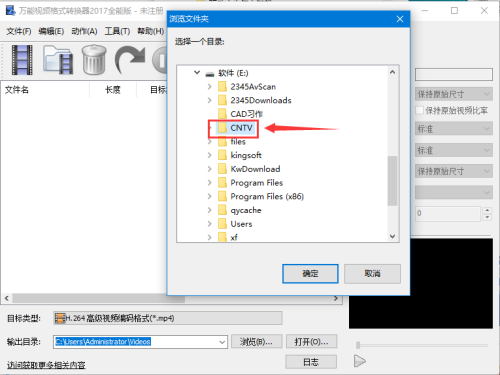
Step 4: Click the output folder under Select drive letter. See picture below

Step 5: After selecting the output folder, click the "OK" button. See picture below

Step 6: If there is no other operation, just click the "X" in the upper right corner of the main interface. See picture below

The above is the entire content of how to modify the default output directory of the universal video format converter brought to you by the editor. I hope it can help you.


