Many people don’t know how to create a new mvc web project in Visual Studio 2019? The article brought to you today is how to create a new mvc project in Visual Studio 2019 If you still don’t know the method of web project, let’s learn it with the editor.
The first step: Open the visual studio code editing tool. Click File-New-Project in the upper left corner (as shown in the picture).

Step 2: Select the asp.net web application (.NET Framework) and click Next in the lower right corner (as shown in the picture).

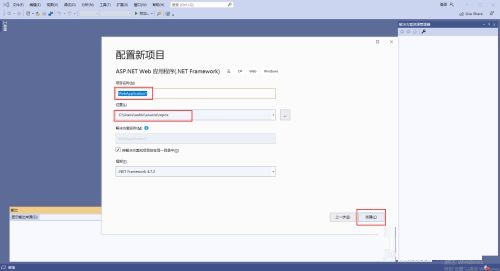
Step 3: Configure the new project. Enter your project name, select the project storage address, and click Create in the lower right corner (as shown in the picture).

Step 4: Select the mvc template and click the create button in the lower right corner (as shown in the picture).

Step 5: The application has been created and the project structure is as shown on the right (as shown in the figure).

Step 6: Click the Run button to run the project in the IIS server. Visual Studio will automatically call the browser to open the local address of the website (as shown in the figure).

Step 7: The project has been successfully run, and the browser correctly displays the web page (as shown in the picture).

The above is the entire content of how to create a new mvc web project in Visual Studio 2019 brought to you by the editor. I hope it can help you.


