使用EV录屏还不会录PPT课件? This section introduces the detailed steps of EV screen recording and PPT courseware. For those who don’t know yet, please follow the editor to learn. I hope it will be helpful to you.
1. Open EV screen recording. Before starting recording, click the small gear in the upper right corner to enter the settings interface, and adjust the video frame rate and save file format in the screen recording parameters.
2. Regarding the video frame rate, generally speaking, when recording courseware videos, the frame rate can be selected in the range of 8-10. The key point is to check the "Capture Window Enhancement" option. Due to the uncertainty of recording time, checking this option can enhance the stability of the recording window and avoid black screens or missing windows.
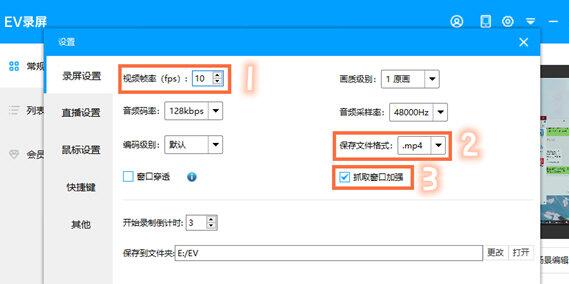
3. After adjusting the basic attributes, we need to adjust the image quality level of the recorded video. In order to ensure that the recorded video is smooth and high-definition, Xiao E recommends that you set the image quality level to the original painting.
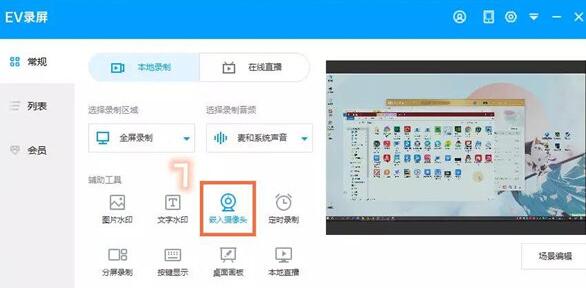
4. After adjusting, return to the EV screen recording homepage. We set the recording area to full-screen recording. If you need to explain the courseware, the recording audio option here is set to microphone and system sound.
5. If you want to record the camera screen into the video at the same time, choose to embed the camera, then adjust the resolution of the camera screen, and click OK.
Note that if we need to embed a camera for recording, we need to adjust the video frame rate in the settings to 30, so as to ensure that the camera picture is clear.
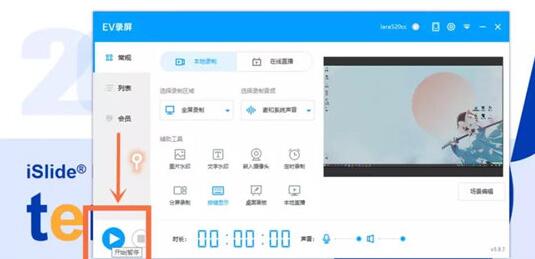
6. After all the settings are completed, open the PPT courseware that needs to be recorded, and then click the start button in the lower left corner of the EV screen recording to start recording. After recording is turned on, the EV screen recording interface will be automatically hidden, and we can stop recording through keyboard shortcuts.
7. You can also move the mouse pointer to the EV screen recording floating ball at any time to control the recording process at any time.
8. After the recording is completed, the EV screen recording will automatically pop up the video list interface, where you can view the completed video and storage path.
Here are the detailed steps for EV screen recording and PPT courseware sharing. Friends in need should hurry up and read this article.


