Recently, many netizens have said that they do not know how to install the ahci driver. For this reason, today I will share with you the installation steps of the ahci driver. Friends in need, come and take a look!
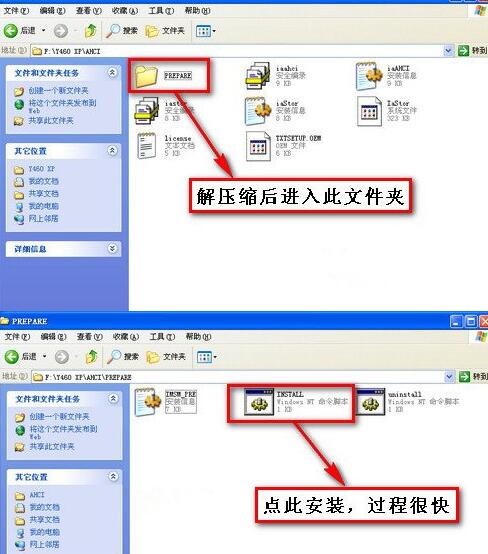
1. After downloading the ahci driver, use 360 compression software to decompress the file. Open the P43 45 AHCI folder. There are ahci driver 32-bit and ahci driver 64-bit for you to choose from. Select the folder that matches your computer system, and then select the PREPARE folder. After entering the folder, click IMSM_PRE.inf.
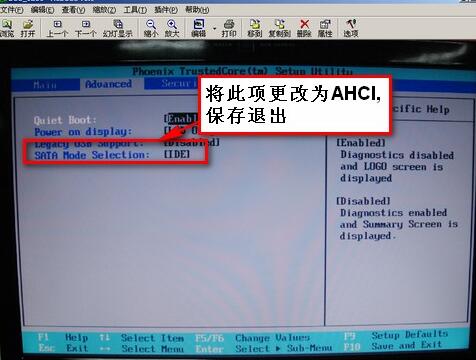
2. Restart the computer and enter the computer BIOS system. After entering the BIOS system, set the SATA working mode to the AHCI option. The method to modify the hard disk mode is "AHCI", and some are Enabled or Disabled.
Note: Different computer motherboards have different methods of entering the BIOS system.
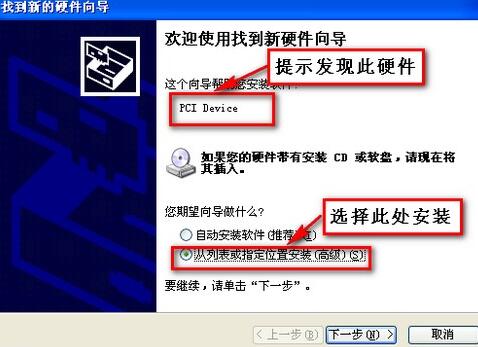
3. When the system startup is complete, the system prompts the Found New Hardware Wizard. Click [Finish].

4. Select the new hardware guide, click [Install from list or specified location], and click [Next] after completing the selection.
5. In the pop-up browse folder option, find the AHCI driver root directory you just decompressed, and click [OK] after finding it.

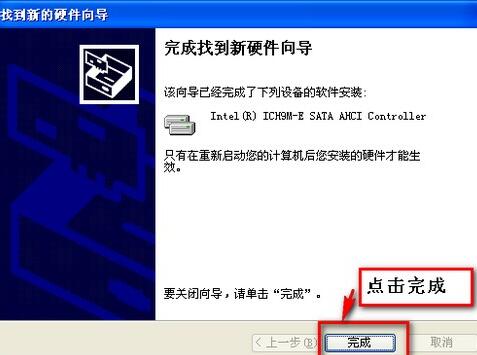
6. After completing the Find New Hardware Guide, click [Finish].
7. When the prompt "Windows has been installed to play with a new device and needs to be restarted to take effect" appears, click [Yes] to restart the computer.

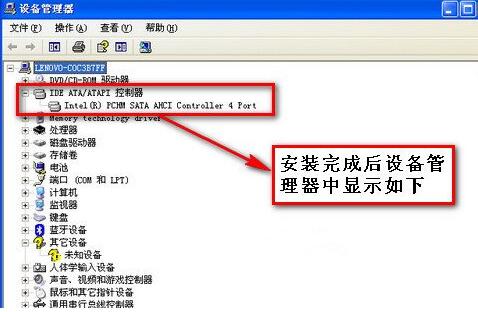
8. After restarting the computer, right-click My Computer and click "Manage" in the pop-up options. After entering the computer management interface, click Device Manager and then click IDE ATA/ATAPI controller. If you see the words AHCI, it means the ahci driver is installed.
The above explains the installation process of the ahci driver. I hope friends in need can learn it.