Printing documents is something we often encounter in our daily work and life. When we use a printer to print, we can generally only print one side and not both sides. There is no option to print on both sides when choosing to print. Due to work needs, the editor has been frequently exposed to printers recently, and has summarized some software experience. Next, the editor will teach you how to use the printer to set up double-sided printing.

Download the fast pdf virtual printer to the computer, install it on the computer, and set it as the default printer, so that we don’t always have to select the printer when printing files.
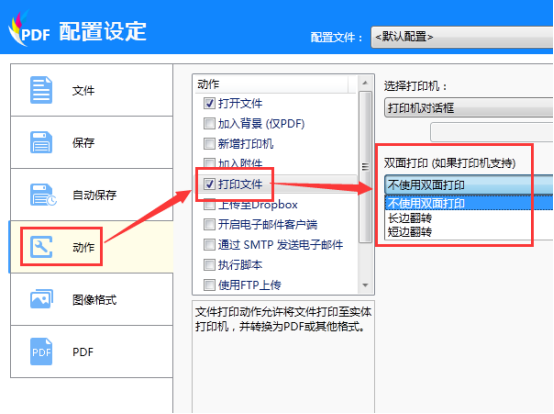
1. Select the "Action" option in the configuration settings, check "Print File" in the action, and select "Long Edge Flip" in the "Double-Sided Printing" area. This is "Short Edge Flip" to print the document as double-sided.
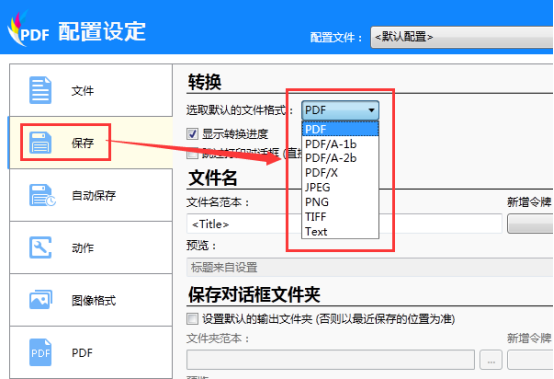
2. Then click the "Save" option and set the default file format here. After the default format is set, the file will be directly saved as the default format when printing.
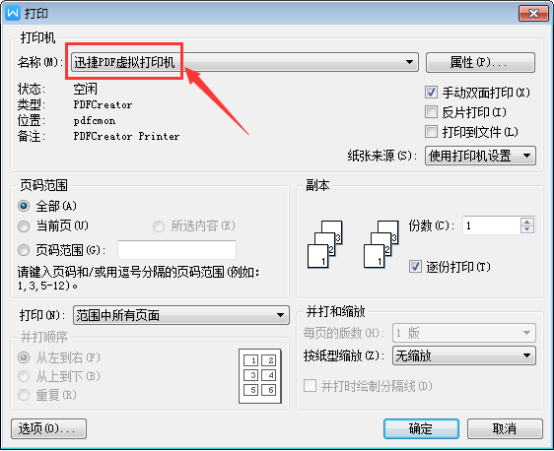
3. In the previous step, the editor saved the default format as pdf format. Next, the editor opened a word document, clicked the file in the upper left corner, and selected print. In the printing interface, the default printer name is Swift PDF Virtual Printer. If not, select Swift PDF Virtual Printer in the drop-down list.
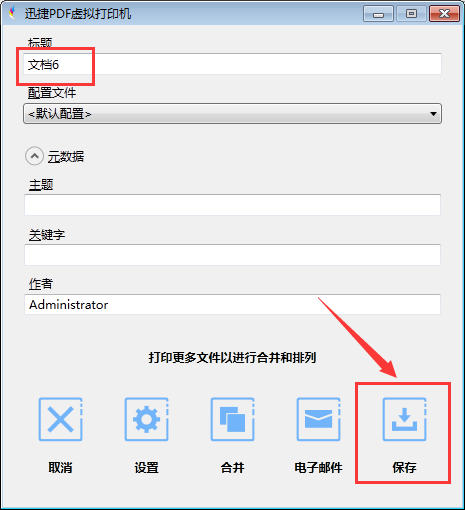
4. Next click "OK", Swift PDF Virtual Printer will pop up a registration interface, click "Trial", and save the files that need to be printed.
The above is how to use the fast pdf virtual printer for double-sided printing. Have you got it? Generally, only printers in print shops can print on both sides, but your printer cannot print on both sides? Then download the fast pdf virtual printer and try it!


