


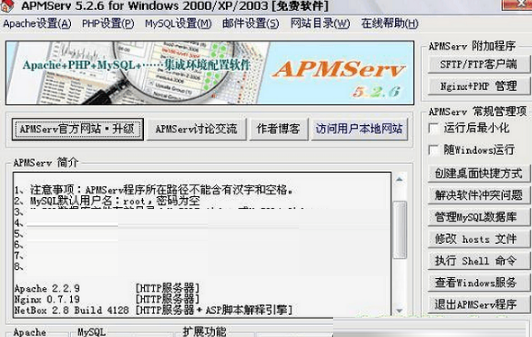
APMServ software introduction
apmserv is an easy-to-use and powerful fast PHP building tool that allows our users to quickly complete the quick building methods required by PHP through the software. The software includes things needed for website servers such as Apache, PHP, MySQL, Nginx, etc., and also provides users with a safe and reliable visual operation interface. Through this interface, users can intuitively perform related operations and complete the required server building work.
apmserv is a green software that does not require installation. You can prepare one on a USB flash drive and start quickly building work anytime and anywhere. Flexible mobility allows our users to easily back up and store on any computer. When needed, just click "APMServ.exe" to make relevant settings. apmserv combines the advantages of Apache's stability and security, and also provides our users with a simple and intuitive graphical management interface. It also supports various PHP and MySQL versions. It is a very easy-to-use and simple PHP quick construction tool. Users in need should not miss it.
APMServ function introduction
1. Create shortcuts
2. Solve software conflicts
3. Manage MySQL database
4. Modify the Hosts file
5. Execute Shell command
6. View Windows services
APMServ software features
The included components include the following:
Apache 2.2.9 [HTTP server]
Nginx 0.7.19 [HTTP server]
NetBox 2.8 Build 4128 [HTTP server + ASP script interpretation engine]
PHP 5.2.6 [PHP script interpretation engine]
MiniPerl 5.8 [Perl script interpreter]
Memcached 1.2.4 [key-value memory caching system]
MySQL 5.1.28 [MySQL database server]
MySQL 4.0.26 [MySQL database server]
phpMyAdmin 2.11.9.2 [MySQL database online management tool]
eAccelerator 0.9.5.3 [PHP script acceleration engine]
ZendOptimizer 3.3.3 [PHP script acceleration engine]
OpenSSL 0.9.8h [HTTPS (SSL) secure transmission protocol]
APMServ installation steps
1. Download the APMServ software from Huajun Software Park, and then unzip it to the current folder

2. Then select the location to release the folder and click Release
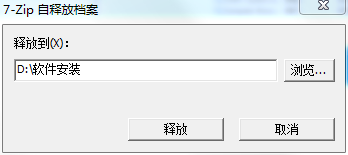
3. It is being released, wait patiently for a moment

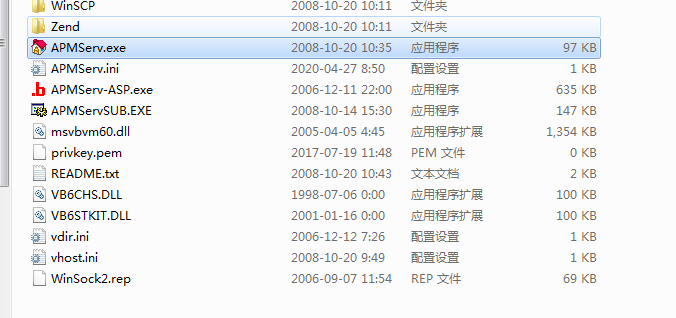
4. At this time, we open the APMServ.exe application in the folder
5. This software is a green version. Users can use it by just clicking to open it.
APMServ usage tutorial
1)apmserv configure virtual host
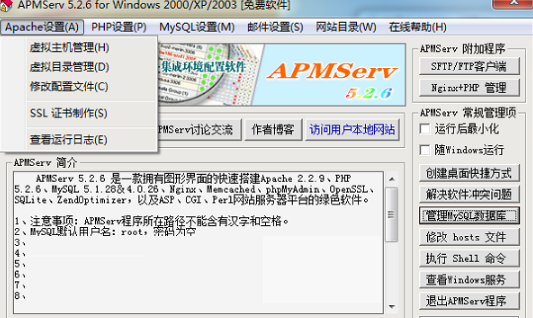
1. Open "Apache Settings" - "Fake Host Management"
2. Set the basic data of the new host. After setting, click "Save this virtual machine" to restart.

2) Quickly build Apache+PHP+MySQL with one click
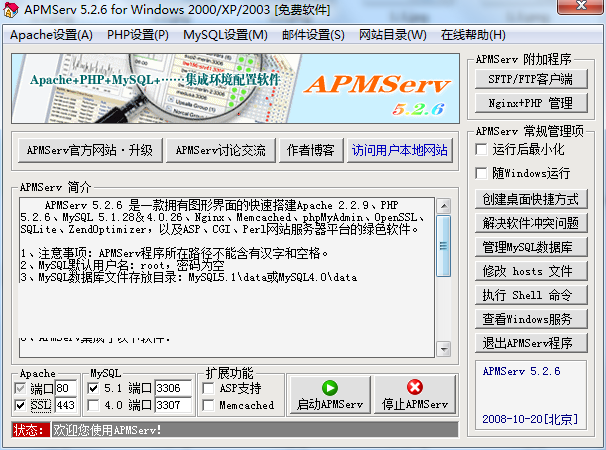
1. Run APMServ.exe, click "Start APMServ", and the status bar will prompt that Apache and mysql have started successfully.
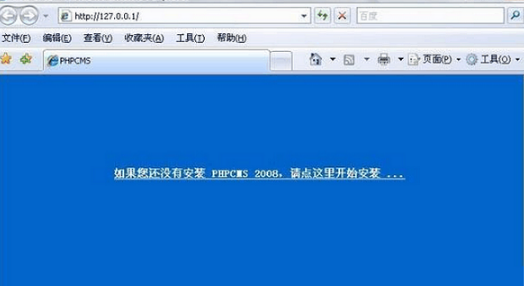
2. Click on the upper right corner to visit the local website or run http://127.0.0.1. Run http://127.0.0.1/phpinfo.php to view the running status of the php component. So far our Aphache+php+Mysql operation has been set up.

3. Download the latest version of the phpcms program from the phpcms official website. After downloading, unzip it to D:APMServ5.2.6wwwhtdocs. Run http://127.0.0.1 and the following screen will appear, prompting you to install the phpcms2008 program.
4. Click "Please click here to start the installation" and follow the prompts step by step. When filling in the database information, use the default database server, database account: root, password is empty (already told you above), you can choose the database name yourself, the database prefix can be the default, you can also modify it to what you want, then fill in the website administrator username, password and email, use the default for other things, click Next

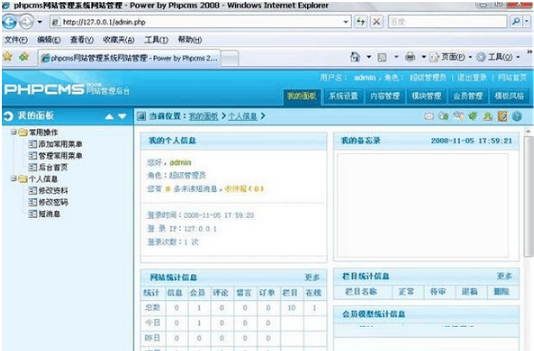
5. The installation is in progress, please wait. After about tens of seconds, the installation will be completed and jump to the interface as shown below.
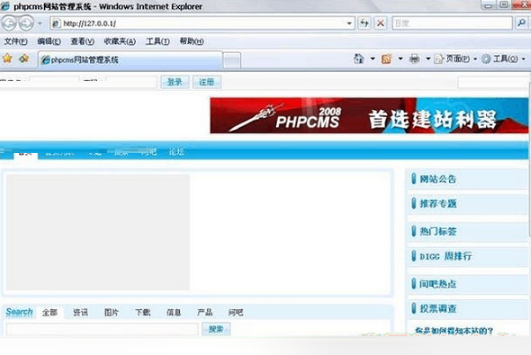
6. Run http://127.0.0.1. If the screen prompting you to install phpcms still appears, it doesn’t matter. It is a static page. Just delete the index.html downloaded from D:APMServ5.2.6wwwhtdocs or delete it in the background. After refreshing, a complete website belonging to the user will be ready.
APMServ FAQ
How to add a website to apmserv?
① After placing the program directory, we can click [Start APMServ] in the picture above, and the status will prompt success or failure! If it fails, it is because your port 80 is occupied. At this time, you need to turn off the software occupying port 80, such asThunder. ② Click on the website directory. This is the website file directory we mentioned above (here is the drive letter APMServ5.2.6wwwhtdocs where you stored it) ③ [Visit the user's local website] This button is for browsing your website. After clicking, the traffic controller will open and the page of your website will appear. The address is generally 127.0.0.1. You can also set it separately, which we will explain in ⑤. ④ This is a one-click entry when accessing phpmyadmin. It is used to manage the mysql database. Generally, the database username is root and the password is empty. If you don’t understand databases, don’t bother to study ④. ⑤ This part is used to select the port. You can easily customize the port information and choose the MYSQL version yourself.
How to uninstall apmserv?
Start-Control Panel-Uninstall-find apmserv, right-click and select apmserv to uninstall it
How does apmserv close the host header?
Stop the default site, create a new site and bind your domain name to use. In IIS, as long as there are no sites directly accessible through localhost or local IP, it will be fine.
apmserv修改文件目录?
Find the apache directory, modify the httpd.conf file under conf, and modify the DocumentRoot: DocumentRoot "f:/www"
Search for the sentence (This should be changed to whatever you set DocumentRoot to) and find the 2 lines below it
Directory is changed to:
Directory f:="" www=""
Then restart apmserv.
APMServ apache failed to start?
1. Possible reasons
1. Port occupancy problem
2. Path and file name issues
3. Configuration file problem
2. Detailed introduction
1. Port occupancy problem
This problem is relatively common and easy to solve. Usually, the Apache startup fails because IE or other installed programs occupy port 80. Before starting Apache, just change the port number to another unoccupied port. After changing the port to non-80, you need to add the port number after the address to access your own site, such as: Http://127.0.0.1:88
2. Path and file name issues
The port problem has been solved, but the startup still fails, why? We need to pay attention to a small detail, check the path where we installed APMServ, and make sure that no Chinese characters or spaces appear in the folder name of the installation path. After all, this is a personal work, and some places are not very thoughtful, resulting in some bugs.
3. Configuration file problem
3. After solving the above two problems, it is found that the Apache service still fails to start. Here I will tell you a more general method to solve the problem through an example.
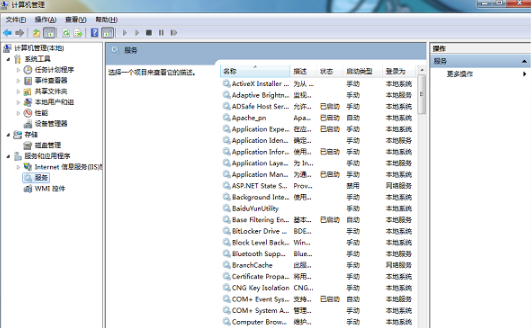
After installing APMServ, after starting the service, it prompts that Apache failed to start! After ruling out the above two situations, we open the local service to check, as shown in the figure
APMServ update log
1: Optimized performance
2: We are serious about solving bug problems
Huajun editor recommends:
In addition to APMServ, which is very convenient, there are alsoQuick Easy FTP Server,Telnet Server,Foxmail Server,xampp,WinShellRelated software is available for download. If you need it, please click to download and use it.


Useful
Useful
Useful