How to use:
Step one:
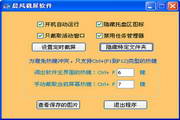
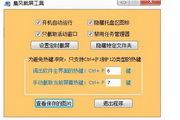
Unzip the "timecap.exe" file in the downloaded compressed package to a certain directory, double-click to run it. When the software is run for the first time, a configuration interface will pop up. You can set whether to "run automatically at boot", "hide the tray area icon", "capture only active windows" and "disable the task manager" according to your own needs.
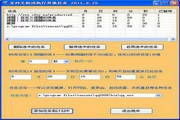
Step 2: Click the "Set Scheduled Screenshot" button to set the scheduled screenshot parameters, such as how often to take a screenshot and the path to save the screenshot.
Step 3: You can hide the folder where the screenshots are stored according to your own needs. Click the "Hide Specific Folder" button to hide the folder where the screenshots are stored (of course, you can also hide other folders or files you want to hide, just drag them to the window). After hiding the folder in this way, the system's search for hidden files will not be able to find it. You can click the "Unhide Selected Item" button to restore the normal display of hidden files.
Step 4: Set the hotkey to bring up the main interface of the software. By default, pressing the Ctrl and F6 keys at the same time will bring up the main interface of the software. You can also modify this hotkey by entering other numbers. If you press the Ctrl and F7 keys at the same time, you will take a manual screenshot regardless of whether you have set the scheduled screenshot parameters before. You can also modify this default hotkey. If you want to view the pictures automatically saved after taking the screenshot, you can click the "View Saved Pictures" button on the main interface, and the software will automatically open the picture folder (even if you have set this folder to be hidden before).
Step 5: After completing the above steps, click the minimize or close button in the upper right corner of the main window to minimize the program to the tray area in the lower right corner of the desktop and automatically take screenshots at a scheduled time according to your previous settings. If you want to exit the program, click the "Exit Program" button on the main interface.
Step 6: After the software is minimized to the tray area in the lower right corner of the desktop, if you have previously set "hide tray area icon", you need to use the hotkey set in step 4 to bring up the main interface of the software. Before the main interface is displayed, the user will be asked to enter a password. The default password is blank. You can change it to your own password when using it for the first time.
Step 7: After the first run, the software will minimize itself to the tray area in the lower right corner when it is run again. If you set up a hidden tray area icon, it will automatically run in the background.
Friendly reminder: If you want to better hide this program, you can rename the default program file name "timecap.exe" and put it in a private and safe location. It is best to hide the folder where it is located using the hiding function of this software. More functions are waiting to be explored by yourself.
This software is only used to satisfy your personal curiosity. Please do not use it for illegal purposes, otherwise you will be responsible for the consequences.
Version 1.1 fixes the bug that user settings cannot be saved in some cases, and also improves the running speed.







Useful
Useful
Useful