


MSOfficeCAI software features
Specialized learning system, the practice process is the learning process;
The software provides two working modes: local mode and service mode;
You can refer to the operating instructions for the practice process;
Each exercise question is set with assessment indicators, and practitioners can make targeted modifications based on the assessment indicators;
The software can connect to the server and update automatically;
Software users are divided into different roles such as teachers, students, administrators, and network users.
MSOfficeCAIInstallation guide:
1. Download the installation package
Download the installation package and unzip it. The files in the installation package are shown in Figure 1.

Figure 1 Installation package file list
Among them:
Installation instructions.html - Installation steps and FAQ instructions. It is recommended to review this instruction before installation.
VC_redist.x64.exe——Microsoft Visual C++ 2015-2019 Redistributable (x64) installation files
Mysql-connector-odbc-8.3.0-winx64.msi——MySQL driver installation file
setup.exe and setup.msi——MSOfficeCAI installation files
windowsdesktop-runtime-8.0.6-win-x64.exe——.Net Runtime installation file
2. Uninstall the installed version
If you have already installed an old version of MSOfficeCAI, you need to uninstall the old version first. If you have not installed it before, skip this step.
Find the MSOfficeCAI shortcut in the "Start" menu, right-click the mouse and select "Uninstall" to enter the "Control Panel Programs and Features Uninstall or Change Programs" window, as shown in Figure 2.
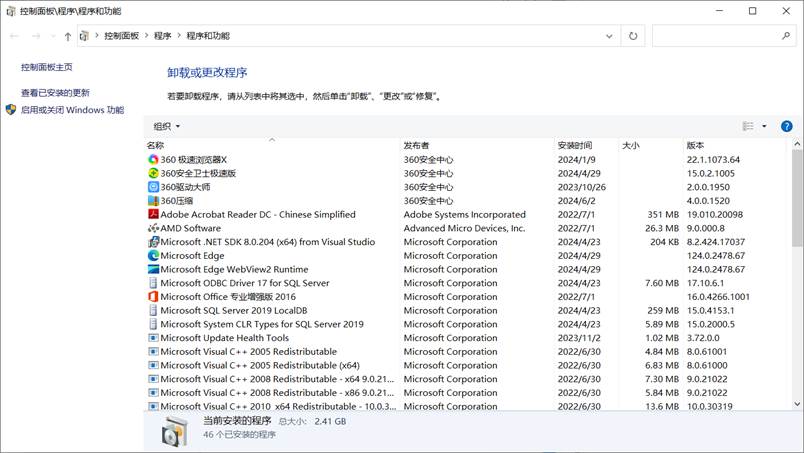
Figure 2 Uninstall or change programs
In this window, click to select MSOfficeCAI and right-click to select "Uninstall" and follow the prompts, as shown in Figure 3.
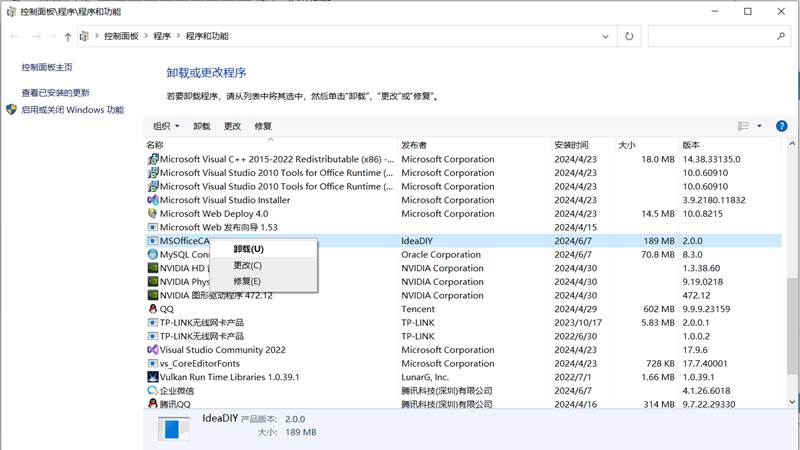
Figure 3 Uninstaller
3. Install the MySQL driver
1.Install Microsoft Visual C++ 2015-2019 Redistributable (x64)
Double-click to run “VC_redist.x64.exe” in the installation package and follow the prompts. If it has been installed in the system, an error will be reported when installing again, as shown in Figure 4. At this point, just click the "Close" button.
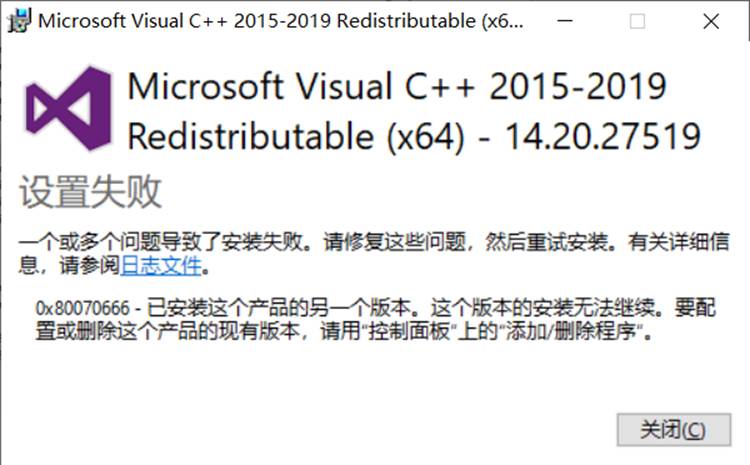
Figure 4 Installed error report
2. Install mysql-connector-odbc-8.3.0-winx64
Double-click "mysql-connector-odbc-8.3.0-winx64.msi" in the installation package and follow the prompts. In "Setup Type" interface, select "Typical", as shown in Figure 5.
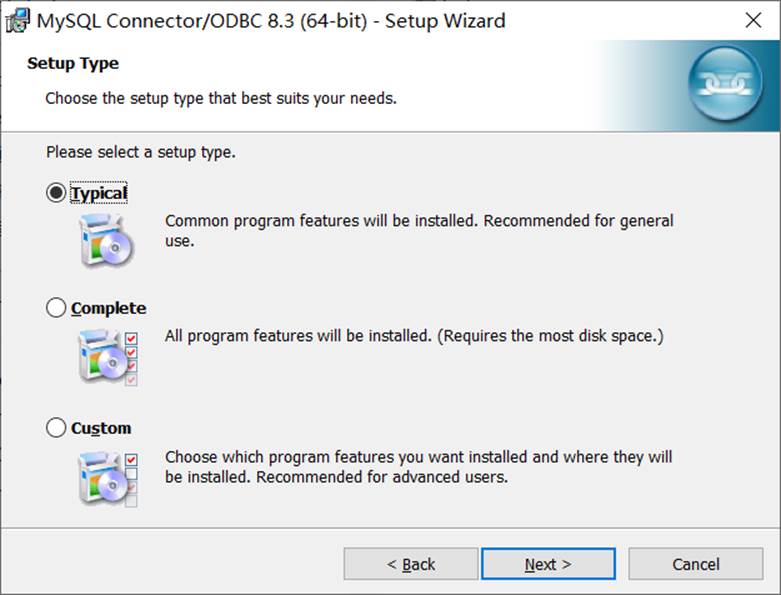
Figure 5 Installation type selection
Note: If it has already been installed, the interface shown in Figure 6 will appear. Click the "Cancel" button to exit.

Figure 6 Installed prompts
4. Install MSOfficeCAI
Double-click "setup.exe" in the installation package and follow the prompts. After successful installation, a shortcut to launch the program will be created on the desktop and start menu, as shown in Figure 7.


Figure 7 Shortcut
Note: It is recommended not to change the default settings in each step during the installation process.
When running for the first time, you will be prompted to download and install .Net Runtime, as shown in Figure 8.
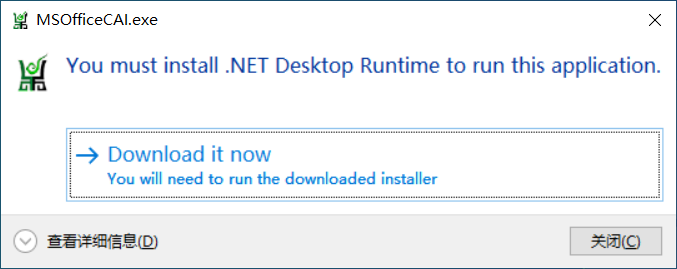
Figure 8 Prompt to install .NET Desktop Runtime
After clicking the "Download it now" button, the installation file will be downloaded from the official website, as shown in Figure 9.
Figure 9 Download .NET Desktop Runtime
After the download is complete, run the file and follow the prompts to install it, as shown in Figure 10.

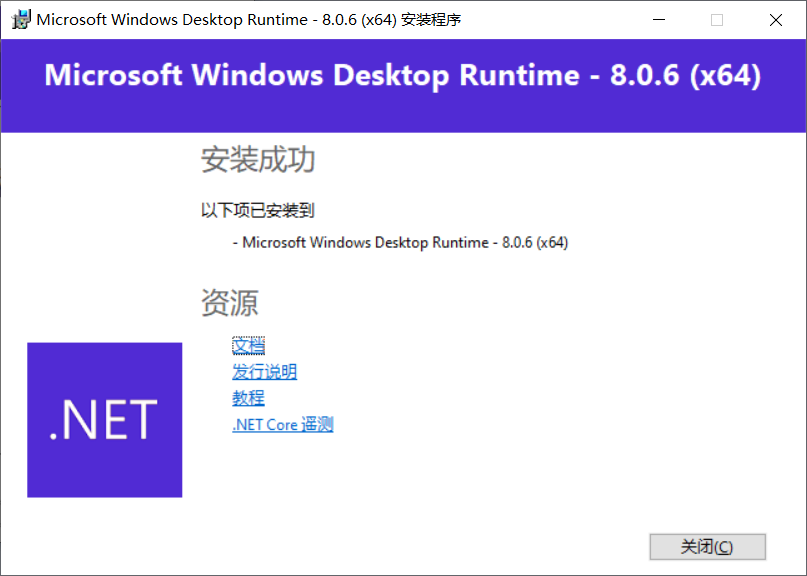
Figure 10 Installing .NET Desktop Runtime
If you cannot connect to the network, you can directly double-click "windowsdesktop-runtime-8.0.6-win-x64.exe" in the installation package to install. After the installation is complete, you can use the software normally.
Usage tutorial:
The usage permissions of student and network user roles are basically the same. The difference is that the data generated by the student role when using the platform will be synchronized to the server, while the network user role will not.
(1) Display interface
After opening the software, the display interface is shown in Figure 1.
The software provides two working modes: local mode and service mode. By default, the server will be connected to get the latest information. If the server connection fails, the prompt shown in Figure 2 will appear.
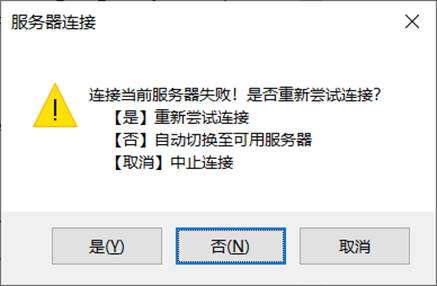
Figure 2 Connecting to the server
The dialog box prompts 3 options, namely:
Yes - Retry connecting to the current server.
No—Automatically switch to an available server. The software provides multiple servers to back up each other. When one server is unavailable, you can choose to switch to another server.
Cancel - terminate the connection, that is, no longer connect to the server, and switch to local mode.
If all servers are unavailable (or "Cancel" is selected in the dialog box shown in Figure 2), you will be further prompted to enter local mode, as shown in Figure 3.
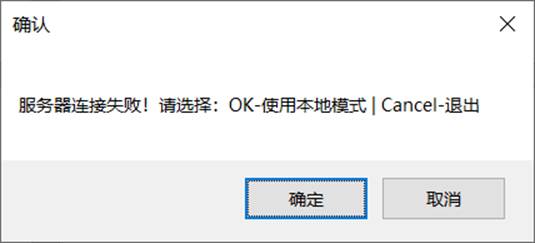
Figure 3 Local mode confirmation
Click the "OK" button to work in local mode; click the "Cancel" button to exit the software.
(2) Automatic update
After opening the software, if the server is available, it will automatically connect to the server to check for updates (this process will be skipped in local mode). If there is an update, the program is automatically downloaded from the server to complete the update, as shown in Figure 4.
After the update is completed, the main program will be started again.
(3) User login
After starting the main program, the user login interface will be displayed, as shown in Figure 5.
After entering the user and password, click the login button to confirm the login. After the user is authenticated, synchronization of local data and server data is started, as shown in Figure 6. (Note: Internet users do not have this function)
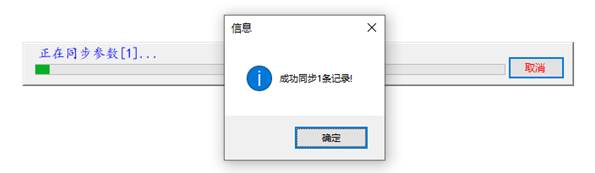
Figure 6 Data synchronization
(4) Main interface
After successful login, the main interface will be displayed. The software provides two practice modes: chapter mode and task mode. The main interfaces are shown in Figure 7 and Figure 8 respectively.
The two modes can be switched through the menu, as shown.

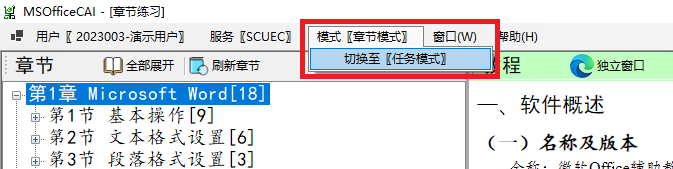
Figure 9 Practice mode switching
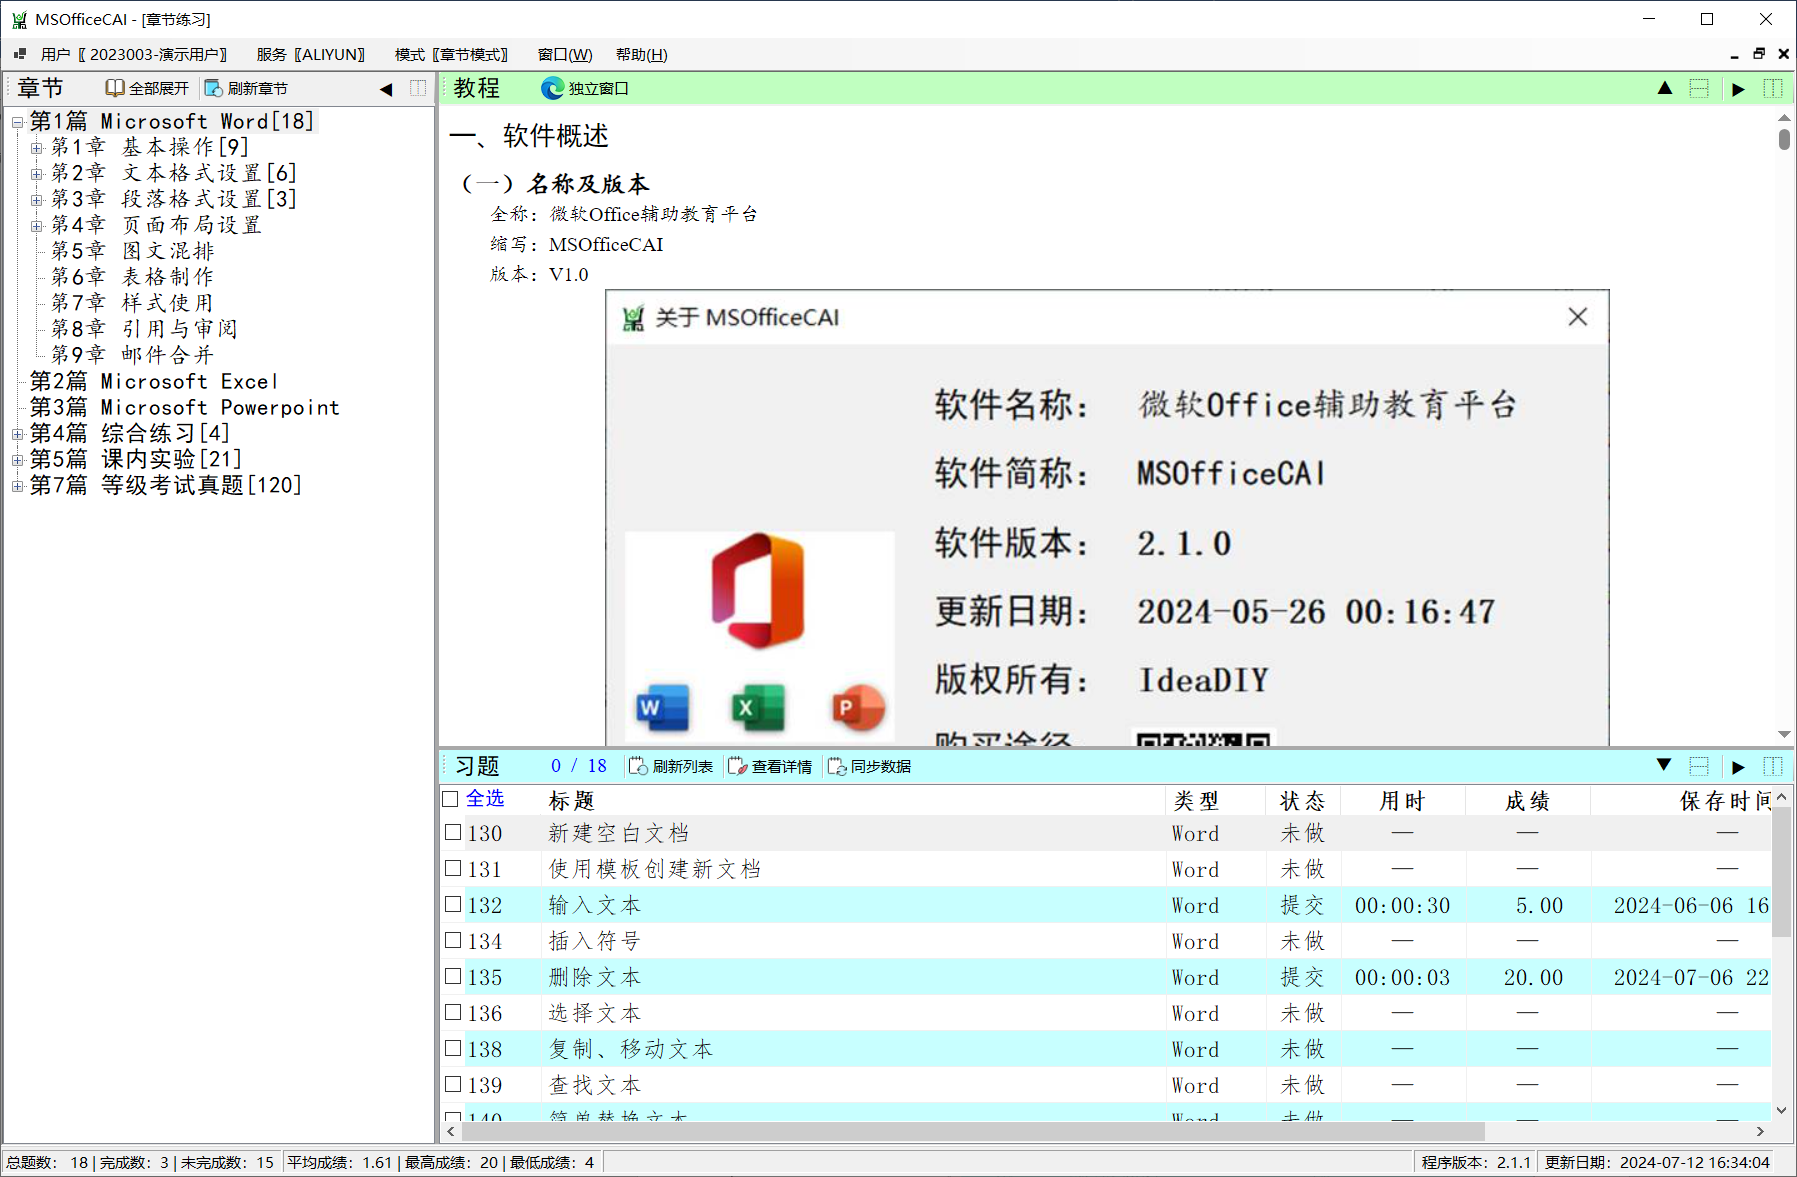
(5) Chapter mode main interface
In the main interface of chapter mode, the left side is the chapter pane, the upper right side is the tutorial pane, and the lower right side is the exercise pane.
1. Chapter Pane
In the chapter pane, the chapter structure displays the knowledge system in a tree menu. There are two toolbar buttons in the upper part of the chapter pane: Expand All, click it to expand all nodes of the chapter structure; Refresh Chapter, used to re-obtain chapter data from the database and display it.
After clicking on a knowledge point in a chapter, the online tutorials and exercises for this knowledge point will be displayed in the tutorial pane and exercise pane respectively, as shown in Figure 10.
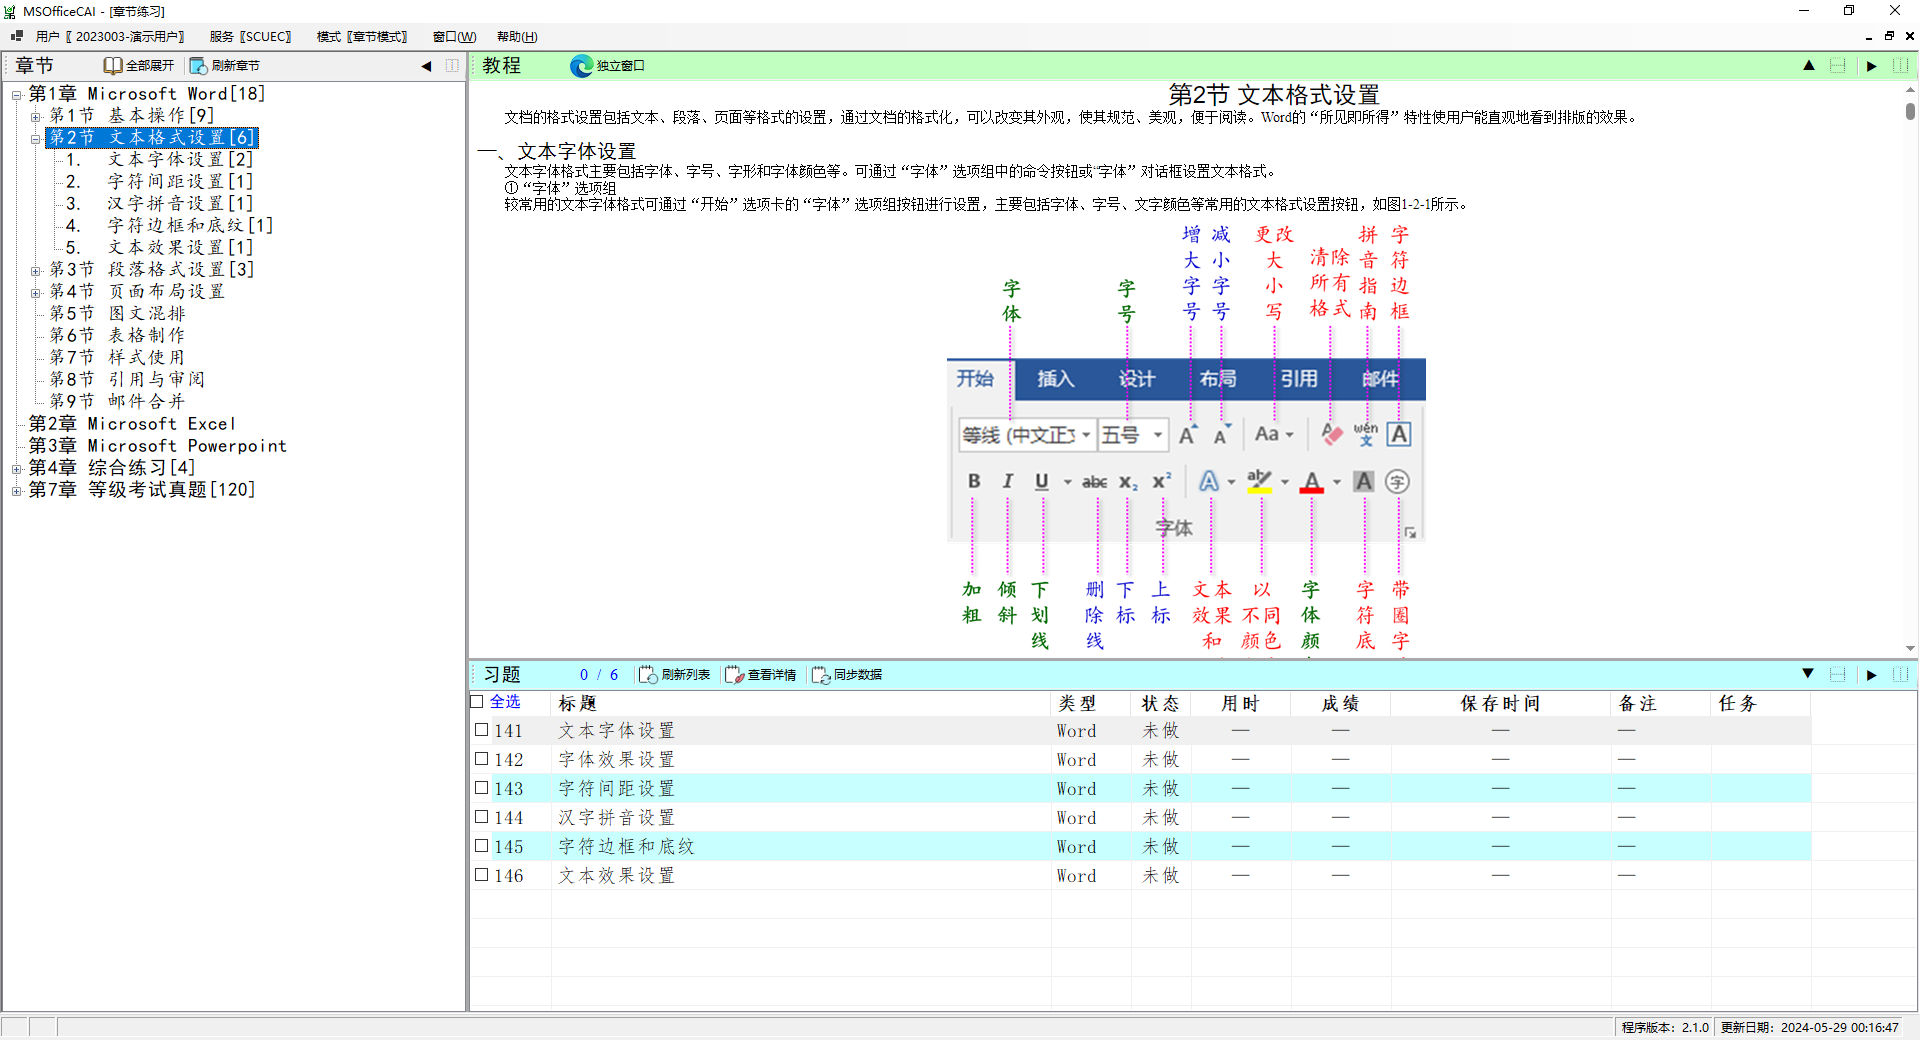
Figure 10 shows the tutorial and exercises
The two buttons on the right side of the toolbar of the chapter pane are used to collapse and expand the chapter pane respectively. You can also drag the gray dividing line between the chapter pane, the tutorial pane, and the exercise pane to adjust the width of the left and right panes, as shown in Figure 11.

Figure 11 Pane folding and unfolding
2. Tutorial Pane
The tutorial pane uses the built-in browser to display the corresponding tutorial. You can also click the "Independent Window" button in the upper toolbar of the pane to display the tutorial separately in the system browser.
There are four buttons on the right side of the toolbar, which are: fold the chapter pane up, expand the chapter pane down, collapse the chapter pane and exercise pane to the right, and expand the chapter pane and exercise pane to the left. You can also drag the gray dividing line between the chapter pane and the exercise pane to adjust the height of the two panes, as shown in Figure 12.
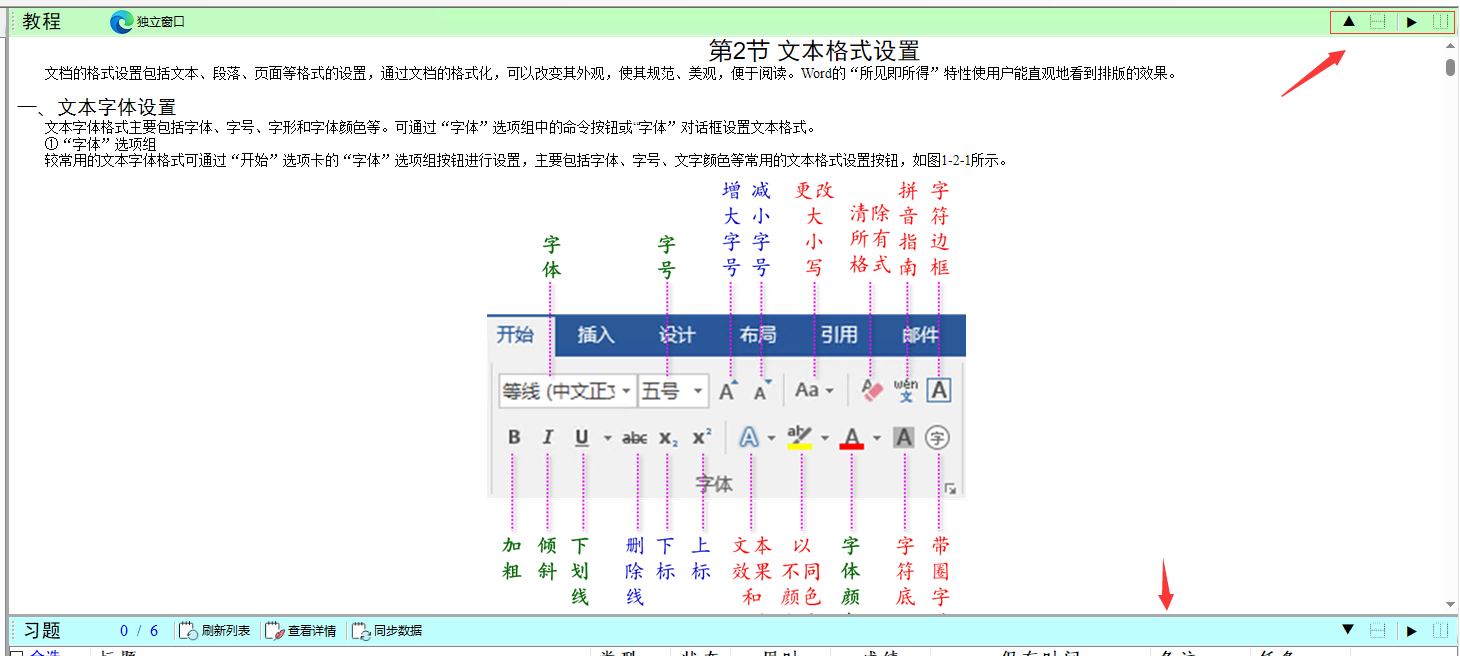
Figure 12 Pane folding and unfolding
3. Exercises pane
After clicking on a knowledge point in the chapter pane, the exercise list of the knowledge point will be displayed in the exercise pane, as shown in Figure 13. The list displays the question number, title, type, status, time taken, score, storage time and other information of the exercises.

Figure 13 View exercises
The toolbar above the pane provides seven function buttons, namely:
Refresh the list - re-read the exercise information from the database and display it;
View details - enter the details interface to view the detailed information of the exercises and exercise history information;
Synchronize data - synchronize local practice data to the server;
The functions of the four function buttons on the right are similar to the tutorial pane.
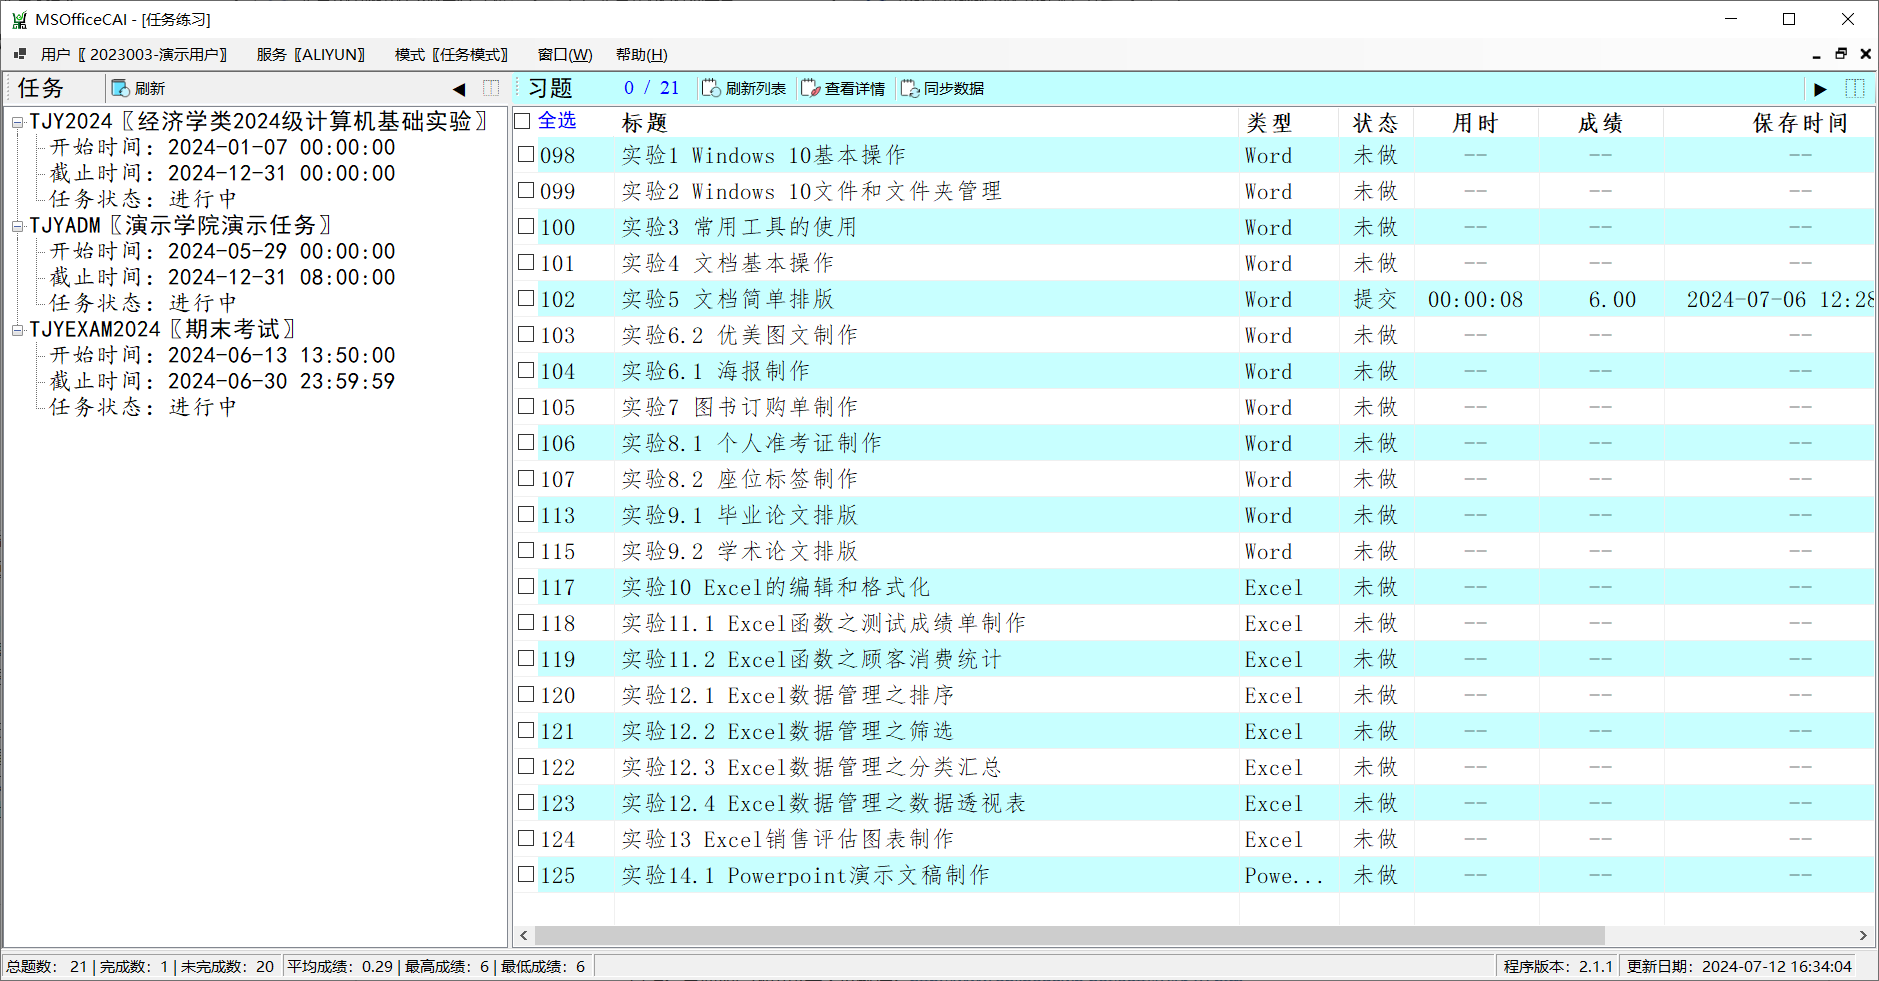
(6) Mission mode main interface
In the main interface of task mode, the task pane is on the left and the exercises pane is on the right.
1. Task pane
In the task pane, the task list is displayed in a tree menu, displaying information such as task number, title, start time, deadline and status, as shown in Figure 14.

Figure 14 Task list
After clicking on a task, the exercises required by the task will be displayed in the exercise pane.
2. Exercises pane
The display and operation of the exercise pane in task mode are similar to those in chapter mode.
(7) View exercise details
Click to select an exercise in the exercise list, and click the "View Details" button in the exercise pane toolbar to enter the exercise details interface, as shown in Figure 15. You can also double-click an exercise to view details.
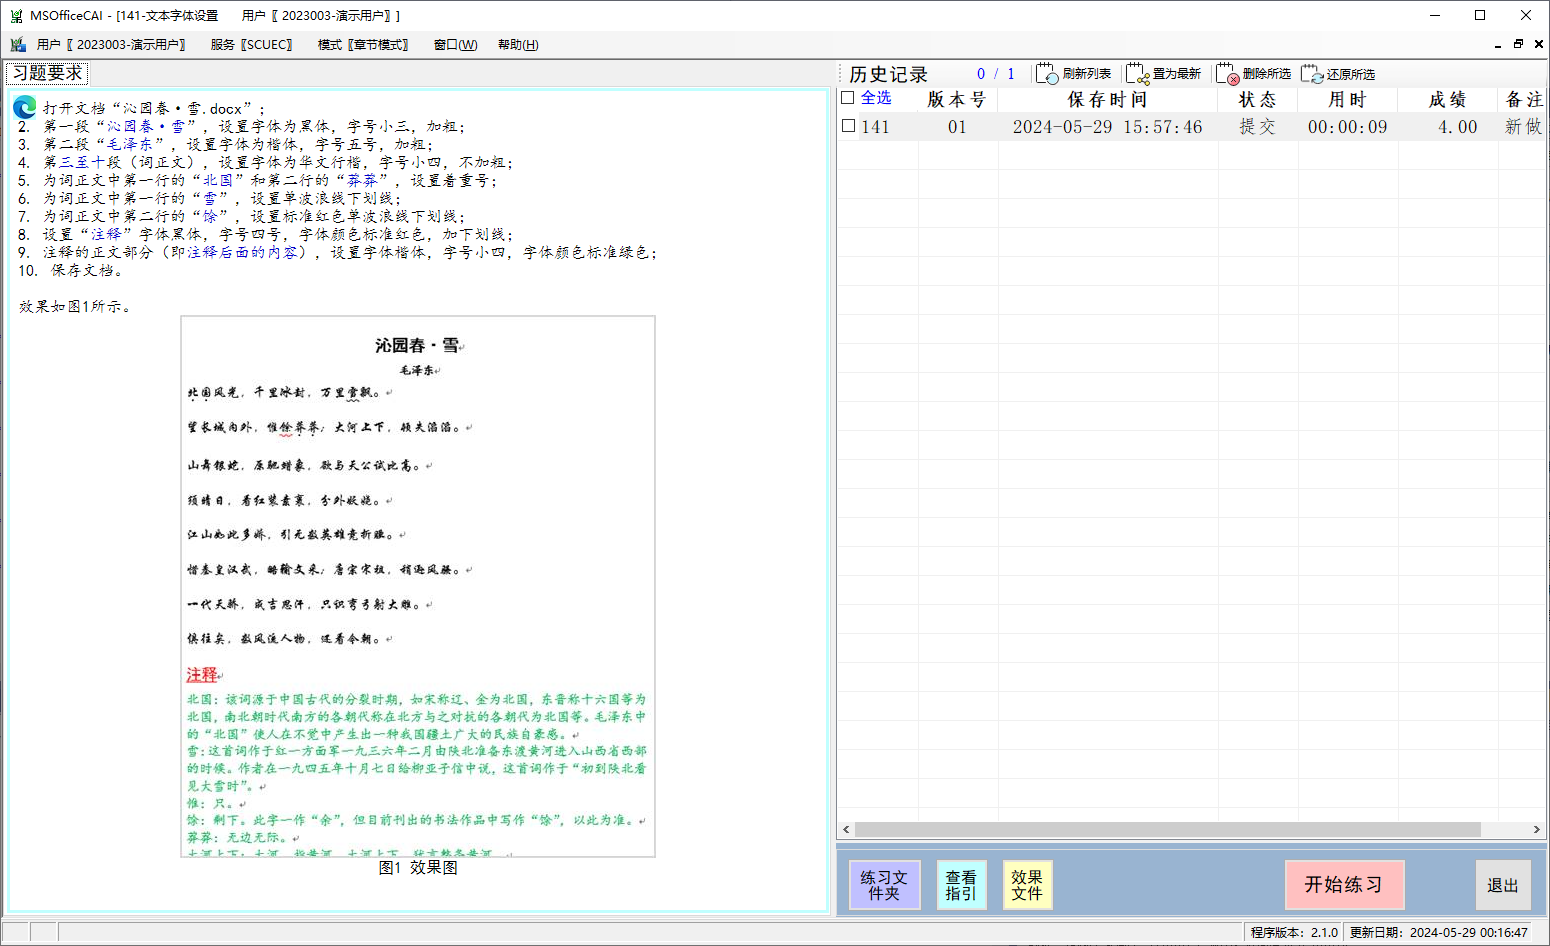
Figure 15 View exercise details
The exercise requirements and operating instructions are displayed on the left side of the window. By default, the operation guide is not displayed. You can click the "View Guide" button in the lower right part of the window to display it, as shown in Figure 16.
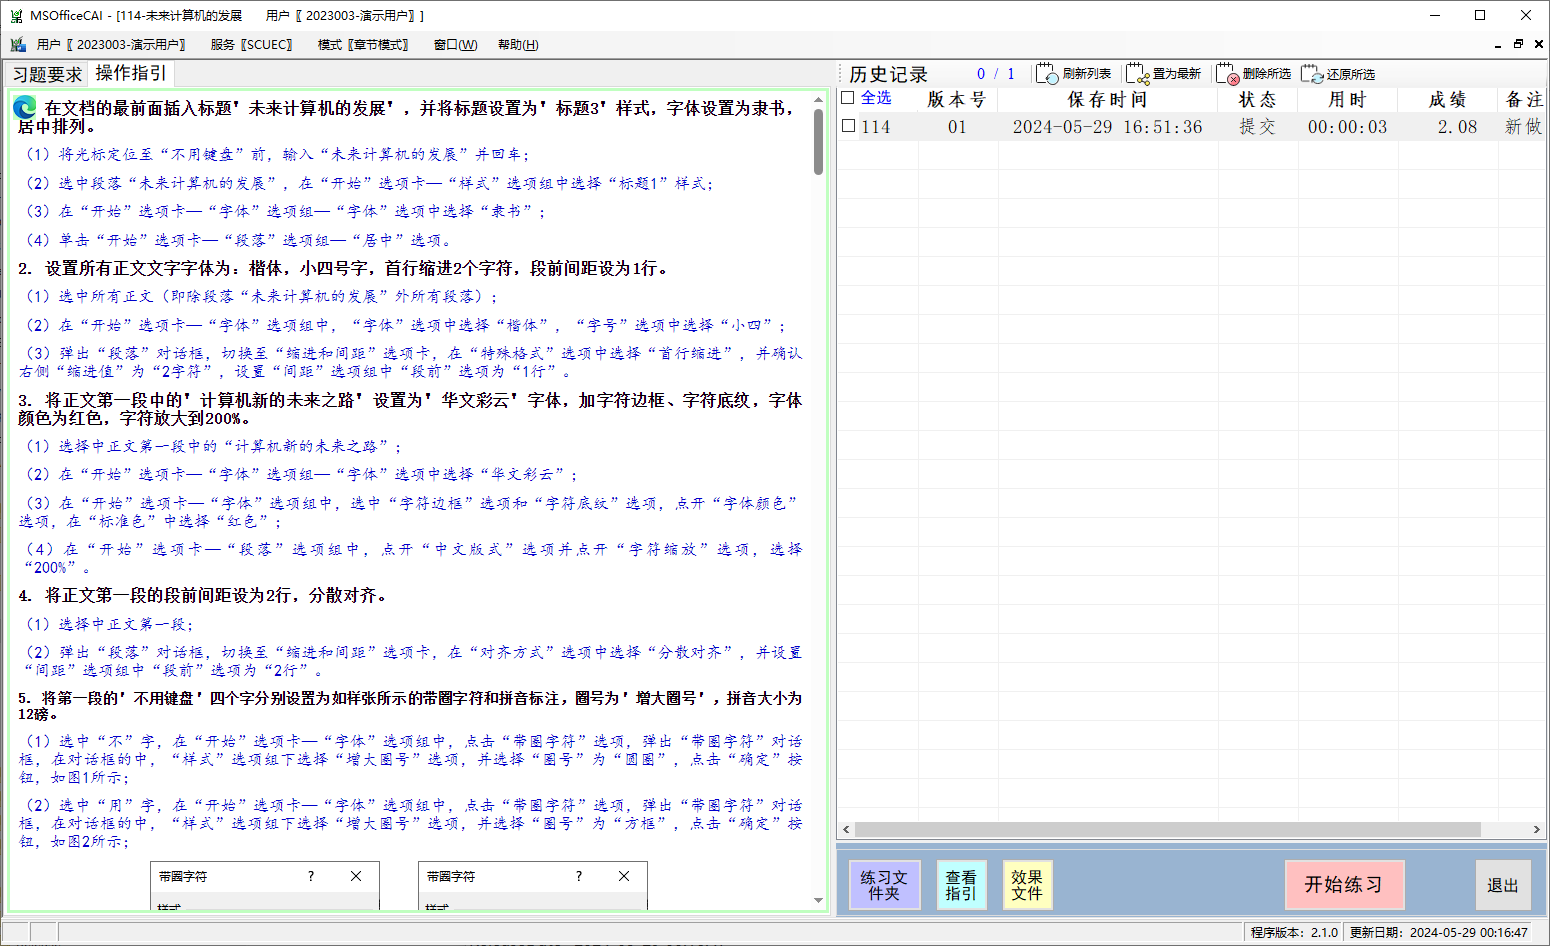
Figure 16 View operating instructions
Outline of the exercise requirements and operation guidelines to be displayed separately in the system browser by clicking on the browser icon in the upper left corner of the pane.
The upper right part of the window is the history pane, which is used to display practice history. The toolbar above the pane provides four function buttons, namely:
Refresh the list - read the latest historical records from the database and display them;
When there are multiple historical records, you can set one of them to the latest status. However, deleted records cannot be updated.
Delete selected—click to select a historical record or select multiple historical records through the checkbox on the left to delete.
Restore selected - If you delete it by mistake, click to select a historical record or select multiple historical records through the checkbox on the left to restore.
In addition, you can double-click a historical record to view detailed scoring, as shown in Figure 17.

Figure 17 View rating details
The lower right part of the window is the function button area, including the following function buttons:
Practice folder - open the practice folder in File Explorer, the system default is C:Exec. All exercise material files are in this folder. All exercise files must be saved in this folder to be valid.
out out out out out of the stylus.
Effect file - directly open the effect file of the exercise. If your system settings do not allow viewing effects files, this button will not be visible.
Start practicing - Begin the practice process of this exercise.
Exit - Close the exercise details window.
(8) Start practicing
Click the "Start Practice" function button in the exercise details window to start practicing the exercise. If this is not the first time you practice this question, the system will prompt you whether to start over, as shown in Figure 18.
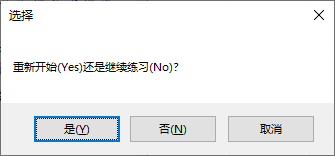
Figure 18 Whether to start again
Selecting "Yes" (i.e. "Restart") will clear the previous practice data for this question and treat it as the first practice; selecting "No" (i.e. "Continue practicing") will continue on the basis of the most recent practice, and the practice duration will also be added to the length of the most recent practice; selecting "Cancel" will give up this practice.
After starting the exercise, the main interface will be hidden and the main exercise interface will be displayed, as shown in Figure 19.

The title of the main exercise interface will display the exercise title, and the exercise requirements will be displayed below the title.
The software will automatically open the document that needs to be operated according to the exercise settings. The exercise requirements will be displayed in a small window, and the window will be on top. At the same time, the exercise requires the timer on the lower left to start timing.
There are function buttons on the right side of the timer, among which: click the "Submit Inspection" button to submit the system inspection score; click the "Save and Exit" button to save the operated document and exit the practice interface without submitting the inspection score; click the "Exit without saving" button to directly exit the practice interface without saving the document or submitting the inspection score.
1. Pin the window to the top/unpin the window to the top
After starting the exercise, the window will be on top by default. At this time, you can click the "Cancel Pin" button to cancel the pinned status of the exercise requirement window. At this time, the document window and the exercise requirement window will be displayed side by side, as shown in Figure 20.

2. View the exercise folder
All files and documents related to the exercises are saved in the exercise folder (the system default is C:Exec). Clicking the "Practice Folder" button will open the practice folder in the file explorer, as shown in Figure 21.
Figure 21 Open the practice folder
3. View/hide operation guide
You can click the "View Guide" button to display the operation guide for this exercise, as shown in Figure 22.
Instructions will appear below the exercise requirements. After the instructions are displayed, the "View Guidelines" button will change to "Hide Guidelines". Click the "Hide Guidelines" button to hide the instructions.
4. View exercise requirements and operating instructions in a separate window
There is a browser icon in the upper left corner of "Exercise Requirements" and "Operation Guide". Click it to open the "Exercise Requirements" and "Operation Guide" respectively in the system default browser, as shown in Figure 23.
Figure 23 Browser opens
(9) Submit for inspection
After the document operation is completed and saved, click the "Submit Inspection" button in the practice interface to submit the system inspection score. The interface is shown in Figure 24. The scoring interface will automatically appear side by side with the document interface.

The interface toolbar is shown in Figure 25.
Figure 25 Toolbar
Among them: "Exercise Requirements", "Operation Guidelines" and "Effect Files" are used to view exercise requirements, operation guidelines and effect files respectively; "Horizontal Side by Side" and "Vertical Side by Side" respectively adjust the scoring window and the document window to be displayed horizontally and vertically side by side; "Resubmit" means to check the scoring again after the document is modified; "Export Details" exports the scoring details to an Excel table, and "Export Text" exports the scoring details to a text file; "Exit Grading" returns to the main interface of the program.
The upper part of the main interface displays the statistics of the total score and score details. The lower part displays detailed scores in list form. Each scoring rubric displays two lines. The first row displays the scoring rubric information, and the second row displays the user's answer status and results.
If the user answer is consistent with the reference answer, the detailed result is correct; otherwise, it is wrong, and the background color of the first line changes to red.
1. View side by side
To facilitate comparison and review of answer questions, you can click the "Horizontal Side by Side" or "Vertical Side by Side" button in the toolbar. At this time, the scoring interface and the document window will be displayed side by side horizontally or vertically, as shown in Figure 24 and Figure 26 respectively.
2. Wrong positioning
When displayed side by side, double-click a row in the rating details (mainly for the row displayed as an error), you will find the corresponding document part in the document window, and select the part, as shown in Figure 27.
3. Resubmit
After locating the error, you can make targeted modifications in the document. After the modification is completed, you can click the "Resubmit" button in the toolbar to submit the modified document to the software for inspection and scoring, as shown in Figure 28.
Figure 28 Resubmit
You can resubmit multiple times until you achieve the desired result.
4. Check the exercise requirements/operation instructions
There are two buttons "Exercise Requirements" and "Operation Guidelines" in the toolbar. You can view the exercise requirements and operation guidelines respectively in the browser.
5. Export details/export text
The toolbar provides two buttons, "Export Details" and "Export Text", to export the scoring details into Excel files and text files respectively, as shown in Figure 29.
Figure 29 Export details
6. Exit rating
If you want to exit grading, you can click the "Exit Grading" button to return to the main interface of the program.
(10) Upload practice data
The user’s practice mode is local mode, that is, the practice data is saved in the local database. If you want to synchronize exercise data to the server, you can click the "Sync History" button in the toolbar of the exercise window to upload it. When the upload is completed, the number of uploaded data items will be displayed, as shown in Figure 30.
(11) Exit the software
When you need to exit the software, just click the close button of the window. When exiting, if you have done new exercises and the history has not been synchronized manually, it will be automatically synchronized, as shown in Figure 31.
Figure 31 Exit pre-synchronization
Note: Since the computer in the computer room will automatically restore after shutting down, if you are doing exercises in the computer room, be sure to confirm that the history is synchronized to the server after completing the exercises.
(12) Other operations
The main interface menu includes "Current User", "Window", "Help", etc.
1. Current user
"Current User" displays the name and user number of the current user. Click "Current User" to see two secondary menus: change password and exit. Exiting will close the system.
The interface for changing the password is shown in Figure 32. After entering the "original password" and the "new password" twice, click the "OK" button.
Figure 32 Change password
2. Window
The submenu of the "Window" menu is shown in Figure 33. Its main function is to change the layout of the opened subwindow.
Figure 33 Window menu
3. Help
The submenu of the “Help” menu is shown in Figure 34.
Figure 34 Help menu
Clicking "User Manual" will open the operation manual of this system in the browser, as shown in Figure 35.
Figure 35 Operation manual
Clicking "About" will open the producer, copyright and other information of this system in the browser, as shown in Figure 36.
Figure 36 About
Microsoft Office Word自主学习及专项练习;Microsoft Office Excel自主学习及专项练习;Microsoft Office Powerpoint independent study and special exercises. Huajun Software Park provides you with
Microsoft Office practice platform update log:
1. Optimized some functions
2. Solved many unbearable bugs
Huajun editor recommends:
After you use the Microsoft Office practice platform, I think you may also needquestion bank expert,jingyou.com,Learn Wubi easily with WinCet,Whale Academy,Online learning platform for cadres in the national human resources and social security systemWaiting for software, come to Huajun Software Park to download and use it!


Your comment needs to be reviewed before it can be displayed