XAMPPIt is an easy-to-install website-building integrated software package that includes MySQL, PHP and Perl. XAMPP software is simple to operate and powerful. We only need to download and unzip it from this site to install and use it. XAMPP software supports different versions and languages to help everyone set up a server quickly and easily. Huajun Software Park provides you with the official download of xampp.

xampp software features
This version of XAMPP has been recompiled by the author of phpStudy and has been streamlined by four-fifths. The installation package is only 35M.
The original xampp was 1250M after decompression, and 990M was removed and reduced to only 250M.
The control panel has been greatly optimized and updated, and many useless functions of the old version have been abandoned.
The software adds one-click switching between PHP5.3, PHP5.5 and PHP7.0.
Upgrade apache to the new version 2.4.10 and php to 7.0.1.
Mysql was upgraded to 5.6.21, and tomcat was upgraded to 7.0.56.
The program package is 35M. After decompression, you can start it and it is easy to install and set up.

XAMPP installation steps
1. First of all, we download the XAMPP official version software package from this site. After the download is completed, we will get a compressed package. After decompressing it, we will find two exe files, which are 32-bit and 64-bit installation files. We select the corresponding installation package according to the operating system of our computer.
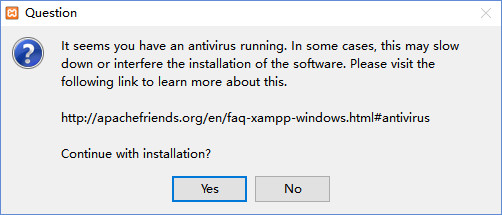
2. Next, we double-click the exe file, and then some friends will pop up the window in the picture below. This window is because anti-virus software is installed on your computer, prompting you that it may slow down the installation process. We do not need to set it. Just click "yes" at the bottom of the interface to enter the next step.
3. Next, a warning window as shown in the picture below may pop up, reminding you that "When the system starts the User Account Control function, it will affect some functions of XAMPP (caused by permission issues), so do not install it in the C:Program Files (x86) directory." After remembering this warning, click "OK" below to proceed to the next step.

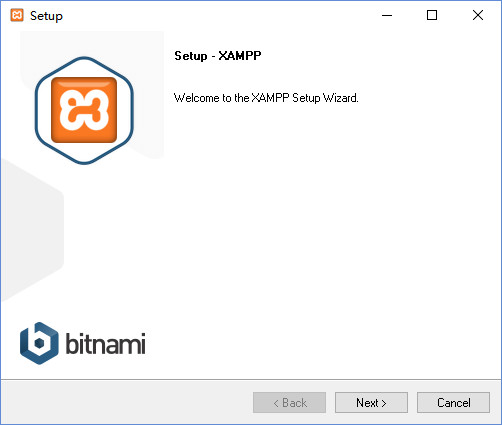
4. Enter the XAMPP software installation interface, as shown in the figure below, we directly click "next" at the bottom of the interface.
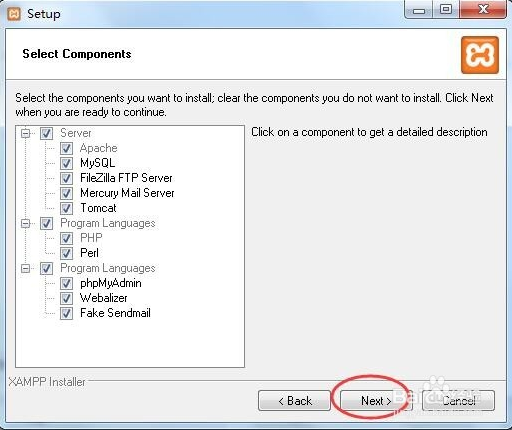
5. Next, enter the XAMPP software component selection interface, as shown in the figure below. We need to select the components you want to install. Here, the editor recommends that you check them all, and then click "next" at the bottom of the interface.
6. Next, enter the interface in the picture below. We can see that there is a checked option in the interface. After we uncheck it, click "next" at the bottom of the interface.

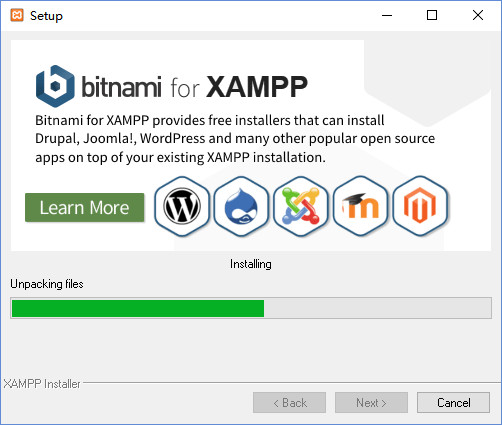
7. Enter the XAMPP software installation interface, as shown in the figure below. We need to wait patiently for the installation progress bar to be completed. The installation speed is very fast, and it only takes a short while to complete the installation.
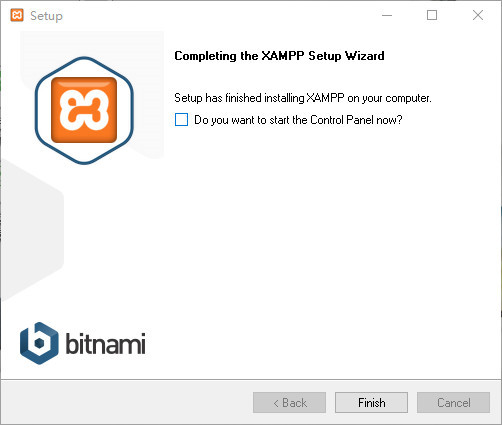
8. After the XAMPP software installation is completed, the interface in the picture below shows that the XAMPP software has been successfully installed on our computer. We can close the installation interface and open the software by clicking the "finish" option at the bottom of the interface.
xampp usage tutorial
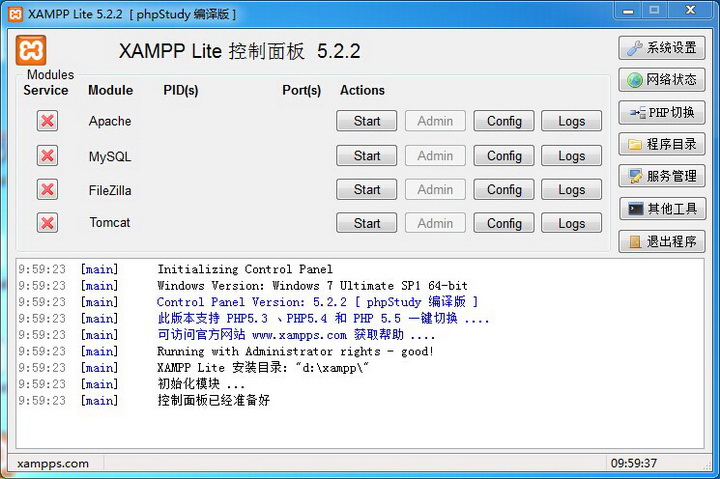
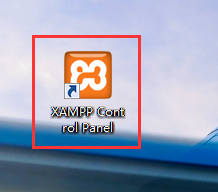
1. First, after we download and install the XAMPP software on this site, there will be a shortcut to the XAMPP software on the desktop. We can enter the main interface of the software by double-clicking the left mouse button to run it.
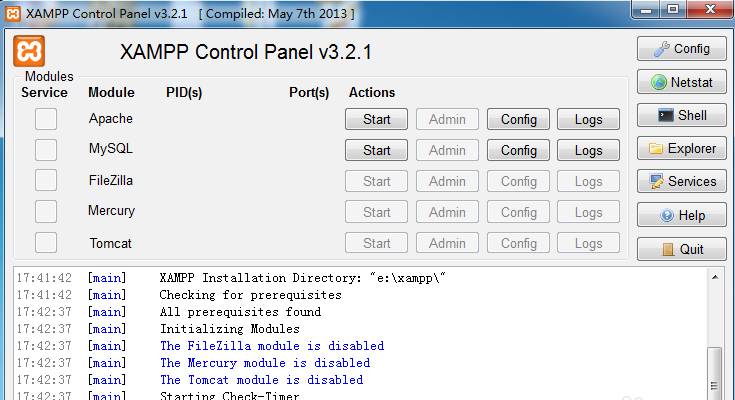
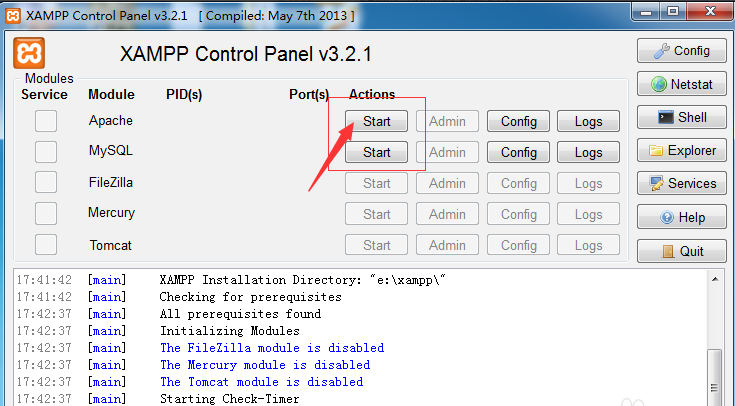
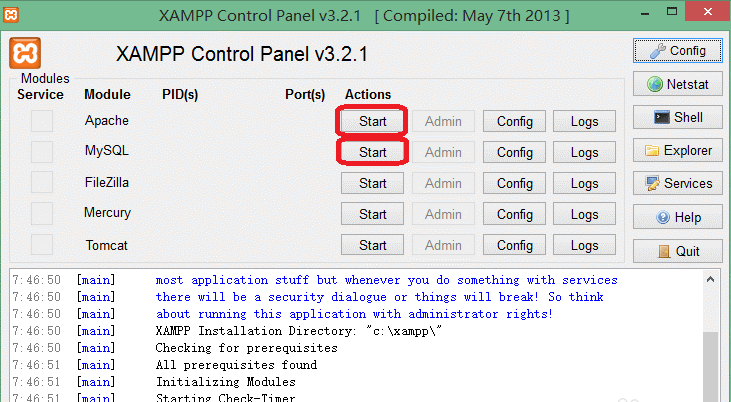
2. Next, we can see that there are two options, apache and mysql, on the main interface of the XAMPP software. We click the "start" option at the back to proceed to the next step.
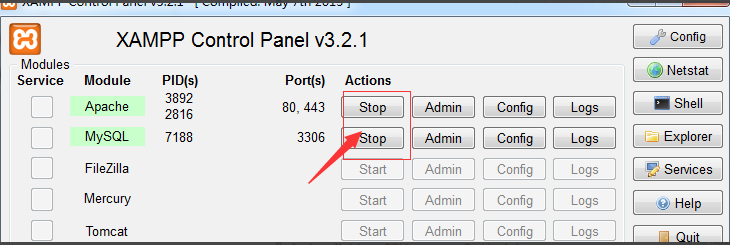
3. After it is successfully opened, we can enter the interface in the picture below, and we can see the port number used. As shown below.

4. Next, we click the "admin" option behind "apache" to enter the main page of the xampp local site, as shown in the figure below.


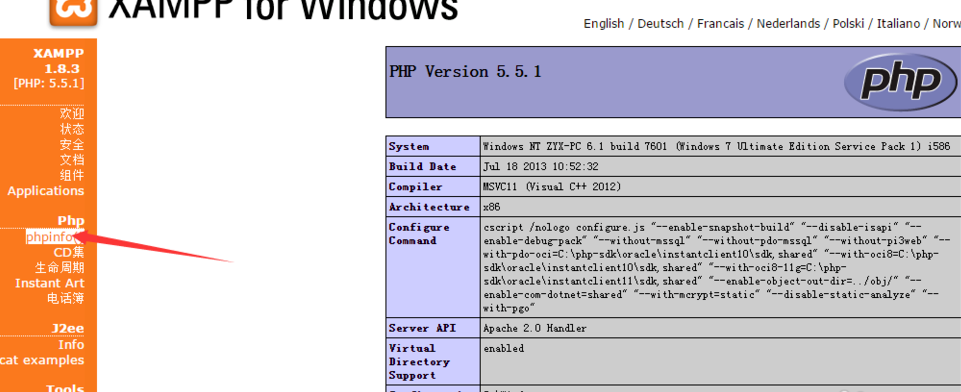
5. After we enter the main page of the xampp local site, we can see the version number of php in the interface. We can also click the "phpinfo" option on the left side of the interface, and then view the specific information of php on the right side of the interface.
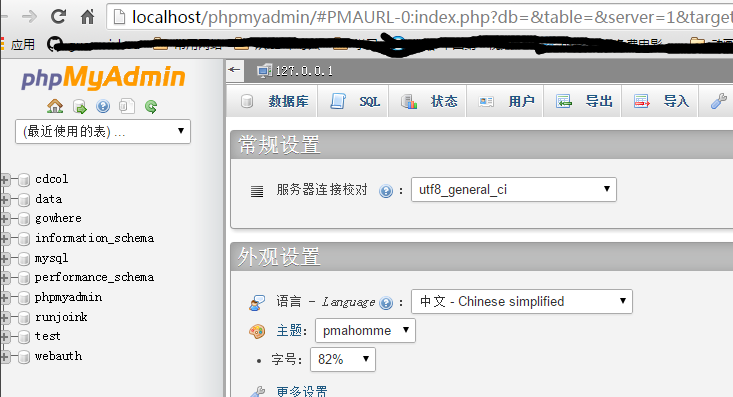
6. Next, we can also click "admin" behind the "mysql" option in the xampp software interface. After clicking, we can enter phpmyadmin, as shown in the figure below, we can control the mysql database.

7. The above is the simple way to use the xampp software. We operate according to the above aspects. If you want to close it, you can click the "stop" option on the interface to close it. It is very simple, so come and take a look.
xampp FAQ
1. What is the default account password of XAMPP Mysql? How to change the password?
User: root
Password:''(empty)
How to modify xampp default sql password
1. After we download and install the xampp software first, open the interface in the picture below. We click the "start" option behind the "apache" and "MySQL" options, and then proceed to the next step.
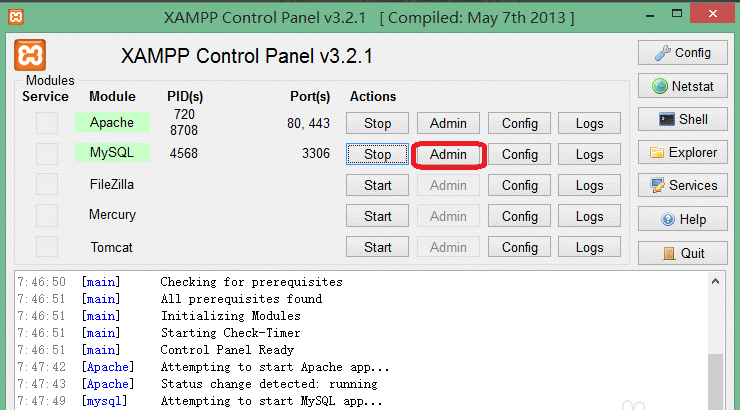
2. Next, we click on the “admin” option behind the “MySQL” option in the xampp software.
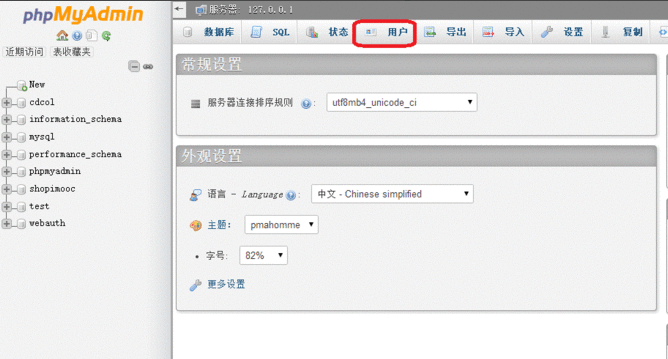
3. Next we can enter the phpadmin interface, as shown in the figure below, we click the "User" option at the top of the interface.
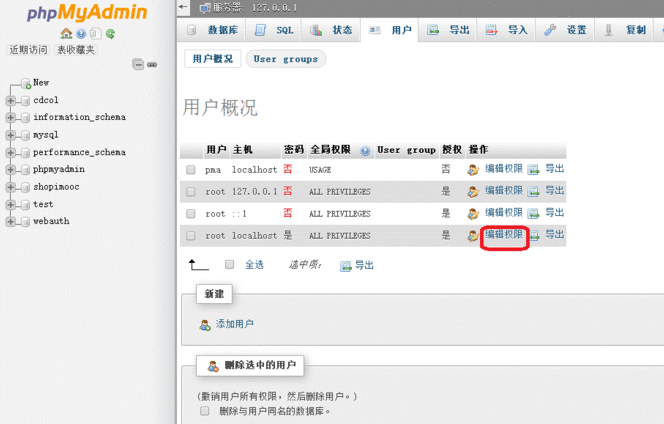
4. We enter the user interface, and then click the "Edit Permissions" option under the root@localhost option, and then proceed to the next step.
5. We enter the editing permissions interface. Next we can see the "Change Password" option. After we click it, we change the password to 123, and then click to execute.

6. We click Execute and refresh the page, and then the interface in the picture below will appear. This problem is because we have not modified the configuration file, so the error occurs. We follow the steps below to set it up.

7. Next, we find the xampp software installation folder, and then find the folder named "phpMyAdmin" in the folder. We open the folder and find the "config.inc.php" file, and then click the mouse to open the file.

8. Next we enter the interface in the picture below. In the interface we find the "password" option, and then change the password to 123 behind the option. After the modification is completed, we click Save.
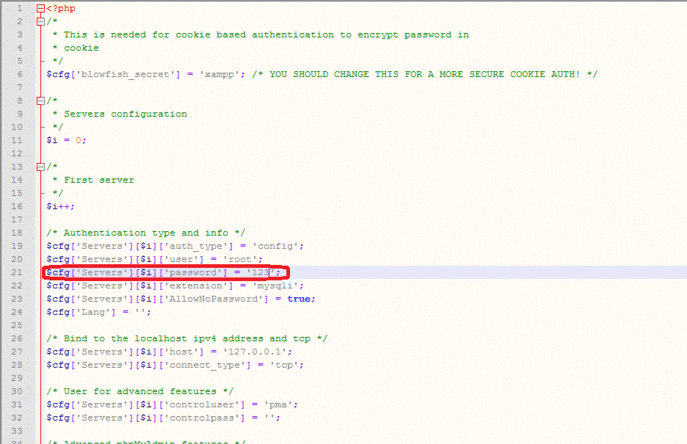
9. Next, we return to the interface where the error message appears above, and then refresh the interface to show that the login is successful. Isn’t it very simple? Friends who need it, please come and try it.

2. What is the configuration file path of XAMPP?
Apache configuration: xamppapacheconfhttpd.conf;
PHP: xamppphpphp.ini;
MySQL: xamppmysqlbinmy.ini;
phpMyAdmin:xamppphpMyAdminconfig.inc.php;
FileZilla FTP server: xamppFileZillaFTPFileZilla Server.xml;
3. XAMPP integrated environment apache fails to start?
1. We open the installed xampp software, and then enter the interface in the picture below.
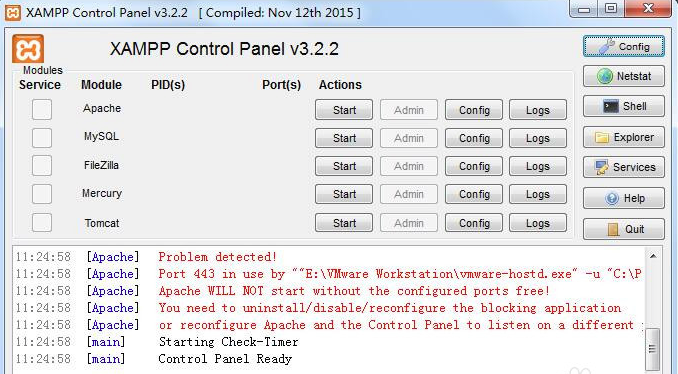
2. Next, we click the "start" option behind the Apache option in the xampp software interface. At the bottom of the interface, you will be prompted that the startup failed.
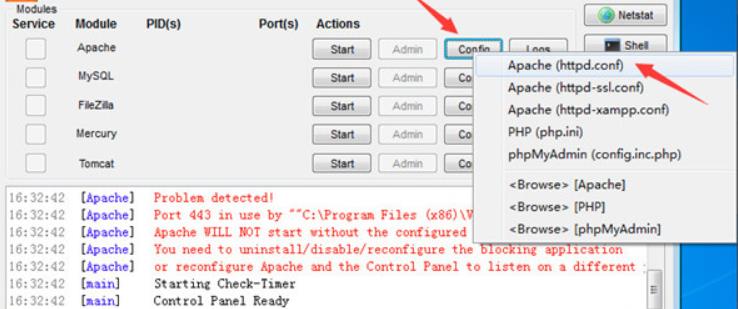
3. We can see in the prompt below that the reason for the startup failure is that the port is occupied. Next, we start setting the port.
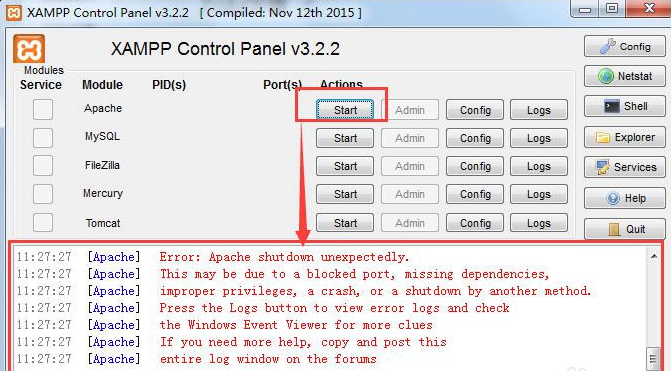
4. We click the "config" button behind the "apache" option in the xampp software interface, and then click the "Apache (httpd.conf)" option in the drop-down option.
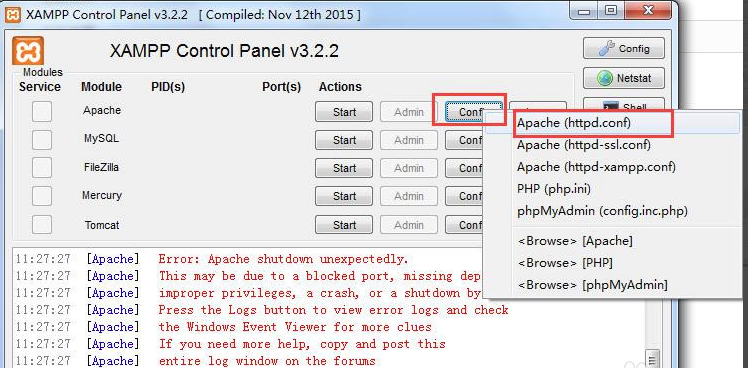
5. We enter the interface in the picture below. We change port 80 to 8083 in the TXT document. After the modification is completed, we click Save.
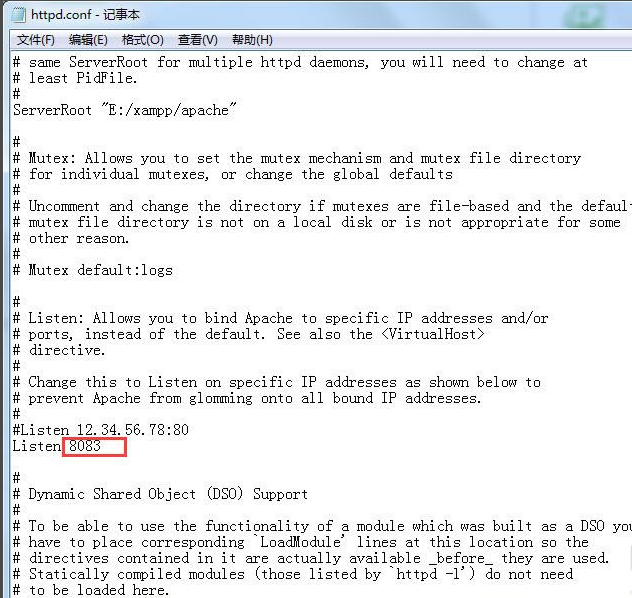
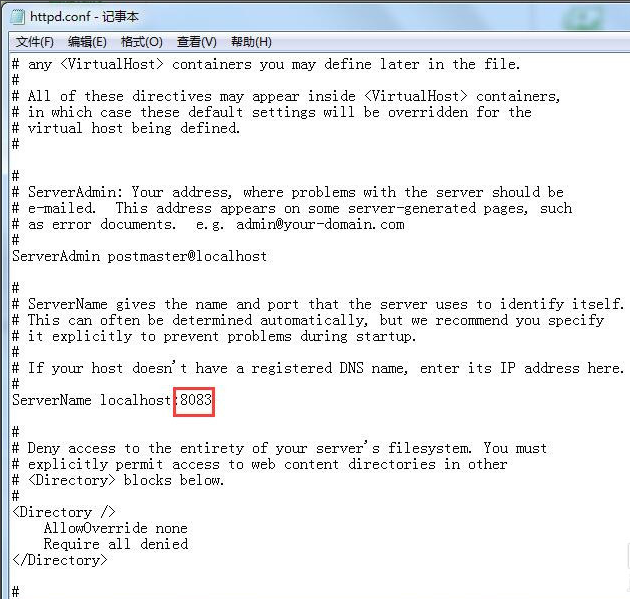
6. Next, we click the "Config" button behind the Apache option, and then we click "Apache (httpd-ssl.conf)" from the options that come down, as shown in the figure below.
Next, we change the 443 port to 4433 from the TXT document again. After the modification is completed, click Save again.

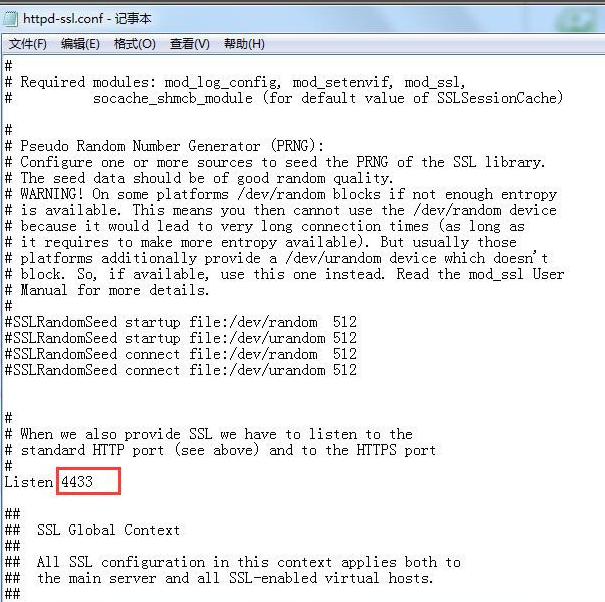
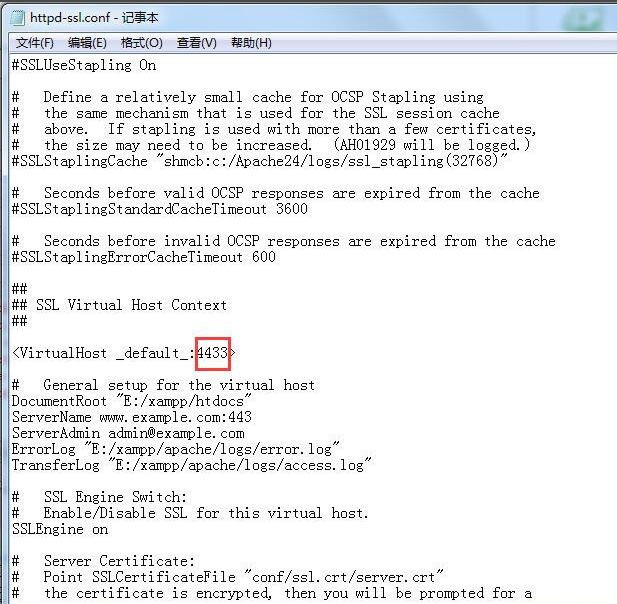
7. Next, we start apache again. At this time, we can see in the prompt below that the startup is successful! Come download and experience it now.

xamppandwampSoftware comparison
Functional service comparison:
wamp
wamp is apache+mysql+php under windows, basically used to learn PHP development
It’s just a mysql database.
xampp
The function is very powerful.
Servers included: Apache, MySQL, FTP Server, Mail Server (mail server), Tomcat (JSP server)
Supported programming languages: PHP, Perl
Provided tool components: phpMyAdmin, Webalizer, fake sendmail (send email).
Speed comparison:
wamp
运行PHP速度有时比较慢。
xampp
The speed is stable and feels faster than wamp.
Both softwares have their own characteristics, and users can choose the appropriate one to download and use according to their own needs. Friends who need wamp software can click the link below to download it.
wampDownload address:softwaredownload4.com/soft/118187.htm
xampp update log
1. The pace of optimization never stops!
2. More little surprises are waiting for you to discover~
Huajun editor recommends:
xampp software is a very practical integrated software package for building XAMPP software sites. The xampp software is simple to operate and very powerful. It can help you install the server well, and it supports multiple languages, bringing you a very simple use experience. If you are in need, hurry up and download it to experience it. The editor has also prepared self-service website building system integration, Jialuo website web server, Xiaoma Dreamweaver website building toolbox, etc. for you. If you need it, take a look.


