Photoshop
1. You can use the following shortcut keys to quickly browse your images:
Home scrolls to the upper left corner of the image; End scrolls to the lower right corner of the image; Page UP scrolls to the top of the image; Page Down scrolls to the bottom of the image; Ctrl+Page Up scrolls to the left of the image; Ctrl+Page Down scrolls to the right of the image.
2. Press the Ctrl key + Alt key + 0 key to display the image in a 1:1 ratio.
3. When you want to "tighten" (adjust the space between individual letters), first click between the two letters, then press the Alt key and use the left and right arrow keys to adjust.
4. To restore the settings in the dialog box to the default, first hold down the Alt key, the Cancel key will become the Reset key, and then click the Reset key.
5. To quickly change the value displayed in the dialog box, first click the number with the mouse so that the cursor is in the dialog box, and then use the up and down arrow keys to change the number. If you press the Shift key before using the arrow keys to change a value, the value will change faster.
6. In addition to the familiar shortcut key Ctrl+Z (which can freely switch between the history and the current state), Photoshop 6.0 also adds two shortcut keys: Shift+Ctrl+Z (used to continuously and gradually resume operations according to the order of operations) and Alt+Ctrl+Z (allowing the user to continuously and gradually cancel operations according to the order of operations). Press Ctrl+Alt+Z and Ctrl+Shift+Z to move backward and forward in history respectively (or you can use the menu in the History panel to use these commands).
7. Fill function:
Shift+Backspace opens the fill dialog box;
The Alt+Backspace and Ctrl+Backspace key combinations are used to fill the foreground color and background color respectively;
Press the Alt+Shift+Backspace and Ctrl+Shift+Backspace key combinations to only fill the existing pixels (keep the transparent area) when filling the foreground and background colors.
8. The D key and X key on the keyboard can quickly switch between the foreground color and the background color.
9. Use any drawing tool to draw a straight stroke: first click the mouse at the starting point, then hold down the Shift key, then move the cursor to the end point and click the mouse.
10. When opening the Curve dialog box, press the Alt key and click the curve box to make the grid finer, and click the mouse again to restore it to its original state.
11. After using the rectangular (ellipse) selection tool to select a range, hold down the mouse and press the space bar to adjust the position of the selection frame at will. After releasing it, you can adjust the size of the selection range.
12. Add a rectangle or ellipse drawn from the center outward. In any added selection area, first press the Shift key to drag the rectangular or elliptical mask tool, then release the Shift key, then press the Alt key, and finally release the mouse button and then release the Alt key. Press the Enter or Return key to close the slider box. To cancel changes, press the Escape key (Esc). To increase or decrease a value in 10% increments while the pop-up slider dialog box is open, hold down the Shift key and press the Up Arrow or Down Arrow key.
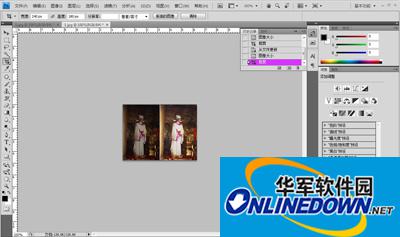
13. If you want to preview the CMYK mode color of the RGB mode image on the screen, you can first execute the "View" → "New View" command to generate a new view, and then execute the "View" → "Preview" → "CMYK" command to view the images in the two modes at the same time for easy comparison and analysis.
14. Press the Shift key and drag the marquee tool to limit the marquee to a square or circular shape; press the Alt key and drag the marquee tool to draw the marquee from the center; press the Shift+Alt key to drag the marquee tool to draw a square or circular marquee from the center.
15. To prevent the marquee from adhering to the picture frame when using the crop tool, hold down the Ctrl key while dragging the control point on the crop tool marquee.
16. To correct a tilted image, first use the measuring tool to draw a line on the image where it can be used as a horizontal or vertical reference (such as the image frame, the door frame, the horizontal line between the eyes, etc.), then select "Image" → "Rotate Canvas" → "Any Angle..." from the menu. After opening, you will find that the correct rotation angle has been filled in automatically. Just press OK.
17. You can use the crop tool to complete the rotation and shearing work in one step: first use the crop tool to draw a box, drag the control points on the marquee to adjust the angle and size of the marquee, and finally press Enter to rotate and shear. The angle measured by the measurement tool will also be automatically filled in the digital transformation tool ("Edit" → "Transform" → "Number") dialog box.
18. After cropping the image, all pixels outside the cropping range are lost. To crop without loss you can use the "canvas size" command instead. While Photoshop will warn you that some clipping will be made, for some reason not all of the "clipped" data is actually kept out of the frame, but this doesn't work with Indexed Color mode.


