Some netizens expressed that they still don’t know the relevant operations of how to use UltraISO to create a U disk system boot disk. This section introduces the operation tutorial of UltraISO to create a U disk system boot disk. If you don’t know yet, please follow the editor to learn. I hope it will be helpful to you.
We first insert the U disk, back up the data in the U disk, and run the ultraISO floppy disk pass software as an administrator.

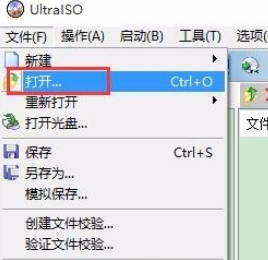
Then we click: File → Open
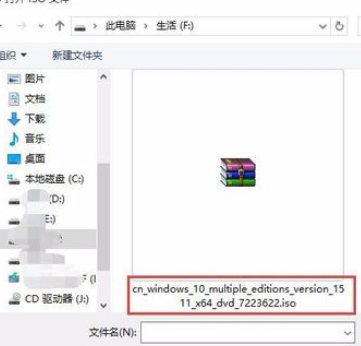
At this time we find the iso file (system image) that needs to be burned and click to open it.
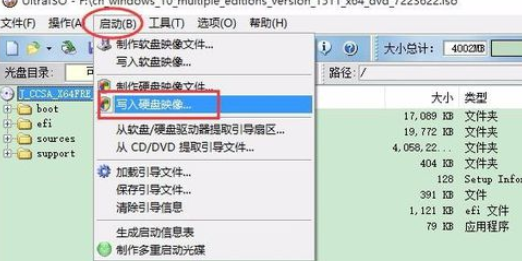
Then we click: Start → Write Disk Image.
away from the default settings as shown in the picture, please note that the drive letter is a U disk, do not use it as a hard disk. Click "Write".
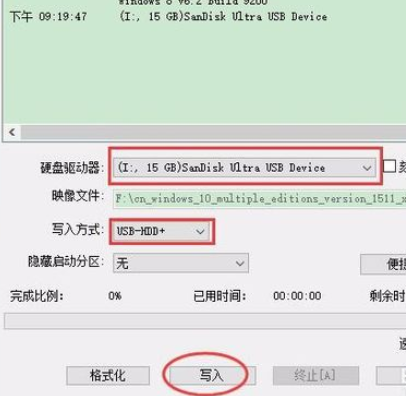
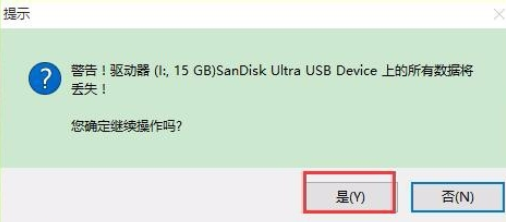
It prompts you to clear the U disk data. At this time, pay attention to backing up the U disk data again and click "Yes".
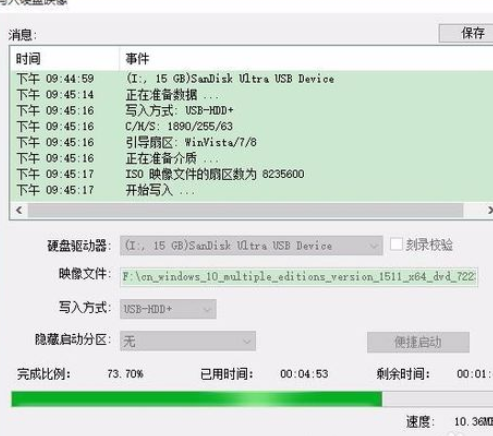
The writing has started, please wait patiently for completion.
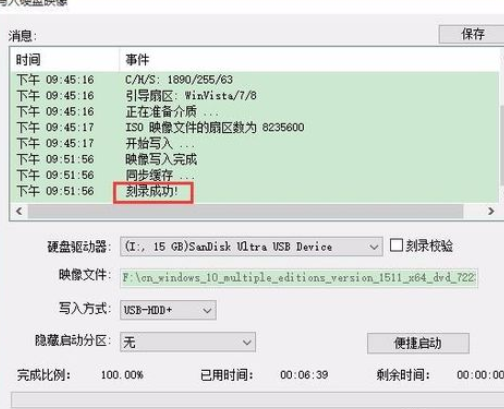
After a while, it will prompt that it is completed.
以上这里为各位分享了UltraISO软碟通制作U盘系统启动盘的操作教程。 Friends in need, please come and read this article!