Dear friends who use AOMEI Partition Assistant, if you don’t know how to perform partition operations, please come and learn about the partitioning methods of AOMEI Partition Assistant below. I hope it can help you.
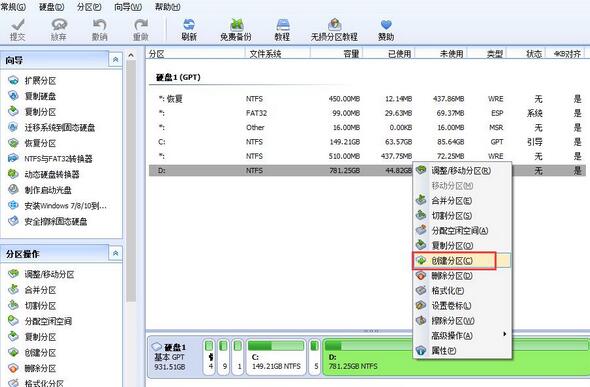
1. Open AOMEI Partition Assistant, find the drive letter that needs to be partitioned in the corresponding hard disk below, right-click with the mouse, and select the "Create Partition" function in the right-click menu that opens.
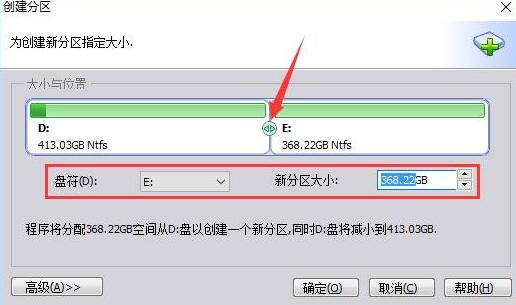
2. Enter the partition creation window. First, you can use the left button of the mouse to click on the arrow icon between the two new drive letters and drag left and right to adjust the size of the new partition, or you can directly set the name and size of the new drive letter from below.
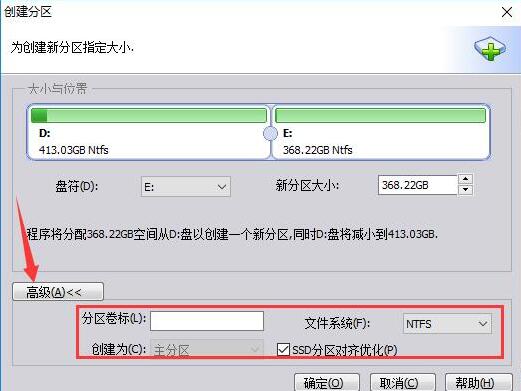
3. Click the "Advanced" button on the lower left. In the advanced settings, you can select the volume label and file system of the new partition. If it is an SSD hard drive, it is best to check the "SSD partition alignment optimization" option. After selecting all, click the "OK" button below and wait for the partition task to be completed.
The above article explains the partitioning method of Aomei Partition Assistant. I hope friends in need can learn it.