How to use exe4j to package a java project into an exe file? So today I will explain to you how to use exe4j to package a java project into an exe file. Friends in need can take a look. I hope it can help you.
First, export the jar package of the project we need to convert from eclipse. Remember that the path of this project must be in English, otherwise there will be problems with the opened exe file.
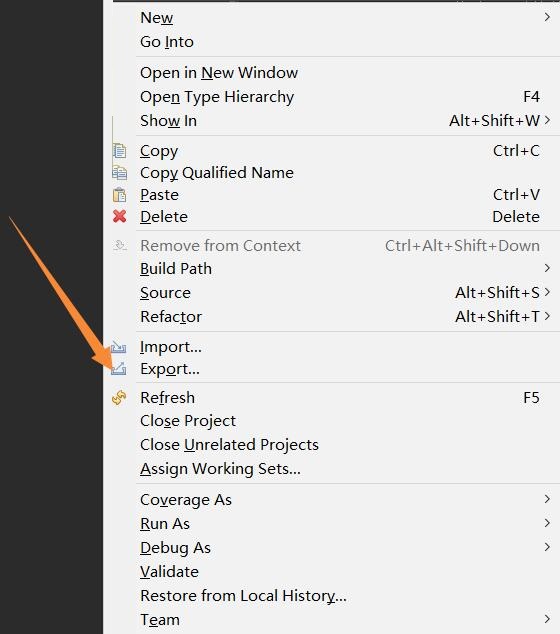
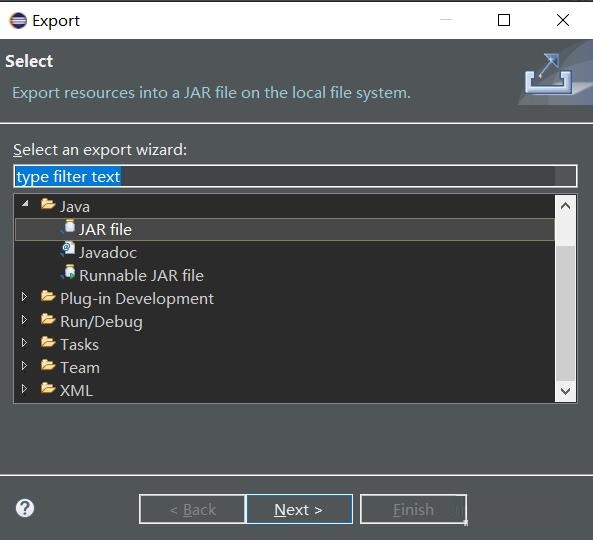
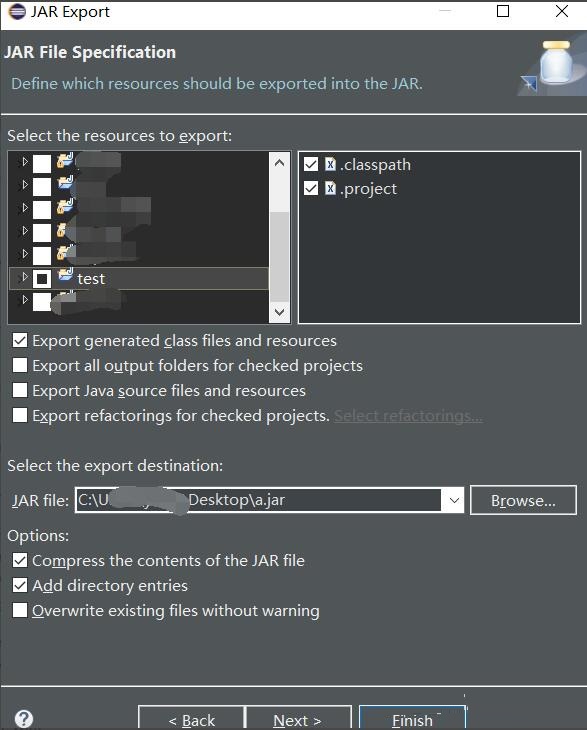


Open the downloaded exe4j. The interface is as shown below. Remember to fill in the license below when using it for the first time.
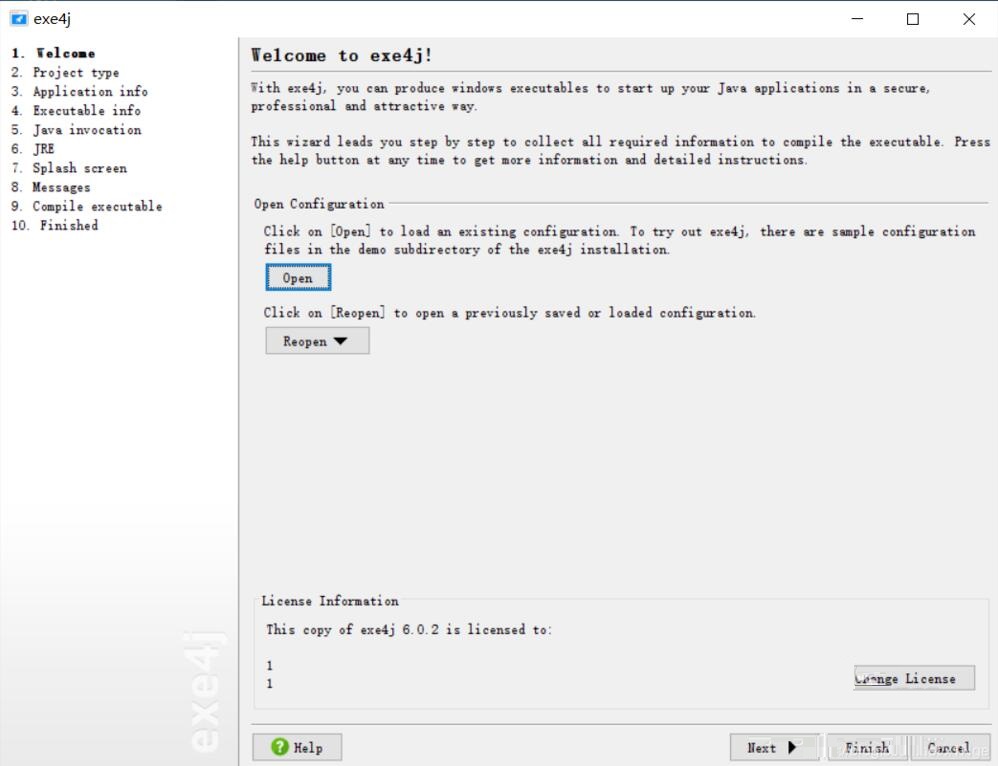
Then we start exporting. Click open to open the exe4j file that has been edited before. Here we create a new one and click Next.

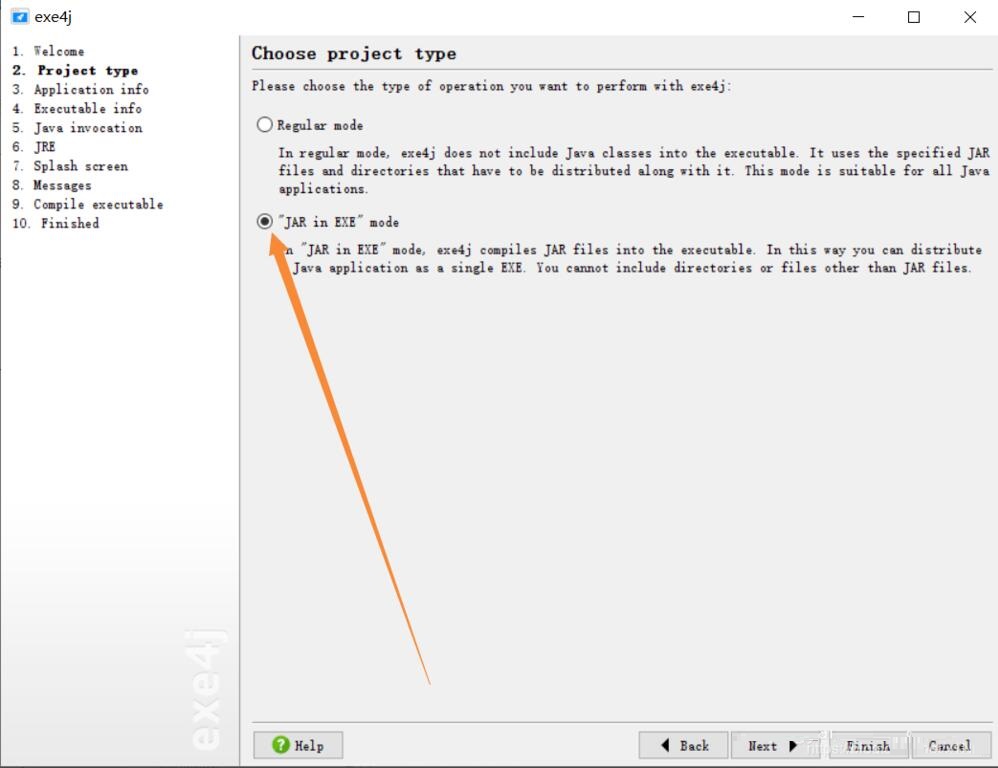
Select JAR in EXE mode
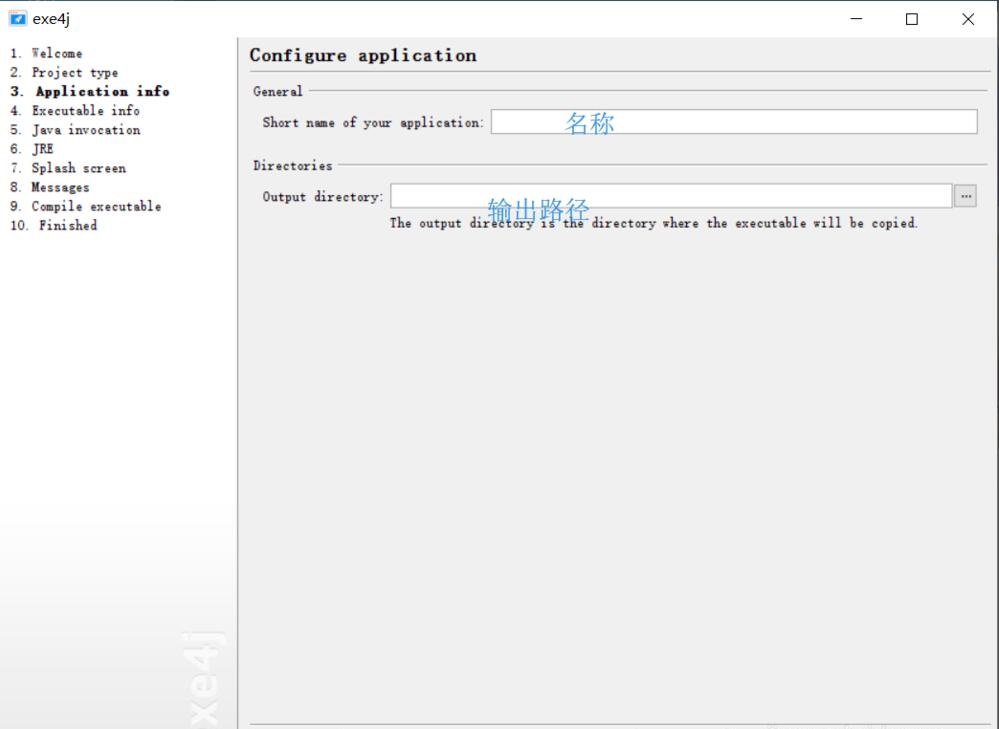
Next, fill in the corresponding information. I have marked the meaning of each option in the picture.
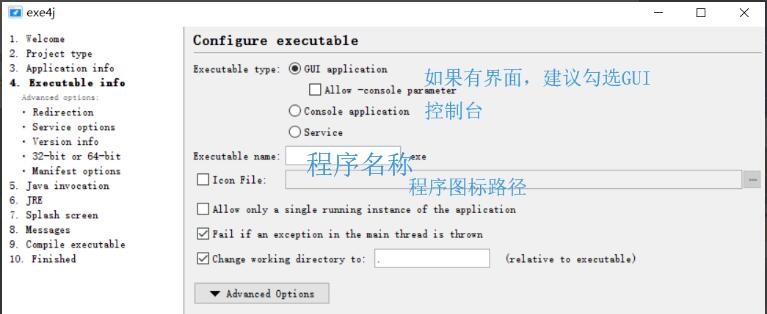
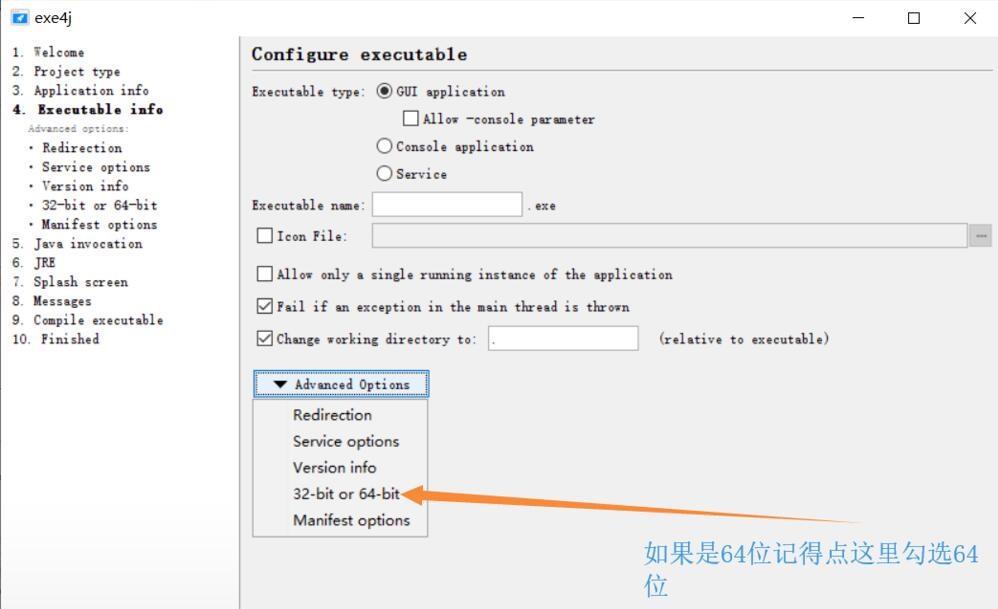
Next several interfaces come to this interface. In order to prevent Chinese garbled characters in the generated program, we add here: -Dfile.encoding=UTF-8
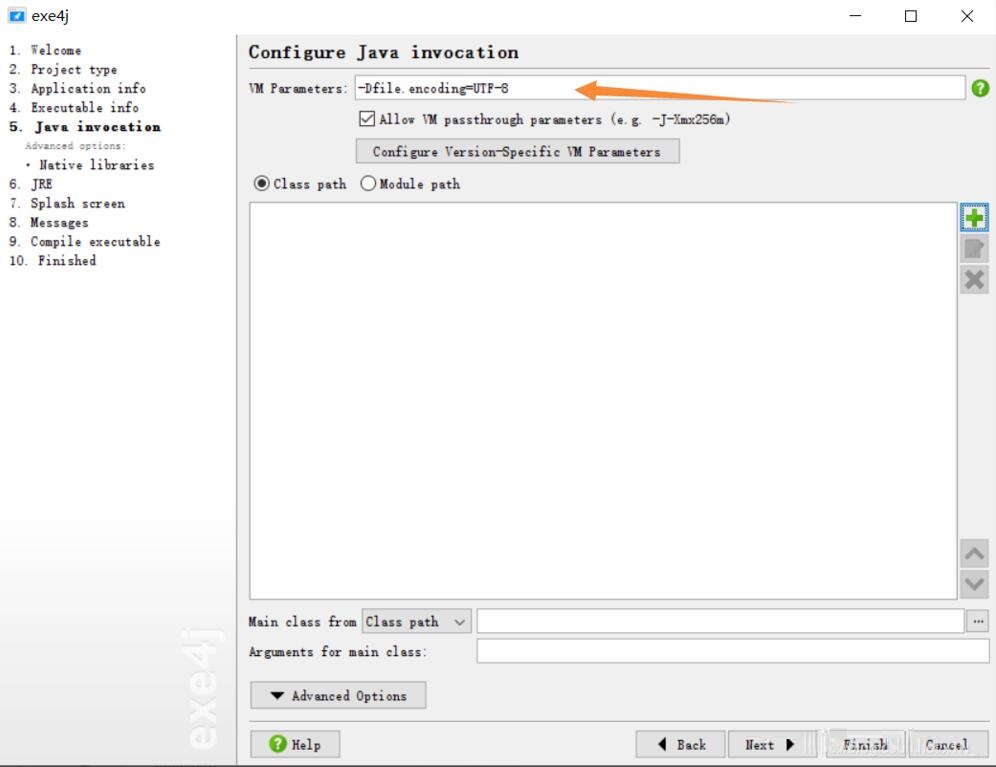
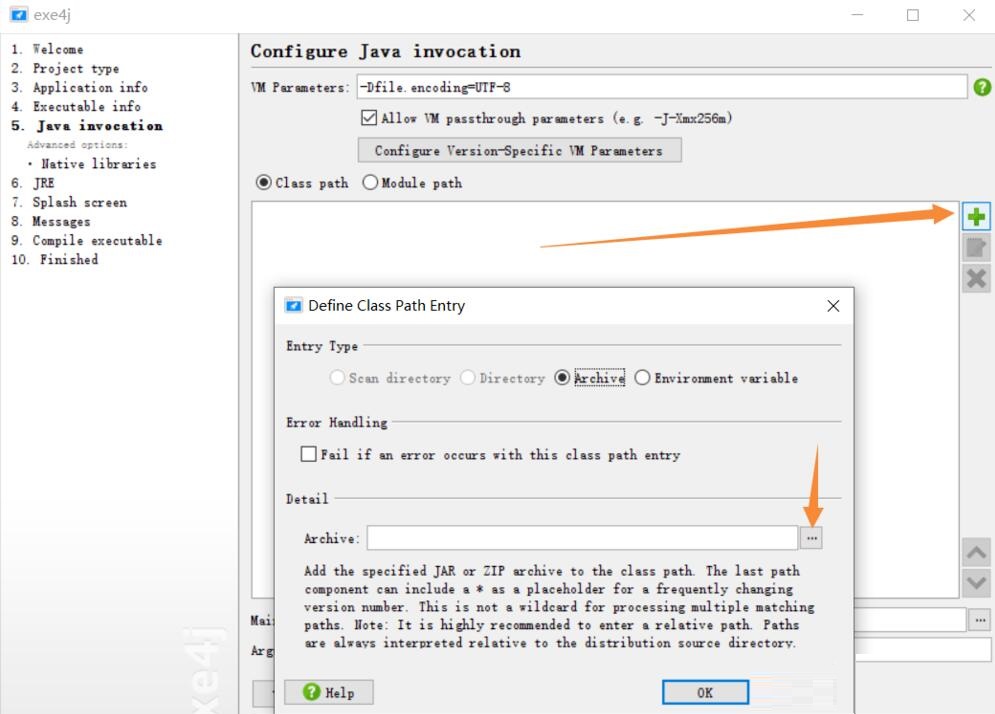
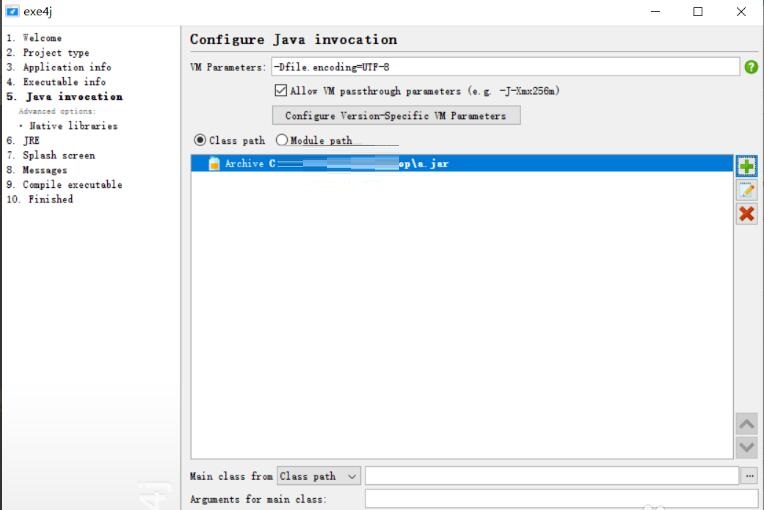
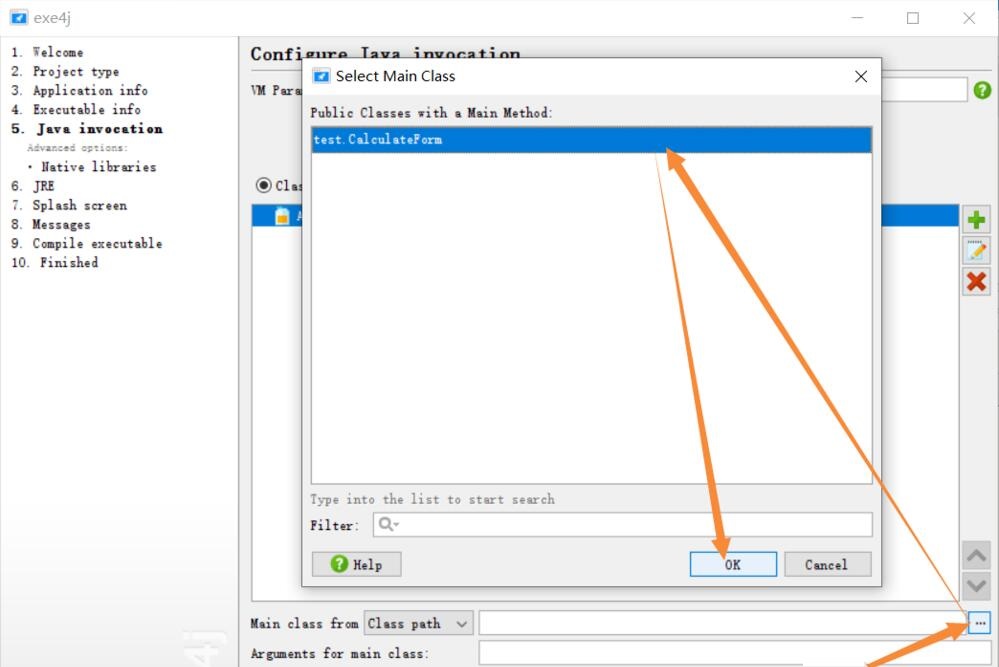
Add the jar package we just generated. If you have introduced a third-party package, remember to add it too, and then select Main Class
Here you set the upper and lower limits of the JDK version allowed by the program. It seems that 1.8 is used more now.
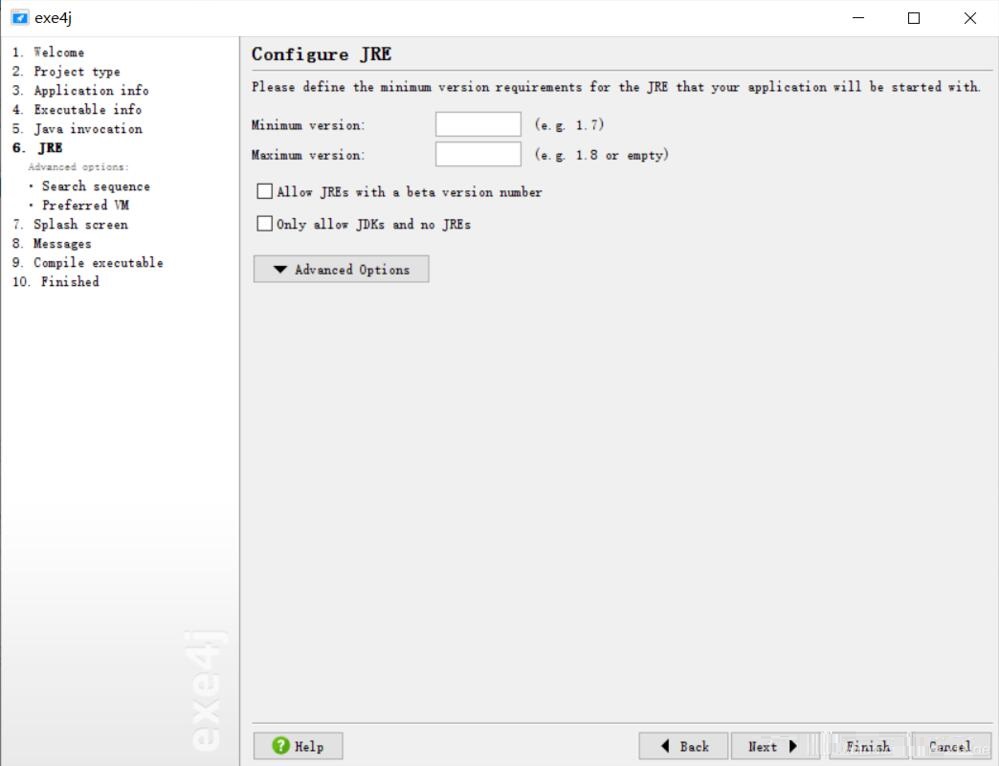
Then next twice, waiting for the generation to complete.
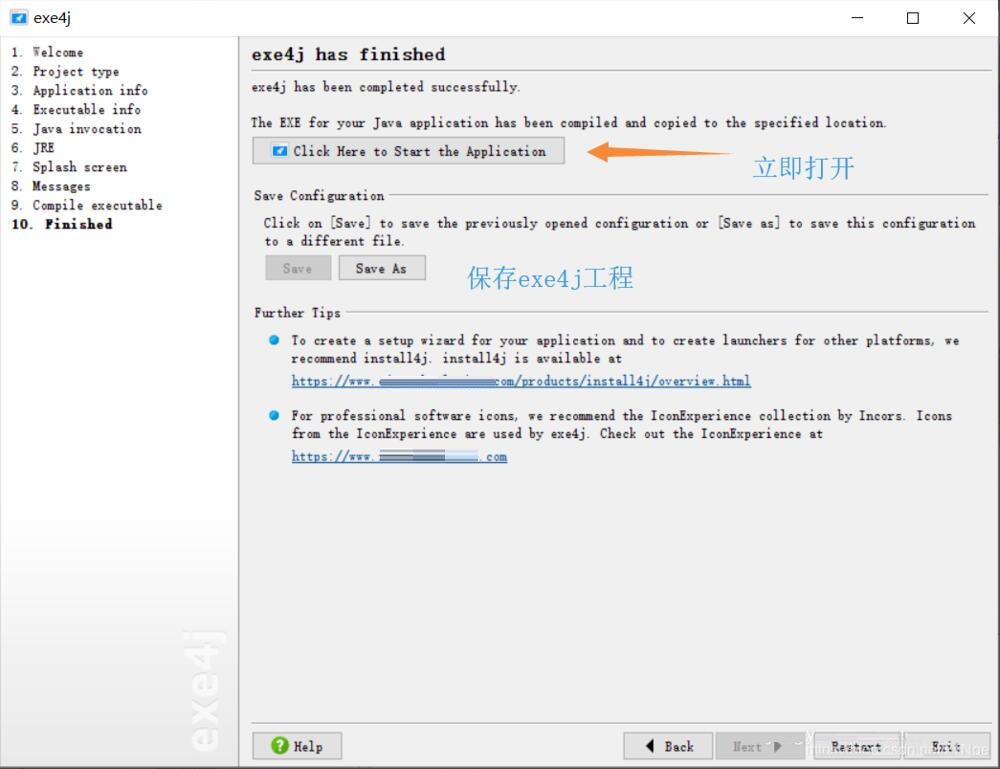
The above is the method shared by the editor to use exe4j to package java projects into exe files. Friends who don’t know how to do it should hurry up and learn.


